The TiVo Stream 4K is a great media streamer that utilizes both TiVo’s and Android TV’s interface to provide a comprehensive and excellent TV-focused viewing experience. The TiVo Stream 4K is essentially a small box that connects to your TV and allows you to access all the services and apps on your Android TV.
It also offers live television through Locast and Sling TV, eliminating the need for setting up a cable service or antenna. Since it’s not a DVR, you don’t need to purchase a TiVo subscription either, making it an exceptional media streamer for all TV lovers.
However, the TiVo Stream 4K only comes with 8GB of storage, which fills up incredibly quickly. Luckily, the box comes with a USB-C port, allowing you to expand its storage space. Let’s dive right in on how you can add storage to your TiVo Stream 4K!
Steps for Adding Storage on TiVo Stream 4K
The TiVo Stream 4K connects to an Android TV, which runs thousands of applications and streaming services, including big names like Google Play, Netflix, YouTube, Twitch, Amazon, Hulu, and Sling TV. It’s also compatible with Google Cast, allowing you to stream content from your tablet, computer, or phone to your TV.
However, the box only has 8GB of storage and once you install all the system applications, you’ll only have approximately 4GB of storage left for other games and apps. Fortunately, the TiVo Stream 4K comes with a USB-C port, which you can use to connect external devices, like Ethernet adapters, keyboards, and thumb drives.
By connecting an external hard drive and then formatting it as internal storage, you can easily add storage to your TiVo Stream 4K. Here’s a complete step-by-step guide for increasing the storage space of a TiVo Stream 4K:
Step 1: Connect an External Storage Device
Firstly, connect a USB thumb drive to a USB-C adapter and then connect the adapter to your TiVo device. You can also connect a USB adapter to an OTG cable and then plug in your USB drive. Once the TiVo Stream 4K successfully recognizes the connected devices, you can move on to the next step.
Step 2: Format Your External Drive
Once you connect your storage device to the TiVo Stream 4K, a message will pop up on the top-right corner of the screen. If you don’t see this message, it’s highly likely that your USB-C drive isn’t formatted properly. In order to format your drive in FAT32 format, here’s what you need to do:
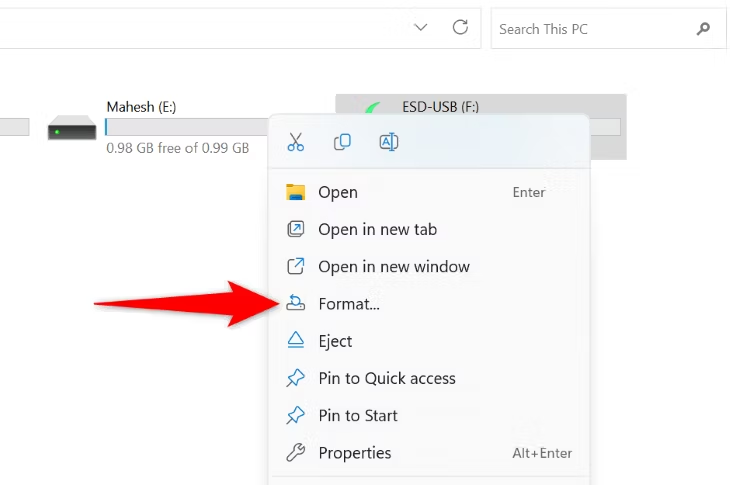
Format using File Explorer
- Plug your flash drive into your Windows laptop or PC.
- Press Windows+E to launch File Explorer
- In the left pane of the File Explorer, locate and right-click on your flash drive. Then, press ‘Format.’
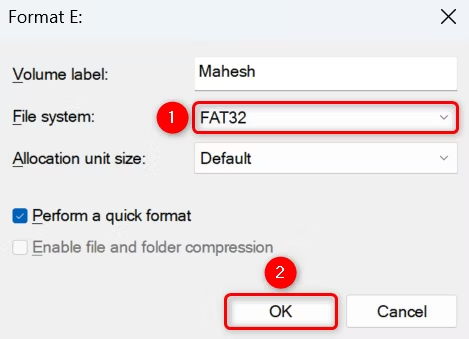
- In the ‘Format’ window, click on the ‘File System’ drop-down menu and then select ‘Fat32.’
- Select ‘Start.’

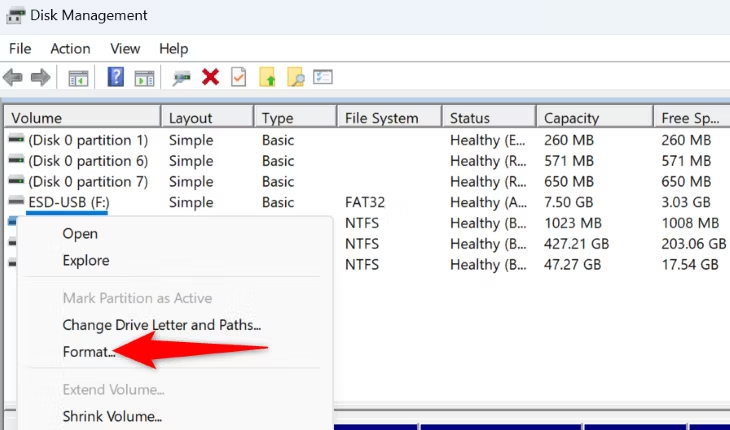
Format using Disk Management
- Plug your flash drive into your Windows laptop or PC.
- Right-click the ‘Start’ menu icon or the Windows icon in the bottom-left corner of your screen, and then select ‘Disk Management.’
- Right-click the name of your USB drive in the main window and then select ‘Format.’
- Click on the ‘File System’ drop-down menu and then select ‘FAT32.’
- Click ‘OK’ to begin the formatting process. A message will pop up on your screen once the drive is formatted.
However, it’s important to note that you can’t format a USB with over 32GB of storage with these traditional Windows formatting tools. So, if you have a bigger USB, you’ll need to use a third-party USB formatter to format your drive and connect it to TiVo Stream 4K.
It’s also important to keep in mind that every external device might not work with your TiVo Stream 4K, even if you format it. Smaller devices have a better chance of working than larger ones, so it’s best to opt for a USB driver with 32GB or less than 32GB of space.
Step 3: Enable Developer Options
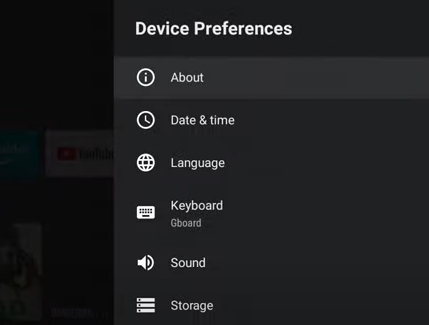
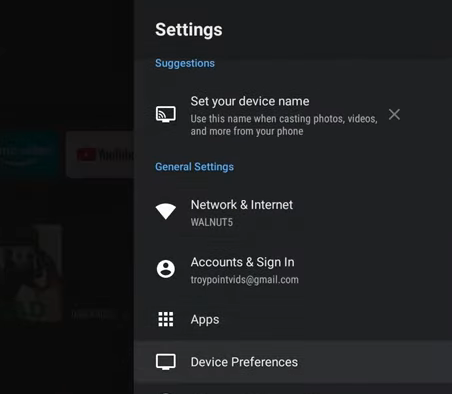
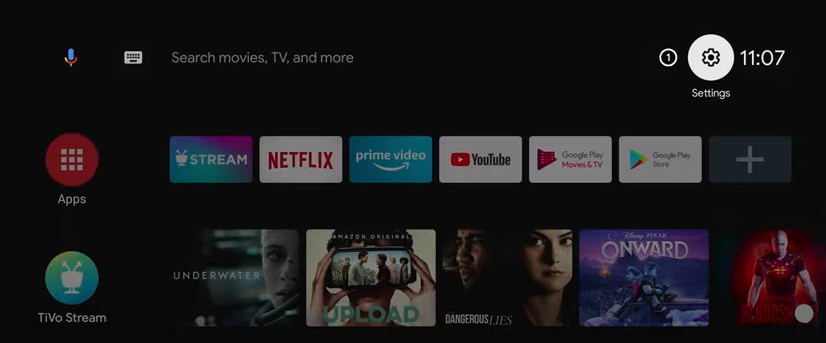
- Launch Settings and then select ‘Device Preferences’ from the list of options.

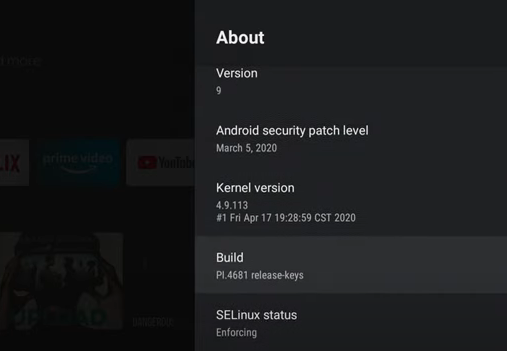
- Select ‘About,’ and then scroll down until you find ‘Build.’ Click on this option around 7 times or until a message saying, ‘You are now a developer!’ pops up on your screen.
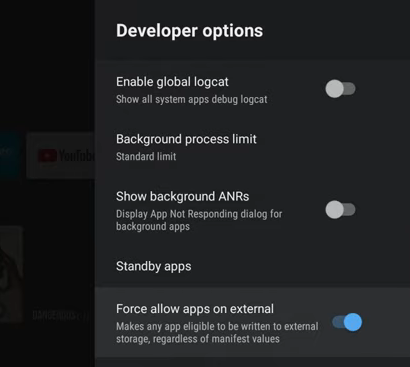
- Go back to ‘Device Preferences’ by clicking the back button on your remote, and then click on ‘Developer options’ from the list.
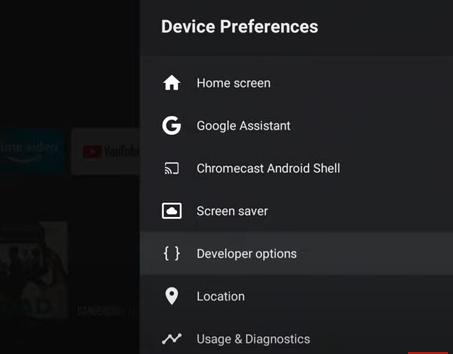
- Move down to the bottom, and then enable the ‘Force allow apps on external’ option.
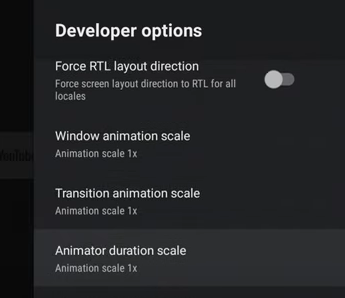
Step 4: Change Animation Scale (Optional)
Under the ‘Drawing’ section in the ‘Developer Options’ menu, change the ‘Window animation scale,’ ‘Transition animation scale,’ and ‘Animator duration scale’ to 0.5x. This will allow for quicker navigation, as you won’t have to wait a full second for the animation to complete before performing any action.
Step 5: Format External Storage as Internal Storage
- Move back to the home screen.
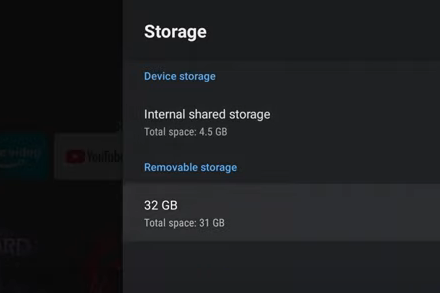
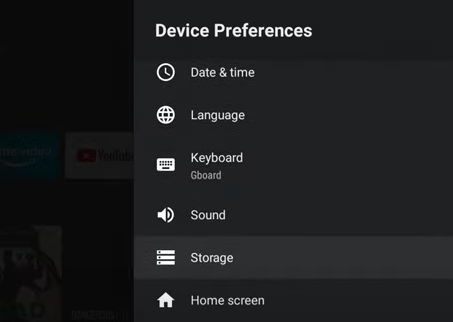
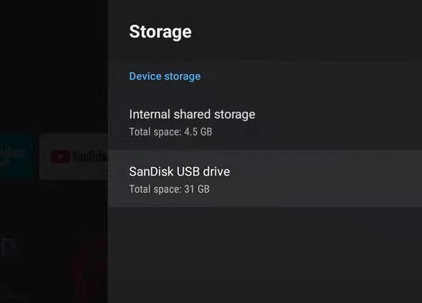
- Open ‘Settings,’ select ‘Device Preferences,’ and click on ‘Storage.’


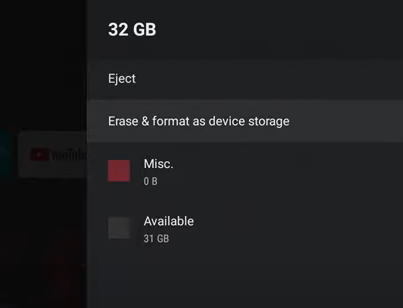
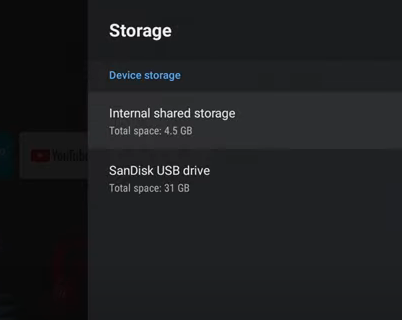
- Once all options load successfully, click on your external storage device under the ‘Removable storage’ option.
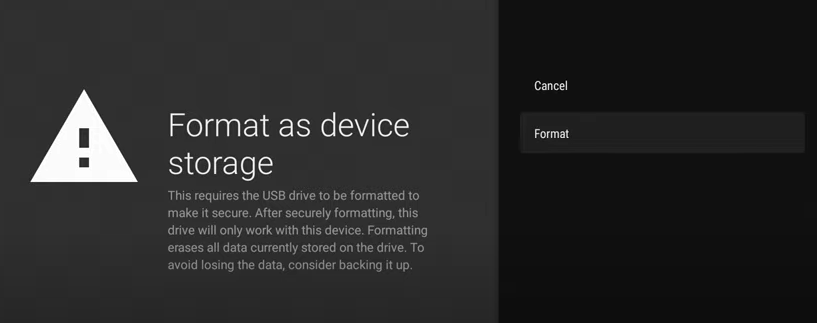
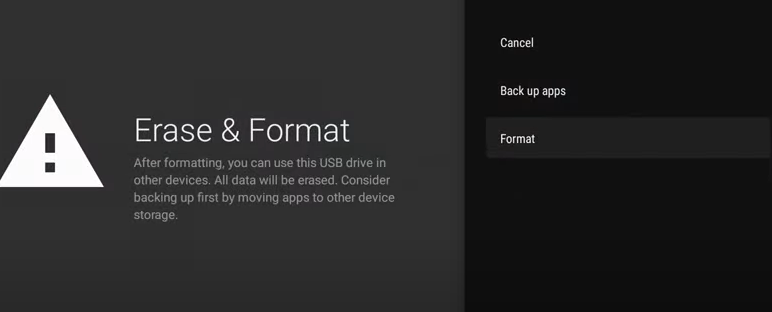
- Click on ‘Erase and format as device storage,’ and then select ‘Format.’ It’s important to note that after completing this step, you won’t be able to use your USB or external storage on any other device. You’ll only be able to use it with your TiVo Stream 4K.
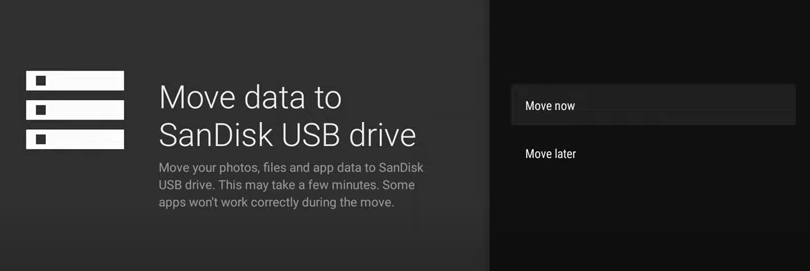
- Wait a few minutes for the formatting to complete. A message should pop up on the bottom of your screen once the process concludes successfully.
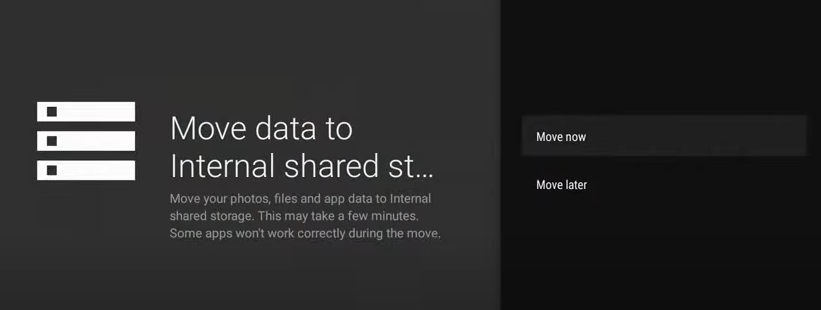
- Select ‘Move now’ to move your data to your USB drive. This step could take a couple of minutes, depending on the data and the size of your external drive. A message will again pop up on the bottom of your screen after the process is complete.
Step 6: Install an Application
- Move back to your home screen.
- Launch ‘Google Play Store,’ and download and install an app of your preference.

- Launch the app after the installation is complete to check if it’s working properly.
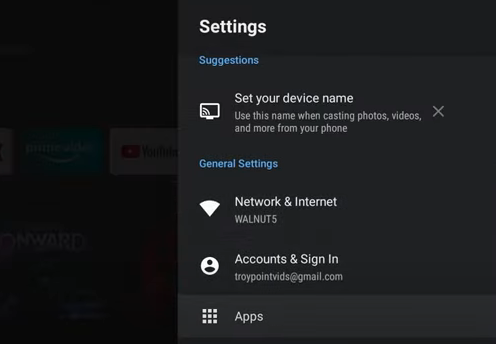
- Exit the app, go back to the home screen, and then launch ‘Settings.’
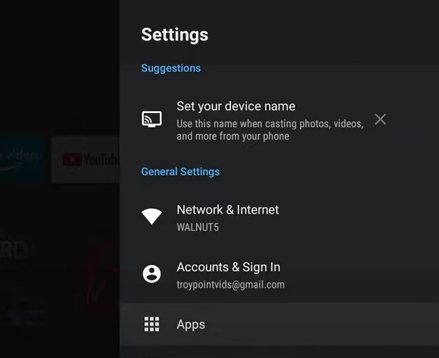
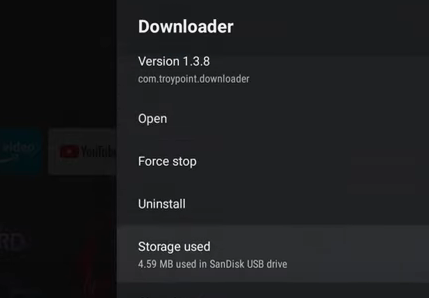
- Click on ‘Apps,’ and select the app you just installed.
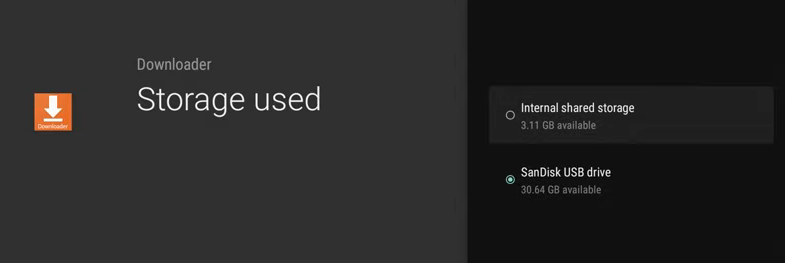
- Scroll down to the ‘Storage used’ option and check whether the app is in your USB drive or external storage device.
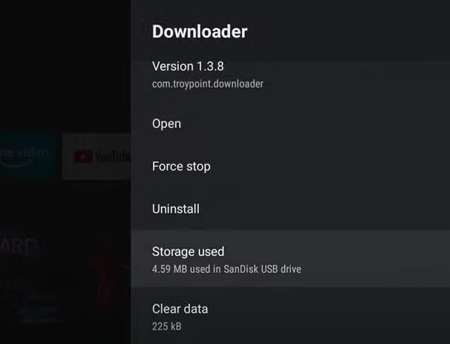
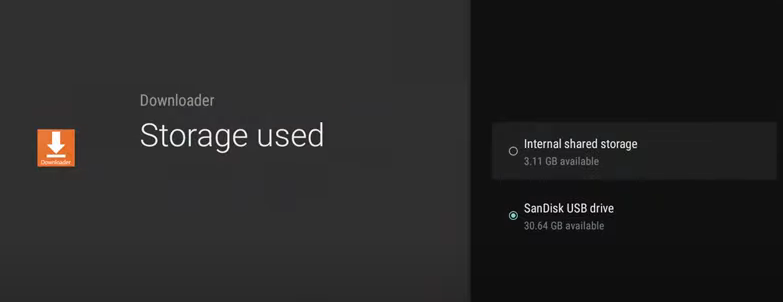
- If the app is still using internal storage, click on the ‘Storage used’ option and then select your external storage device to change its location.
If you’ve already installed apps before connecting an external storage device, you can still change their location by following these steps:
- Go to the home screen and launch ‘Settings.’
- Click on ‘Apps,’ and then select ‘See all apps.’
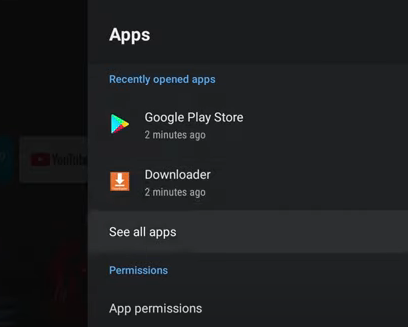
- Select each app and move it to the external storage by clicking on the ‘Storage used’ option.
However, keep in mind that you won’t be able to move some of the system applications that came with your TiVo Stream 4K to your external storage device.
How to Remove an External Storage Device From TiVo Stream 4K
- Launch ‘Settings,’ select ‘Device Preferences,’ and then click on ‘Storage.’


- Select ‘Internal shared storage,’ and click on ‘Migrate data to this storage.’

- Select ‘Move now’ and wait a few seconds for the process to complete. A message saying, ‘Migrated data to internal shared storage’ should pop up on the bottom of your screen to indicate a successful transfer.
- Go back to ‘Settings,’ and then select ‘Apps.’


- Select the apps you’ve installed on your external storage device, click on ‘Storage used,’ and then move them to ‘Internal shared storage’ one after the other.
- Go back to ‘Settings,’ click on ‘Device Preferences,’ and select ‘Storage.’


- Click on your USB drive or external storage device, and select the ‘Erase and format as removable storage’ option.
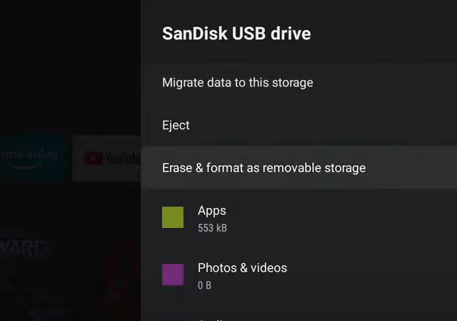
- Select ‘Format,’ and wait for the process to complete.
- Once a pop-up message appears on the bottom of your screen, you can disconnect your USB drive from the TiVo Stream 4K and use the external storage with other devices.
Conclusion
The TiVo Stream 4K is an excellent media streamer that’s perfect for live TV viewers. Since it allows you to expand its storage with an external drive, it’s also perfect for those who need additional storage space for apps and games.
Thanks to its compatibility with USB 2.0 standard devices, the TiVo Stream 4K allows you to connect several different components and peripherals to expand the capabilities of the device.
FAQs
What can I use the TiVo Stream 4K’s USB port for?
You can use the USB-C port on the TiVo Stream 4K to expand its capabilities. You can connect storage drives, like USB-C flash drives, wired mouse and keyboards, game controllers, and even ethernet adapters for a wired Ethernet network. However, you cannot use the USB-C port to power the TiVo Stream 4K.
How do I add applications to TiVo Stream 4K?
- Go to your Android TV’s home screen.
- Click on ‘Apps,’ and then select ‘Get More Apps.’ This will take you to the Google Play Store where you can search for and download additional apps.
- However, keep in mind that all apps on the Google Play Store aren’t compatible with the TiVo Stream 4K and Android TV.
Do I need to pay a monthly fee for TiVo Stream 4K?
You don’t need to pay any additional monthly service fee to use the TiVo Stream 4K app or device. However, the streaming apps you install from the Google Play Store might require a monthly subscription through the app provider itself.