Have you ever found yourself wanting to speed through a long video lecture or slow down a fast-paced tutorial to catch every detail? Windows Media Player, a widely available program on Windows operating systems, offers a simple feature that allows you to do just that. Adjusting the playback speed can enhance your viewing experience, making it a vital trick for any user to master. This guide will walk you through the steps to effortlessly control the playback speed of videos and audio files using Windows Media Player.
Adjust Playback Using the Enhancement Menu
Windows Media Player includes an Enhancements menu that provides various options to improve your media playback experience. One such feature is the ability to adjust the playback speed.
- Open Windows Media Player and begin playing the media file you wish to adjust.
- Right-click on the main part of the Windows Media Player screen and select ‘Enhancements’.
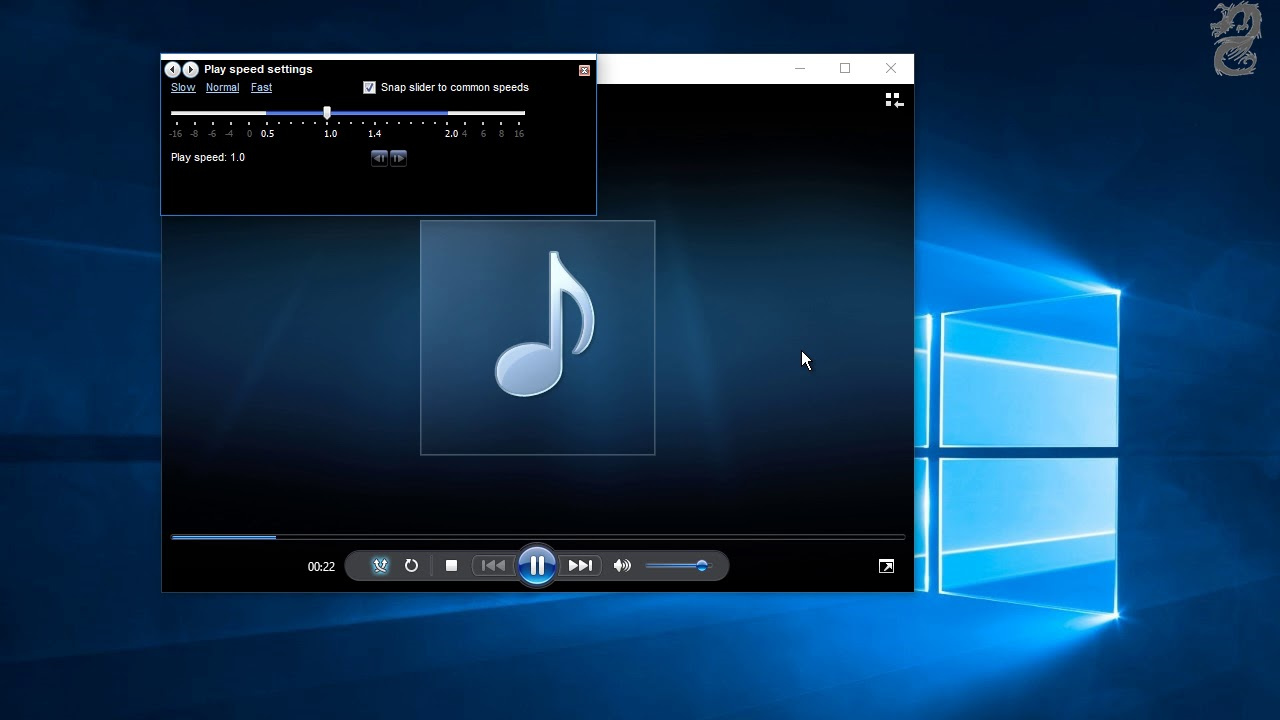
- Choose ‘Play speed settings’ from the drop-down menu.
- A new window will pop up with a slider. Moving this slider to the right increases the speed, while moving it to the left decreases it.
- Adjust the slider until you reach the desired playback speed and listen to or watch the media to ensure it’s at your preferred pace.
The benefits of using the Enhancements menu include intuitive controls in the form of a slider and immediate feedback on how the new speed affects your media. However, it’s worth noting that extreme speed adjustments might affect audio quality or make the video difficult to follow.
Hotkeys for Speed Adjustment
Hotkeys or shortcut keys offer a quick and efficient way to adjust playback speed without navigating through menus.
- While a video or audio file is playing in Windows Media Player, hold down the ‘Ctrl’ key on your keyboard.
- To speed up the playback, press the ‘Shift’ key and the ‘G’ key at the same time.
- To slow down the playback, use the ‘Shift’ key in combination with the ‘S’ key.
- Repeat these shortcuts until the playback reaches the speed you want.
Using hotkeys is a quick method that doesn’t interrupt your viewing as much as using menus might. The downside is remembering the key combinations, which can be a hurdle for some users.
Create Custom Speed Settings
Windows Media Player allows you to save custom speed settings for future use, which can be quite useful if you frequently need a particular playback speed.
- Open the ‘Enhancements’ menu as described before and go to ‘Play speed settings’.
- Adjust the slider to your preferred speed.
- Click on ‘Save as…’ next to the Custom settings.
- Give your custom speed a name and click ‘Save’.
The advantage of this method is the convenience it provides for future use. On the flip side, setting this up requires several steps and might be slightly more complex for the average user.
Optimize Audio For Speed Changes
When you change the speed of playback, the pitch of the audio might change. Windows Media Player offers a way to maintain pitch while altering speed.
- Go to ‘Play speed settings’ in the ‘Enhancements’ menu.
- Below the speed slider, find the option labeled ‘Snap slider to common speeds’ and ensure it is not checked.
- Check the box next to ‘Maintain pitch while changing speed’.
- Adjust the slider as desired; the pitch of the audio will remain constant.
The benefit of this feature is its ability to keep voices sounding natural. The downside might be a slight reduction in audio quality at extreme speeds.
Using Presets for Common Speeds
For those who prefer using pre-defined speed settings, Windows Media Player offers useful presets.
- Get to the ‘Play speed settings’ under ‘Enhancements’.
- Look for the ‘Snap slider to common speeds’ checkbox and ensure it is checked.
- Move the slider and it will ‘snap’ to preset speeds like slow, normal, and fast.
- Select the one that suits your needs.
This method is user-friendly, especially for those uncomfortable with manual adjustments. The limitation is that it provides less precision than the manual slider.
Slow Motion Feature
Windows Media Player also has built-in functionality to playback media in slow motion, which is perfect for analyzing sports videos or reviewing instructional content.
- Access the ‘Play speed settings’.
- Move the slider to the left, to the part labeled as ‘slow’.
- Adjust it to the point where you have the desired slow-motion effect.
Slow-motion can be great for detailed review, but it may not be as helpful for audio content because the change in pitch could make comprehension difficult.
Fast Motion for Quick Reviews
Just as slow motion allows you a precise examination, fast motion can help you breeze through content that does not require close attention.
- Open the ‘Play speed settings’.
- Drag the slider to the right towards the ‘fast’ labels.
- Find the speed that allows you to comfortably skim through the media.
Fast motion is perfect for quick reviews, but it may reduce comprehension and the enjoyment of media due to the increased pace.
Keyboard Adjustments for Fine-Tuning
If you prefer using your keyboard for adjustments, there’s a way to fine-tune the speed without touching your mouse.
- Bring up the ‘Play speed settings’.
- Instead of dragging the slider, use the left and right arrow keys on your keyboard for precision adjustments.
This is beneficial for those seeking precise speed control, but may be cumbersome for users who are not keyboard-proficient.
Reset to Default Speed Quickly
After you’ve changed the playback speed, you may want to revert to the standard speed quickly.
- Bring up the ‘Play speed settings’.
- Click the ‘Normal’ button which will immediately reset the speed to the default setting.
This function offers a quick reset without needing to adjust the slider manually.
Combine Video and Audio Speed Adjustments
For a tailored viewing experience, you might want to adjust both video and audio speed settings.
- First, use the ‘Play speed settings’ to adjust video speed.
- Then, use ‘Enhancements’ and ‘Graphic equalizer’ to tweak the audio pitch and tone to match the new video playback speed.
This allows for a fully customized experience, though it requires multiple steps and might be overwhelming for new users.
Conclusion
Understanding how to manipulate playback speed in Windows Media Player can significantly enhance your media consumption, whether for education, entertainment, or work purposes. While there are numerous options and tools within the program to achieve this, the key is to find the method that suits your needs best. Experiment with the various features to discover the perfect balance that improves your productivity or enjoyment when engaging with media.
FAQs
Can I adjust the playback speed of any video or audio file in Windows Media Player?
Yes, Windows Media Player can change the playback speed of most common media file types. However, some file formats might not be supported and therefore cannot be adjusted.
Will changing the playback speed affect my audio quality?
Altering the speed can sometimes affect the audio quality, especially if the change is significant. However, the ‘Maintain pitch’ option helps mitigate this issue.
Is it possible to set a default playback speed that will apply to all videos?
Windows Media Player does not have an option to set a default playback speed globally; you have to adjust the speed each time you play a new media file.