Sewing machines can be incredible companions, assisting you in crafting creations from simple clothing repairs to elaborate quilts. Remembering how to thread them, though, can be a challenge—especially if you’re new to sewing or it’s been a while since you last used one. In this guide, we’ll go through the threading process for a Singer sewing machine, step by step. Knowing how to properly thread your machine is essential for seamless sewing and will help avoid issues such as bunching, tangling, or breaking thread.
Threading the Top Thread
Threading the top thread correctly is crucial for the sewing machine to function properly. If this isn’t done right, it can lead to a host of problems that might frustrate your sewing experience. Let’s ensure your machine is ready to create beautiful stitches on any fabric you choose.
-
Raise the Needle – Turn the handwheel on the side of the machine towards you until the needle is in its highest position. Your machine’s needle has to be raised to properly thread it.
-
Lift the Presser Foot – Raising the presser foot releases the tension discs, allowing the thread to sit properly between them, which is critical for controlling thread tension as you sew.
-
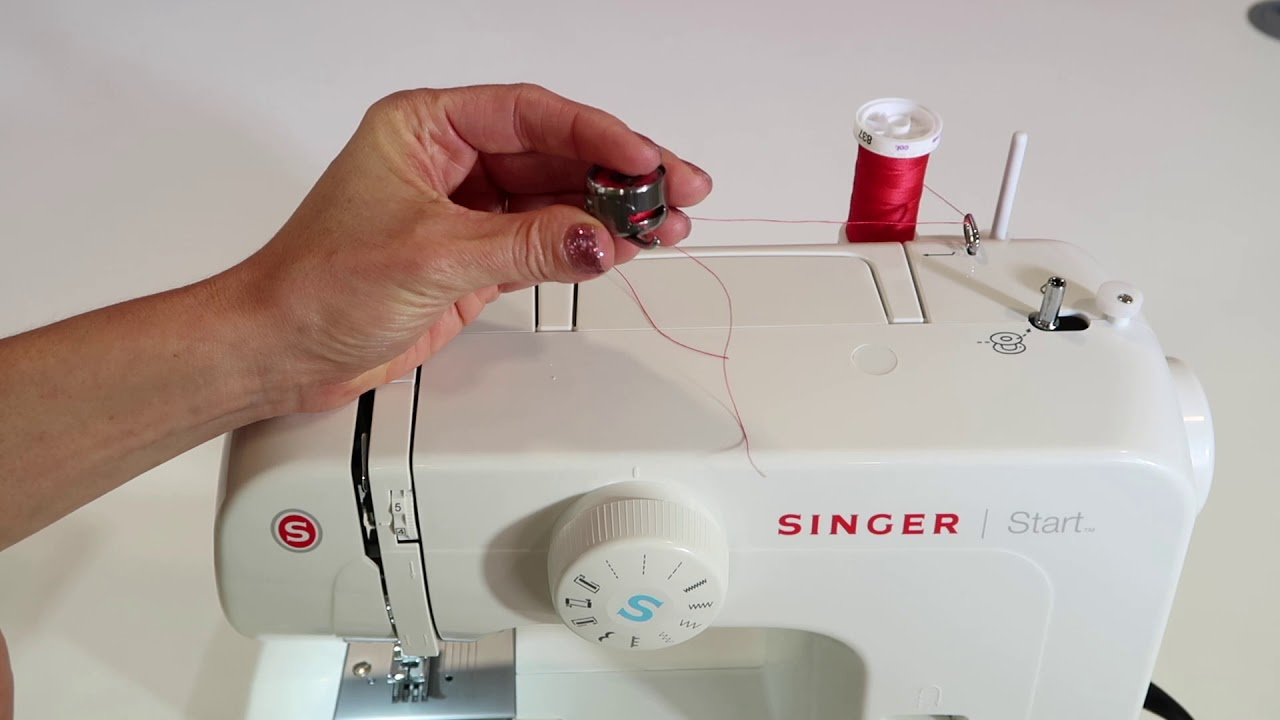
Place the Thread – Locate the spool pin on the top of the machine. Place your spool of thread onto this pin with the thread unwinding towards the front of the machine.
-
Guide the Thread – Follow the numbered threading guide printed on your machine. This typically involves leading the thread through a series of guides, down a channel on the front of the machine, and then up to the take-up lever.
-
Thread the Needle – Lower the thread through the take-up lever and then down towards the needle. Some Singer machines have an automatic needle threader. If not, you’ll thread the needle manually. Thread from the front to the back or as per your machine’s specification.
-
Pull Thread Tail – Make sure a tail of thread (about six inches long) is hanging out the back of the needle to prevent it from slipping out when you start to sew.
Summary: Threading the top thread correctly sets the stage for trouble-free sewing. While it might seem tedious at first, it’s a fundamental skill that, once mastered, provides a strong foundation for all your sewing projects. The potential downside is minimal—if you find it difficult, repeated practice will make the process second nature.
Inserting the Bobbin
Inserting the bobbin correctly is as vital as threading the top thread since the sewing machine uses two threads to create stitches. An incorrectly placed bobbin can lead to skipped stitches, tangled thread, or even damage to your machine.
-
Access the Bobbin Compartment – Most Singer sewing machines have a bobbin compartment either on the front or the top. Depending on your model, you’ll either remove a cover or slide open a panel.
-
Insert the Bobbin – Ensure that the bobbin is wound evenly and place it in the bobbin case. The thread should be facing in the correct direction (consult your machine’s manual) to avoid tangles.
-
Guide the Thread – Pull the thread through the slot in the bobbin case, and follow the guide arrows or your machine’s diagram. This typically involves leading the thread under a metal piece that applies tension.
-
Thread Tension Check – Once you have the bobbin thread in place, gently tug on it. There should be a bit of resistance. If it feels too loose or too tight, you may need to adjust the tension screw.
-
Replace the Bobbin Cover – Slide or snap the bobbin cover back into place, ensuring it’s secure and not disrupting the bobbin or thread.
Summary: Properly inserting the bobbin will ensure that the bottom thread works harmoniously with the top thread to create even, high-quality stitches. The main benefit is consistent stitch quality, whereas a downside could be the need for occasional tension adjustments. However, with practice, understanding and setting thread tension will become an easy task.
Choosing the Right Needle and Thread
The interaction between the needle and thread is central to the sewing process. Using the wrong needle or thread can result in broken or bent needles, skipped stitches, or damage to the fabric you’re working with.
-
Match Needle to Fabric – Consult a sewing guide to choose the right needle size and style for your fabric. For example, fine fabrics require a finer needle, while heavy fabrics require a stronger, thicker needle.
-
Select Appropriate Thread – Use thread that complements your fabric choice. Typically, all-purpose polyester thread works well for most projects, but fabrics such as denim or leather may require a heavier thread.
-
Install the Needle – Loosen the needle clamp screw, insert the needle fully with its flat side facing the back, then tighten the screw securely to hold the needle in place.
Summary: The right needle and thread not only improve stitching quality but also prevent unnecessary wear on your fabric and sewing machine. The drawback can be the need to invest in a variety of needles and threads for different projects, but the advantage of achieving professional results should outweigh this minor inconvenience.
Keeping the Machine Clean
Maintaining a clean sewing machine will significantly extend its life and ensure smooth operation. Dust, fabric lint, and thread pieces can accumulate over time, causing poor performance or damage.
-
Regular Cleaning Schedule – Dedicate time to clean the machine after every project or after a set number of hours of use. Your machine’s manual will provide specific instructions.
-
Access the Bobbin Area – Remove the bobbin, bobbin case, and cover to get to the area where most lint builds up.
-
Remove Lint and Dust – Use a small brush (often provided with your sewing machine) or a lint-free cloth to clean out any debris. Avoid blowing into the machine, as this can push lint further inside.
-
Oiling the Machine – Some Singer machines require periodic oiling to keep the mechanics running smoothly. Consult your manual to see if this is necessary and to learn the correct way to do it.
Summary: Keeping your sewing machine clean is critical for its performance and longevity. The main benefit is that it can prevent a multitude of issues and is relatively simple to do. There are no real downsides to cleaning your machine, though it might be seen as an additional chore. However, regular cleaning is essential maintenance that should not be overlooked.
Perfecting the Tension
Thread tension can be a tricky concept to master, but it’s essential for having beautiful and consistent stitches. Incorrect tension can result in loose stitches, puckered fabric, or even your sewing machine not sewing at all.
-
Understand the Tension System – Singer sewing machines have dials, knobs, or digital controls that adjust the tension. The right tension will depend on your fabric, thread, and sewing speed.
-
Testing Tension – Do a test run on a scrap of the fabric you will be sewing on. Adjust the tension and examine the stitches until they look even and lay flat without puckering.
-
Adjusting as You Go – Be prepared to adjust tension slightly as you change between different types or thicknesses of fabric.
Summary: Perfect tension is a balance that results in smooth, even stitches, forming a harmony between the top and bottom threads. While it takes practice to identify and adjust for the perfect tension, the benefits of mastering this skill are worthwhile, resulting in a professional finish to your sewing projects. There is no major downside to learning about tension other than the time it may take to become proficient.
Using the Right Presser Foot
The presser foot holds the fabric against the feed dogs, allowing it to be fed evenly as you sew. Using the right presser foot for your project will make a notable difference in stitching quality and ease of sewing.
-
Identify the Correct Foot – Refer to your sewing machine’s manual to find the recommended presser foot for your particular sewing task, whether it’s straight stitching, zigzagging, buttonholing, or decorative stitching.
-
Change the Presser Foot – Raise the needle and presser foot lever to their highest positions. Most Singer machines have a lever or button that releases the foot. Attach the new foot by aligning it under the shank and lowering the lever.
-
Test Your Setup – Sew a few trial stitches on scrap fabric to ensure the presser foot is correctly attached and that it’s suitable for your fabric and sewing technique.
Summary: The use of the correct presser foot translates to easier fabric handling, more precise stitches, and an overall improved sewing experience. It also prevents damage to your machine and fabric. Changing feet is a simple task, but keeping track of multiple foot types can sometimes be a challenge for beginners.
Seam Allowances and Stitch Selection
The type of seam and stitch you select is foundational to construction and the final appearance of your sewing project. Consistency in seam allowances and the correct stitch settings will help your pieces fit together accurately.
-
Follow Pattern Guides – Most patterns come with a recommended seam allowance; make sure to follow it precisely for the best results.
-
Use the Seam Guide – Most Singer sewing machines have lines etched into the throat plate to act as guides for different seam allowances. Use these to keep your stitching straight and consistent.
-
Select the Right Stitch – Your machine has various stitches for different purposes. Straight stitches are for construction, zigzag for stretch fabrics or finishing edges, and decorative stitches for adornment. Check your machine’s manual for how to select and adjust stitches appropriately.
Summary: Paying attention to seam allowances and stitch selection will improve the overall finish of your garments or projects. While the process can seem meticulous, the reward is a well-constructed garment that fits together perfectly, enhancing the durability and appearance of your work.
Practicing Stitching Techniques
Practice is key to gaining confidence and skill in sewing. Learning to control the speed of the machine and handle fabric smoothly can significantly impact the final quality of your sewing projects.
-
Beginner Exercises – Start with simple sewing exercises on scrap fabric. Practice sewing straight lines, curves, and corners to build your muscle memory and control over the machine.
-
Experiment with Speed – Get comfortable with varying the speed of your machine, starting on a slow setting and gradually increasing as you become more confident.
-
Handling Different Fabrics – Try sewing on different types of fabric. Each type will have its own characteristics, which will influence how it moves through the machine and the settings you’ll need to use.
Summary: With regular practice, you’ll find that your sewing becomes straighter, faster, and more intuitive. The primary benefit of practice is the improvement of your overall sewing skills and the quality of your finished projects. The only downside is the time commitment required, but the investment of time is well worth the resulting enhancement of your sewing abilities.
Overcoming Thread Snags and Breaks
Thread issues can be frustrating, but understanding how to address thread snags and breaks can save you from major interruptions in your sewing flow.
-
Check Threading Path – If threads are snagging or breaking, rethread your machine to make sure the thread is correctly passing through all guides and the tension mechanism.
-
Inspect Needle and Thread Compatibility – Ensure that the thread is suitable for the needle you’re using. A thread that’s too thick for the needle’s eye can cause breaks.
-
Avoid Knots and Tangles – Gently smooth out your thread before threading to prevent any potential knots or tangles that can lead to snags.
Summary: Resolving thread snags and breaks typically involves simple checks and adjustments to your setup. Correcting these issues leads to a smoother sewing experience and saves time that would otherwise be spent troubleshooting. The disadvantage is the disruption to workflow when these issues occur, but with a bit of patience and practice, resolving them quickly becomes second nature.
Keeping the Machine Maintained
A well-maintained sewing machine can last for decades. Regular maintenance, beyond keeping it clean, includes checking on certain parts of the machine to make sure they’re in good working order.
-
Routine Check-Ups – Consult your Singer sewing machine’s manual for routine maintenance tasks, which may include checking the bobbin case, adjusting the timing, or looking over belts and gears for wear.
-
Seek Professional Servicing – Every few years, take your machine to a professional to have it serviced. They can perform more comprehensive maintenance tasks and check for any underlying issues.
-
Keep It Covered – When not in use, protect your sewing machine from dust and other environmental factors with a cover.
Summary: Regular maintenance ensures that your Singer sewing machine works efficiently for all your projects. The main benefit is the peace of mind that comes with a smoothly running machine, ready whenever you are to start a new project. The downside might be the time or money invested in maintenance, but neglecting your machine can lead to much costlier repairs down the line.
Conclusion
Sewing is not only a practical skill but also a creative outlet that allows you to bring your fabric dreams to life. Understanding how to thread your Singer sewing machine and maintain it properly is the first step toward bringing those visions into reality. With the guidelines provided, you’ll be well on your way to developing a solid foundation in sewing. It takes a bit of practice, but each step you master adds to your confidence and the endless possibilities of your sewing ventures. Keep patience at hand, and rest assured that the few hiccups along the way are all part of the learning process.
FAQs
-
Why does my Singer sewing machine keep jamming?
A sewing machine can jam for several reasons, such as incorrect threading, the bobbin not being correctly placed, or the machine needing cleaning. Always ensure you’re using the correct needle and thread, and that both the top thread and bobbin are threaded correctly according to your Singer model’s instructions. -
What number should my tension be on a Singer sewing machine?
Tension settings vary based on the fabric, thread, and specific sewing project. Most machines have a default setting around 4 or 5, which is suitable for standard, medium-weight fabrics. You’ll need to adjust the tension for finer or heavier fabrics and perform a test seam to check the stitch quality. -
How often should I oil my Singer sewing machine?
If your model requires oiling, refer to your machine’s manual for specific guidance. Generally, after about every 8 hours of use is a good benchmark, but this can vary. Always use sewing machine oil, as it’s specially formulated not to damage your machine.