Adobe Media Encoder is an amazing tool that can create video files with really high quality. However, these files can sometimes be too big when you need to share them online. They might even slow down your work when dealing with large media files. So, that is where understanding the estimated file size becomes important.
To learn more about what media encoder is and how it works, continue reading this guide. Below, we have outlined everything you need to learn about Media Encoder and the detailed steps to estimate file size. Also, keep a check on its pros and cons to learn more about it.
Media Encoder: Simplifying Video Processing and Estimated File Size Control
Adobe Media Encoder offers substantial improvements to video files, enhancing their manageability and versatility for diverse applications. Beyond this, it functions as dedicated software tailored for the effective execution of video processing tasks. Its core purpose revolves around the efficient encoding of video projects into a multitude of formats.
Furthermore, it exhibits a robust capacity to smoothly integrate with an extensive array of video file formats. Moreover, this software demonstrates full compatibility with other Adobe Creative Suite applications, including Premiere and After Effects. This cohesive integration allows users to work concurrently on projects while encoding procedures are underway, ultimately elevating workflow efficiency.
Role of Adobe Media Encoder in Estimated File Size
This software offers a crucial capability in handling video file sizes as part of its encoding process. Its primary mechanism for achieving this is by controlling the video bitrate. It is an important parameter in influencing the resultant file size. Bitrate, in this context, signifies the volume of data processed within a specific time frame within a video.
Pros of Using Adobe Media Encoder
Now, after we are done explaining what media encoder is and how necessary it is when it comes to managing file size, let’s head to its pros:
- Tailored Settings: This software provides the option to tailor presets, which are pre-established configurations designed to enhance video settings. These customizable presets guarantee consistency across projects and streamline the production process.
- Effective Collaboration: Its seamless integration with other Adobe software, such as Premiere Pro and After Effects, ensures a cohesive and efficient creative workflow.
- Extensive Format Compatibility: This tool accommodates a wide spectrum of video file formats, making it adaptable to diverse project requirements.
- Batch Video Processing: Adobe Media Encoder excels in handling multiple video files concurrently, which significantly reduces the time and effort required, especially when dealing with a large volume of files.
Drawbacks of Using Adobe Media Encoder
However, there are also some drawbacks that users must be aware of. We have listed a few of them here so that you can easily consider them before using the tool:
- Resource Demands: It can be resource-intensive, especially on lower-end computer systems, potentially leading to slower performance.
- Complex Interface: The user interface of Adobe Media Encoder might appear complicated, especially for beginners or those unfamiliar with Adobe’s software design.
- Subscription Requirement: Adobe Media Encoder is not available as a one-time purchase; it requires an Adobe subscription, which may not be suitable for everyone.
Managing Estimated File Sizes with Adobe Media Encoder
If you are wondering why your video files become so large when you use Adobe Media Encoder, continue reading this section. The primary factor influencing the size of your video files in Adobe Media Encoder is the bitrate at which they are encoded. Bitrate refers to the amount of data your video uses per second when it’s played back.
During the export process in Adobe Media Encoder, you can choose the bitrate, as higher bitrates result in superior video quality and lead to larger file sizes. The choice of video codec in Adobe Media Encoder plays an important role as codecs are used to compress your video to reduce its size. Some codecs, such as Apple ProRes, are excellent for video editing but tend to create larger files.
On the other hand, codecs like H.264 are more suitable for online uploading as they create smaller files without compromising too much on quality. So, if you plan to use Adobe Media Encoder to share your videos online, you will need to strike a balance between video quality and file size. Consider opting for a codec like H.264 and adjusting the bitrate settings for optimal results.
Estimated File Size Optimization with Adobe Media Encoder
When dealing with video files in Adobe Media Encoder, learning how to achieve smaller file sizes without compromising too much on quality is essential. This becomes relevant when you intend to stream your videos online, as large file sizes can lead to slow uploads and buffering issues. One of the most effective ways to reduce the file size is by selecting an appropriate video codec and adjusting the bitrate.
A codec is essentially a method of compressing your video, and Adobe Media Encoder offers various options for this purpose. For online streaming, codecs like H.264 are commonly recommended. H.264 efficiently compresses video files while maintaining good quality. However, the key to controlling the final file size lies in the bitrate settings.
YouTube, one of the most popular platforms for sharing videos, provides specific recommendations for upload settings. They suggest using the H.264 codec and offer bitrate guidelines based on the resolution of your video, such as for most 4K videos, a bitrate between 35-45 Mbps is recommended. However, for 1080p HD videos, a bitrate between 8-12 Mbps is suggested.
Additional Considerations
These guidelines align with the principles of balancing quality and file size. Following YouTube’s recommendations, you can optimize your video files for online streaming. This will greatly enhance the viewing experience for your audience. Aside from bitrate and codec selection, other factors impact file size optimization.
These include frame rate and resolution. A lower frame rate, such as 30 fps compared to 60 fps, allows the bitrate to be distributed more efficiently because there are fewer frames per second. Similarly, lower resolutions can lead to smaller file sizes with the same bitrate, resulting in less compression and improved overall visual quality.
To provide a clearer understanding, here are recommended video bitrates for different resolutions and frame rates in Adobe Media Encoder. Here are the recommended video bitrates for SDR uploads:
| Type | Standard Video Bitrate | High Video Bitrate |
| 8K | 80 – 160 Mbps | 120 to 240 Mbps |
| 2160p (4K) | 35–45 Mbps | 53–68 Mbps |
| 1440p (2K) | 16 Mbps | 24 Mbps |
| 1080p | 8 Mbps | 12 Mbps |
| 720p | 5 Mbps | 7.5 Mbps |
| 480p | 2.5 Mbps | 4 Mbps |
| 360p | 1 Mbps | 1.5 Mbps |
Next, let’s talk about recommended video bitrates for HDR uploads:
| Type | Standard Video Bitrate | High Video Bitrate |
| 8K | 100 – 200 Mbps | 150 to 300 Mbps |
| 2160p (4K) | 44–56 Mbps | 66–85 Mbps |
| 1440p (2K) | 20 Mbps | 30 Mbps |
| 1080p | 10 Mbps | 15 Mbps |
| 720p | 6.5 Mbps | 9.5 Mbps |
| 480p | Not supported | Not supported |
| 360p | Not supported | Not supported |
We will now list down the recommended audio bitrates for uploads:
| Type | Audio Bitrate |
| Mono | 128 kbps |
| Stereo | 384 kbps |
| 5.1 | 512 kbps |
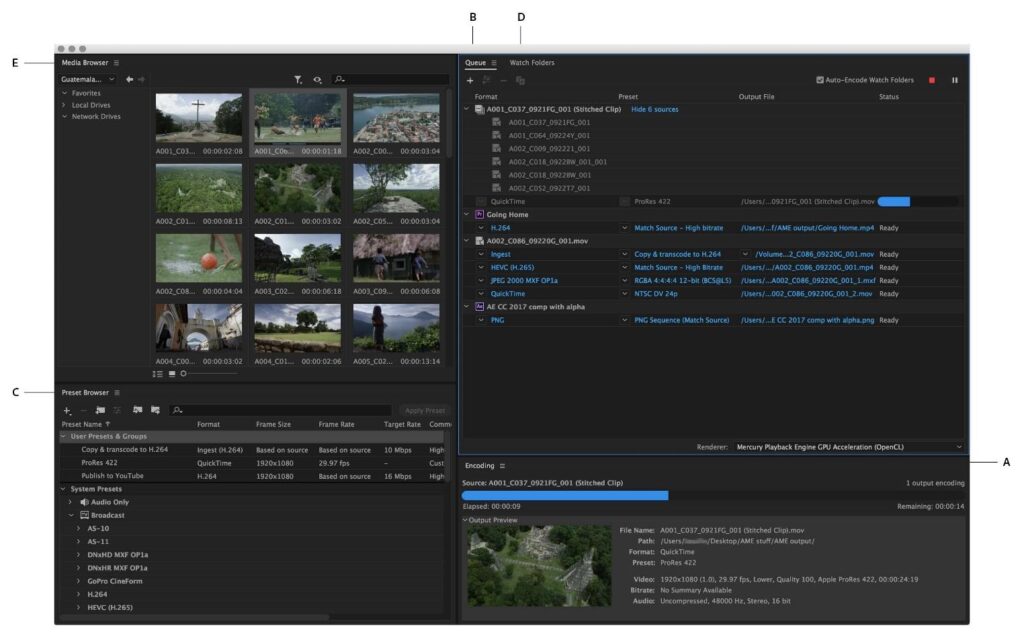
Understanding Adobe Media Encoder Interface and its Options
Before we head to learn the steps of how to reduce file size in Adobe Media Encoder, let’s have a look at how this software looks and works. The Adobe Encoder interface can be broken down into 4 main parts:
- Queue: This feature helps you to import your projects for encoding and turning them into video files. You can add your files here easily by just dragging and dropping them.
- Presets: Within this feature, you will find pre-made settings by Adobe. These presets can be explained as templates that can be very helpful, especially if you are new to working on a video project. Presets usually give you a good starting point for your settings.
- Watch Folders: This is a very useful feature as it lets Adobe Media Encoder automatically encode videos you put into certain folders.
- Encoding: This part is where you can see how your encoding tasks are doing. It tells you factors like how much time is left for the task to finish and allows you to stop or pause tasks if needed.
Fine-Tune Your Video and Audio Settings Using Media Encoder
The fine-tuning setting for your audio and video within Adobe Media Encoder is highly necessary. First, when dealing with the video side, you will need to focus on the following:
- Resolution: This is about how much detail your video shows. A higher resolution means a sharper image, like the difference between a simple sketch and a detailed painting. But keep in mind that higher resolution also means a bigger file size, so you have to find the right balance.
- Frame Rate: This controls how smoothly your video plays. A higher frame rate can make your video smoother, but it can also increase the file size. It is needed to find the right balance for your project.
- Bitrate: This determines the quality of your video. A higher bitrate means better quality, like having a high thread count on your bedsheets – it’s nicer, but it takes up more space.
Now, heading towards the audio settings. Here are the main things to consider about:
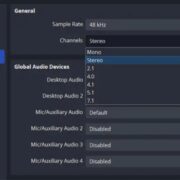
- Sample Rate: This affects the audio quality of your video. A higher sample rate gives you clearer sound, similar to higher video resolution. But, like with video, it can also make your file larger.
- Bitrate: Similar to video, a higher bitrate means better audio quality. It’s much like adjusting the volume on your stereo; the higher it goes, the clearer the sound, but it also uses more space.
How to Reduce the Estimated File Size Using Adobe Media Encoder
After we are familiar with how Media Encoder works and what things to care about, let’s head to the steps to make your files manageable and reduce their file size to share or upload them easily:
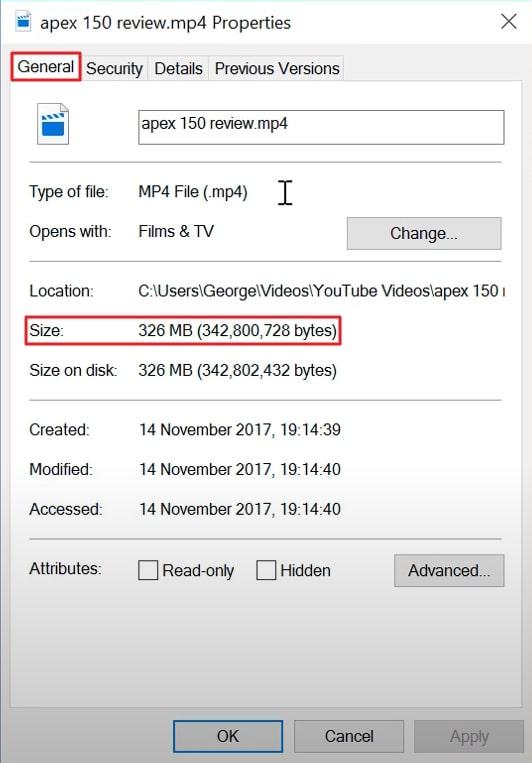
Step 1: First, you will need to access File Explorer and locate the media file to note down the estimated file size. Select the file, right-click it, and from the drop-down menu, choose “Properties.” Under the “General” tab, you notice the “Size” of the media file.
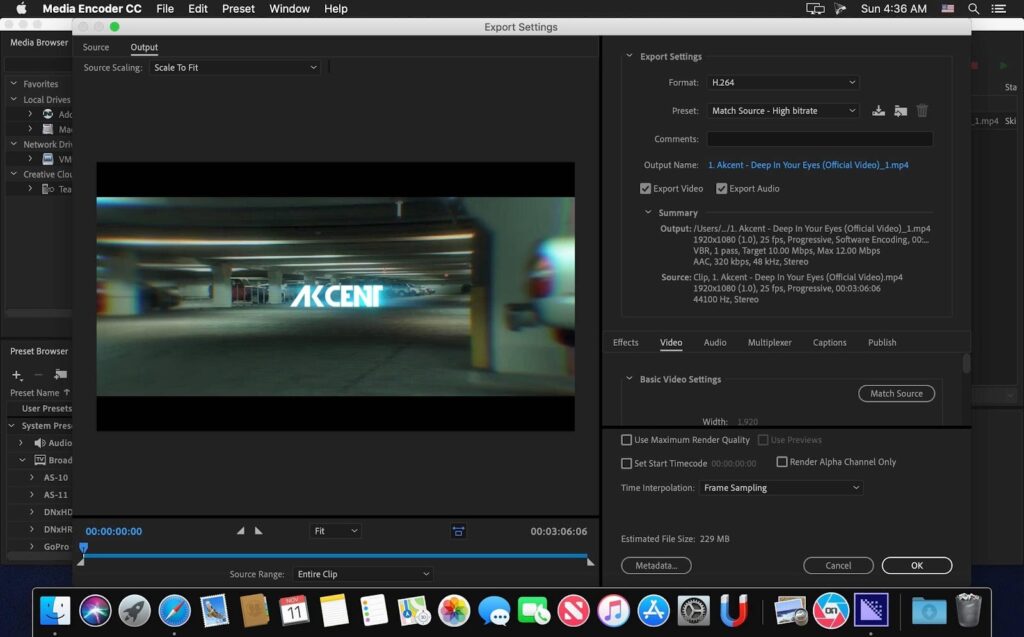
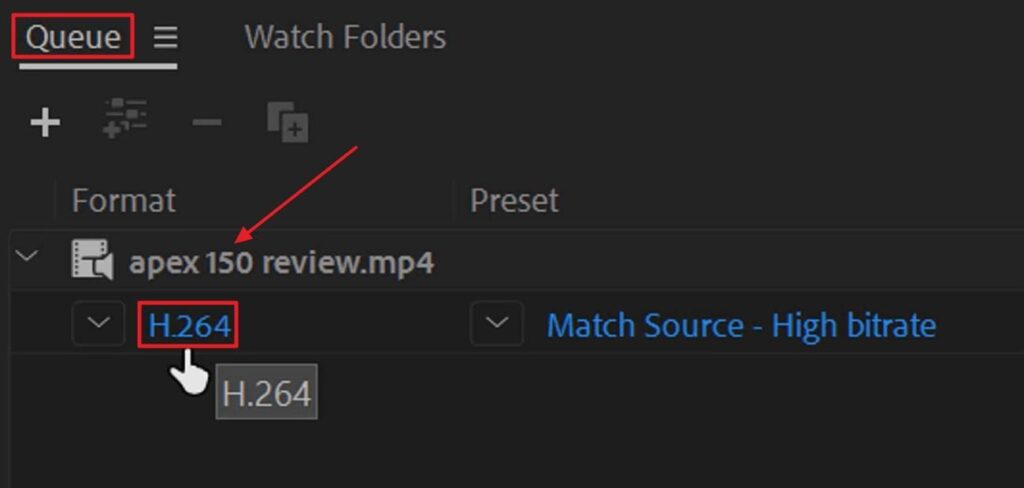
Step 2: Afterward, launch Adobe Media Encoder on your system. Now, drag and drop the media file with a large size into Adobe’s interface under the “Queue” section. Following this hit the “H.264” option below the imported video and explore the “Export Settings” window.
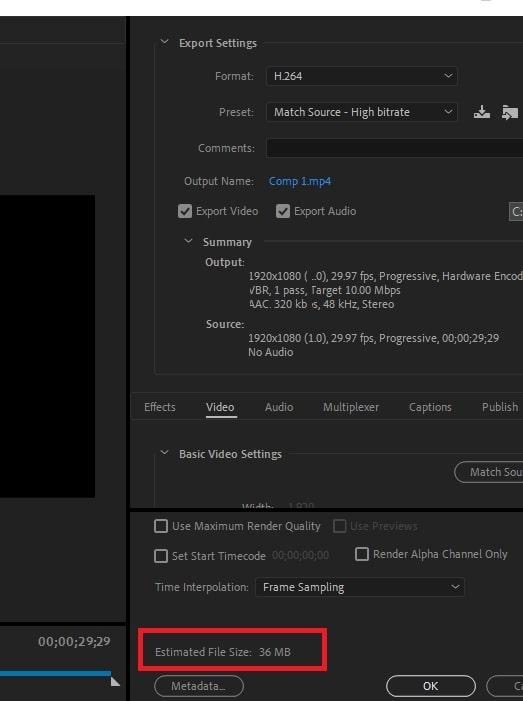
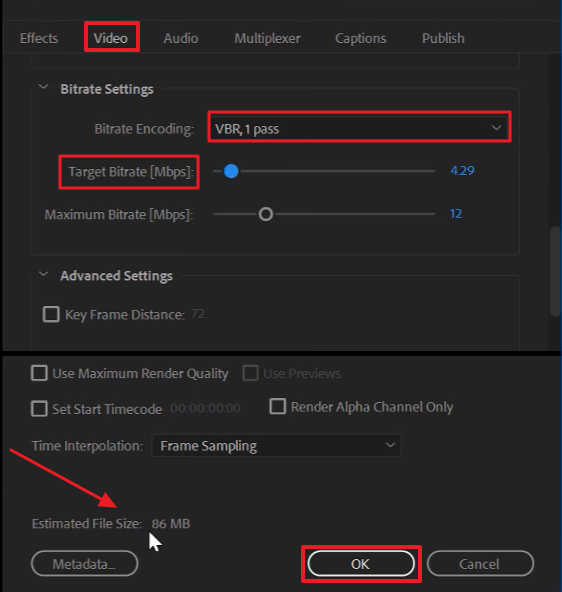
Step 3: Moving on, in the right-side panel of the “Export Settings” window, choose the “Video” tab. Now, scroll down to the “Bitrate” settings section, and ensure to select the “VBR, 1 Pass” from the “Bitrate Encoding” drop-down menu. Move the “Target Bitrate” slider accordingly to adjust the file size. You can now notice the “Estimated File Size” at the bottom and press the “OK” button.
Step 4: Following this, tap on the “Play” icon at the top-right corner when you are finished with the settings. Now, wait for the status to be changed to “Done” and a “Tick Mark.” After that, head to “File Explorer” and again see the “Properties” of your video. You will see the file size reduced as per requirements.

Final Words
You must be now familiar with how Adobe Media Encoder Works and how to reduce estimated file size using this software. Furthermore, we have also explained how the Adobe Media Interface works and what each term means within this tool.
The steps mentioned above are easy to follow and precise to the topic. This will, however, make reducing media file size much easier. Plus, keep a check on the table discussed above for the most standard video and audio bitrates required for each resolution type.