Recently, my C: drive is almost full and I have to change a new one. However, there are lots of favorite games like a series of Battle.net games. I don’t want to lose them. Is there any way to move Battle.net games to another drive without reinstalling them?
With the help of my net friends and my tries, I get it done. Actually, it’s easy to move Battle.net games to another drive, even another computer. Maybe you’re facing the same issue as me, or you just want to update the old drive to a faster SSD. Whatever, follow the below instruction and know how to move Battle.net games to another drive.
Move Battle.net Games to Another Drive via Reinstalling
The first thing that comes to your head may be reinstalling the games. There is no doubt that that way can help you move Battle.net games to another drive. However, you have to re-download the games and it will take a lot of time without a fast network connection. But if you tend to do so, just follow the below steps.
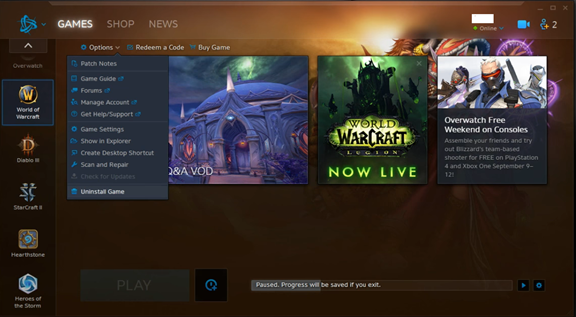
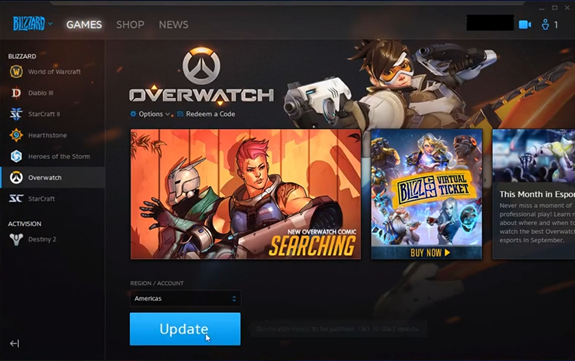
Step 1. Uninstall games with Battle.net app first. Open Blizzard Battle.net app and select any game on the left sidebar. Click Options menu and click Uninstall Game option in the drop-down list.
Step 2. With the uninstallation process done, click Install button
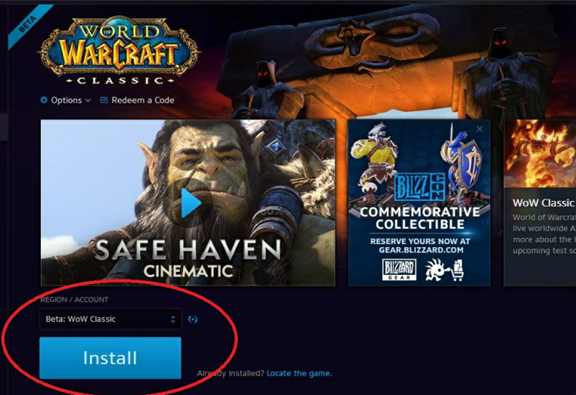
and in the pop-up window, click Change button to browse and select another drive for installing the game. Finally, click Start Install.
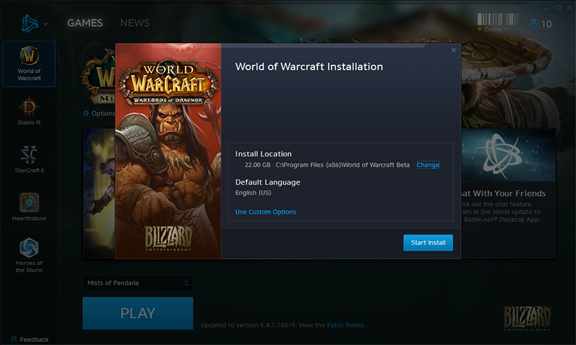
Note: Only the games are moved to another drive in this way. If you want to move Blizzard Battle.net app to another drive too, uninstall the client and install it again in another drive. Then re-download all games and install.
Move Battle.net Games to Another Drive through Changing Installation Settings
But what if I don’t want to reinstall games since my internet will take very long? There are really a few ways to simply copy and paste the games to another drive.
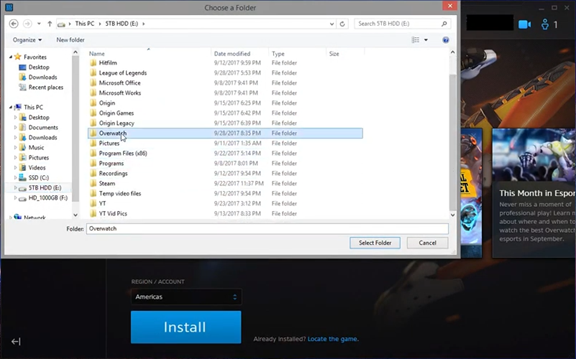
Step 1. Cut the original game folder to the new location. In my case, I want to move Overwatch game in D:\Blizzard Games to C:\Overwatch. So I cut the folder D:\Blizzard Games\Overwatch to C:\Overwatch
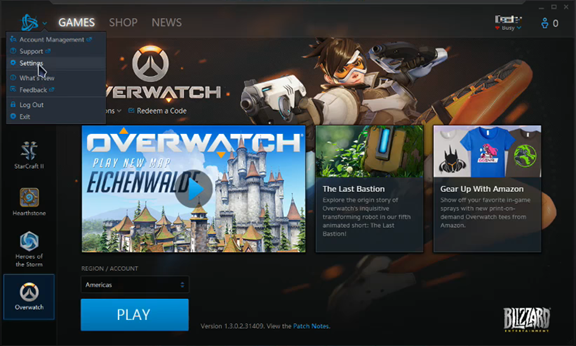
Step 2. Launch Battle.net client and select the game you want to move. Click the BLIZZARD icon at the top left. In the drop-down list, choose Settings.
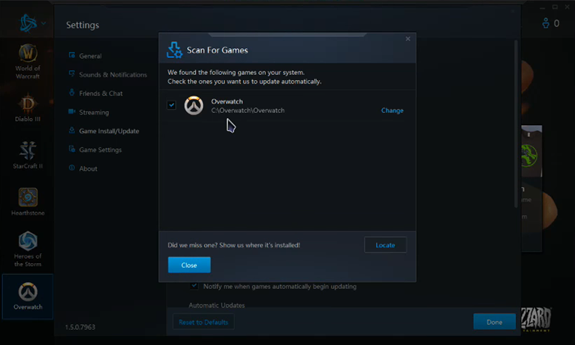
And then switch to Game Install/Update tab in Settings panel. Under FOLDER USED FOR GAME PLAY label, click Use a different folder.

Then choose an existing folder or create a new folder in another drive as the destination location.
Step 3. Scan the new location to find the game. Click Scan for Games button and it will scan the folder automatically and show the found game.
In this way, you don’t need to reinstall games and other Battle.net games can do so.
Move Battle.net Games to Another Drive via Re-locate Game Folder
In addition to change installation location. You can also re-locate game folder directly.
Step 1. Follow the above Step 1 to move the original game folder to another drive. Then restart the Battle.net client.
Step 2. At the bottom of the main interface, you can notice the blue Locate the game link beside Install button. Click on it and choose the new game folder.
Finally, go back and the Install button will change to Update button. That means the game in another drive has been found. You can play it now.
Move Battle.net Games to Another Drive with the Help of Steam Mover
Steam Mover is a little app for moving Steam games. However, it also can be used for Battle.net games. And it’s super easy to use it.
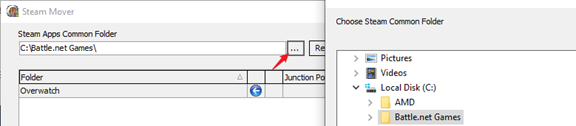
Step 1. Visit the official site to download Steam Mover. Then click the three-dots button beside Refresh button to choose the original game folder. Then click another three-dots button on the right to select a folder in another drive as the new location for the game.
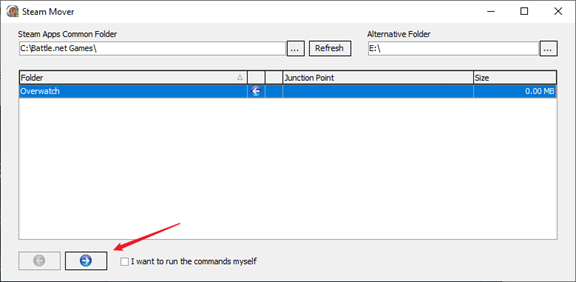
Step 2. Choose any game and click the blue right arrow at the bottom. It will fire off a few command line windows – please let them run to completion. Once finished, you can find the game has been moved to another drive and you can play the game directly in Battle.net client without any other operation.
The above solutions might be a bit difficult for the ordinary users. So, you can try an edge tool – EaseUS Todo PCTrans, which can help you move one or multiple games to another drive or computer in one time.
Best Application and Game Mover – EaseUS Todo PCTrans
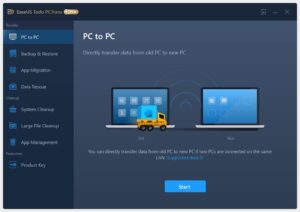
With the help of this application, users can easily manage to transfer files, software, games, and much more from one drive to another or from PC to another. You can always follow the below 3 steps to complete the migration task.
1. Select transfer mode “PC to PC” or “App Migration”.
2. Choose applications, games, or files to transfer.
3. Choose the destination location and confirm to start.
In this article, I introduce 5 ways to move Battle.net games to another drive. All of them are easy to operate. If you don’t bother to reinstall the game and have a good network connection, try the method 1. However, in my opinion, I prefer to move the game directly instead of reinstalling. You can use Battle.net client to complete this task easily. Even, you can try Steam Mover to more games in bulk quickly.
Move Battle.net Games to Another drive – FAQ
How do I move a Blizzard game to another drive?
You can use Blizzard Battle.net app to move Blizzard game to another drive. Way 1. Change the game installation location. Way 2. Re-locate game folder.
How do I move overwatch from C drive to D drive?
The regular way is reinstalling Overwatch. However, you can also change the installation location from C drive to D drive to realize this goal without reinstalling it.
How do you move Blizzard games from HDD to SSD?
I just moved one of Blizzard games from HDD to SSD. You can copy and paste the Blizzard games folder to SSD and re-locate game folder in Blizzard Battle.net app.
Can I install wow on D drive?
Yes, you can install WoW on D drive. However, you need to change the installation location in Blizzard Battle.net app first. Just go into Settings and make the adjustment.