For Windows users, it’s not easy to transfer the files because there is no built-in-feature available that can help to transfer files from Windows XP to Windows 10/11. Furthermore, the most important thing is that Window 10 also doesn’t include “Easy Transfer” feature that can help to transfer data from old Windows to a new one.
So, how to transfer files from Windows XP to Windows 10/11? Luckily, there are three methods that you can try to transfer files from Windows XP to Windows 10/11. All these methods are straightforward, and you can follow them easily. You can also learn how to transfer files from Windows 7 to Windows 10/11.
Without wasting any time, let’s discuss these methods.
Method 1. Use hard drive or flash drive to transfer files from Windows XP to Windows 10/11
This is the most straightforward way and doesn’t require much expertise. It may sound like more of a hassle, but if you are a beginner, then you can follow it easily. For this method, you can use any hard drive or flash drive to transfer the files.
The advantage of this method is that you don’t need to buy any software. All you have to do is plug your drive into your old computer and gathered all the files. Once you are done, you can connect the same drive into the new computer and drag the files back which you have collected from the old computer, isn’t it simple?
Method 2. Choose cloud storage like OneDrive to transfer Windows XP files
One drive is the easiest way to transfer your Windows XP files. In case if you have a Microsoft account, then you can get 5GB of free storage to transfer your files including images, documents, videos and much more.
On the other hand, OneDrive comprises of fastest cloud storage that allows you to share, upload, and download different data with one single click. All you have to do is follow the steps mentioned below, and you are good to go.
Step 1: Go to the official website of OneDrive.
Step 2: Sign up from your Microsoft account
Step 3: Now open the panel and click the Upload option.
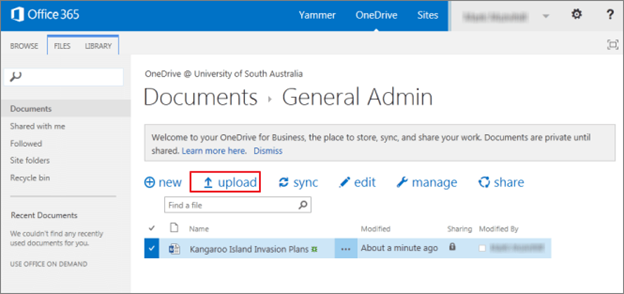
Step 4: Add all the files that you want to upload to your new computer.
Step 5: Open the OneDrive account on the new computer.
Step 6: Click on the Download button. To download the file right-click on the file, you want to download.
Method 3: Use Windows Easy Transfer for XP to transfer files from Windows XP
Windows Easy Transfer is a specialized program that is developed by Microsoft and works for all the operating system. With the help of this software, you can easily transfer files between two computers.
Furthermore, keep this in mind that this software doesn’t transfer all the files. The data that it can transfer includes files, photos, music, e-mail, and various types of Windows settings. In order to make the transfer work successfully, you should have a stable network.
Here are the steps that you can follow to transfer files from Windows XP to 10 using easy transfer.
Unlike Windows Easy Transfer built-in Windows 7 or 8, you have to download the program for Windows XP computer.
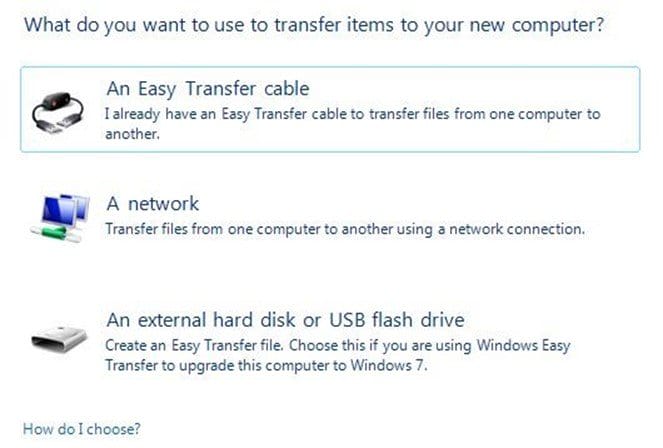
Step 1: Once you are on the welcome screen, choose the method that you want to transfer the files. You can choose different methods such as Easy Transfer Cable, a Network, or an external hard disk or USB flash drive. Here I choose an external hard disk.
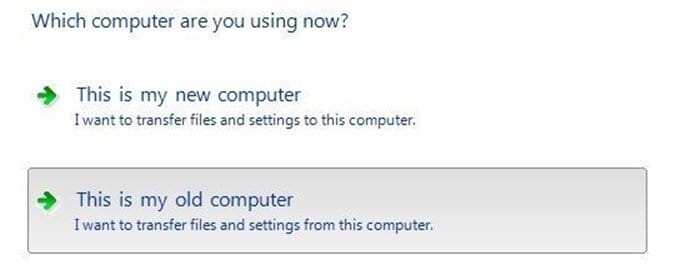
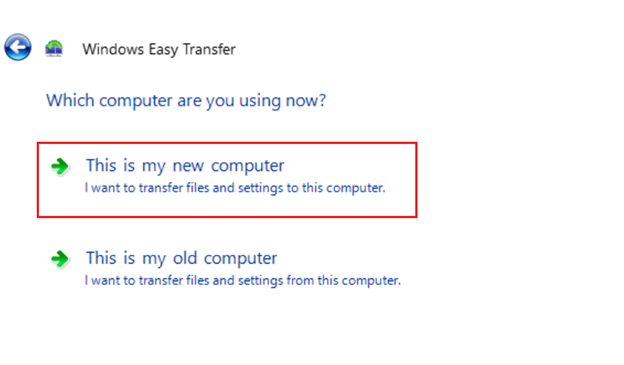
Step 2: The application will ask which computer you are using. You can select This is my old computer option.
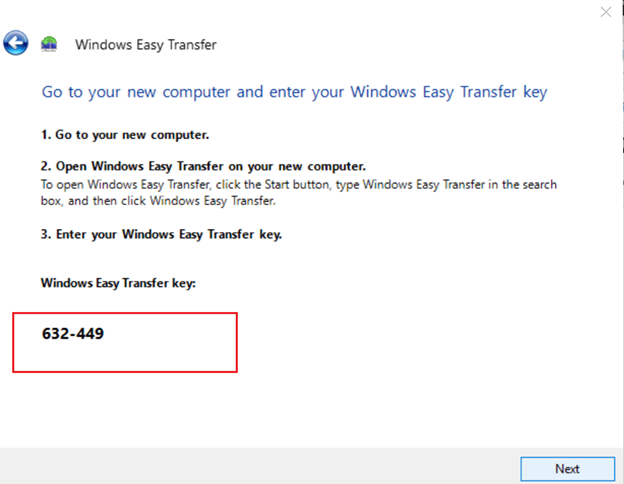
Step 3: Once you are done with step 2, it will provide you with the key. This key will be used on your new computer.
Step 4: In Windows 10, you have to find the migwiz folder. You can copy it from Windows 7 using a USB flash drive. Or download Windows Easy Transfer for Windows 7 (32-bit).
Step 6: Double click the migwiz program and select the option This is my new computer.
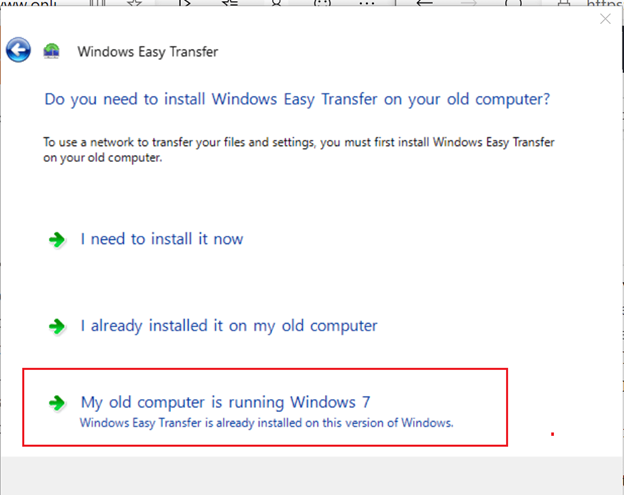
Step 7: Once you are one now select the option My old computer is running Windows 7.
Step 8: After that the software will ask to enter the key. Enter the key and make sure your both the systems are connected with the internet.
Step 9: System will scan the files. Once it is done, you can click the “Transfer” option.


