Whether you’re looking to showcase a panoramic landscape or create a visual narrative, stitching photos together is a powerful way to tell a story. In Windows 10, there are various methods available that enable you to merge multiple images efficiently, regardless of your technical know-how. In the guide that follows, we’ll explore an array of approaches – from built-in tools like Microsoft Paint and Photos app to free software and online services. With easy-to-follow steps, you’ll learn how to seamlessly combine your photographs into one stunning image.
Microsoft Paint
With Microsoft Paint, you can merge photos by manually aligning them. This program is simple and included with Windows 10, making it a convenient option for beginners.
- Open Microsoft Paint by clicking on the Start menu, typing “Paint”, and selecting the app.
- Click on “File” in the top-left corner, then choose “Open” to select the first photo you wish to stitch.
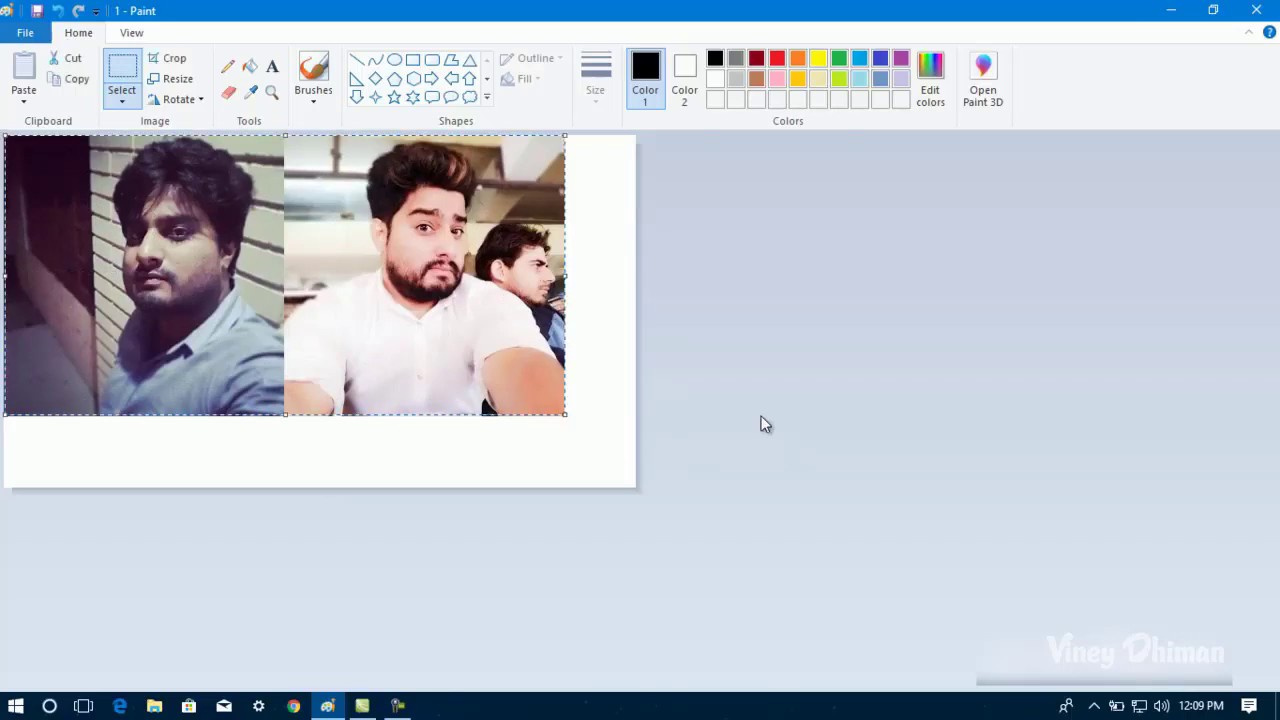
- After opening the first image, expand the white canvas by clicking and dragging the small boxes on the sides or the corners of the canvas, to make room for the second photo.
- Open the second photo in another instance of Paint or any image viewer. Right-click on it and choose “Copy”.
- Return to the first instance of Paint with your first photo. Right-click on the expanded canvas and choose “Paste” to insert the second photo.
- Manually move the second photo so that it aligns with the first. Use the zoom feature at the bottom right corner to enhance precision.
- Repeat the steps for additional photos if needed.
- Once you’re satisfied with the alignment, click “File” and “Save as” to save your stitched image.
Combining images with Microsoft Paint is straightforward, but it’s mostly suited for simple tasks. The manual alignment might be a disadvantage if you’re aiming for perfection or working with a large number of photos.
Photos App
The Photos app in Windows 10 not only helps you organize and view your images but also includes a video editor that can combine photos into a custom video.
- Press the Start button, type “Photos”, and open the Photos app.
- In the Photos app, click on the “Video Editor” tab at the top.
- Choose “New video project,” name your project, and then click “OK.”
- Click on “Add” to upload the photos you want to combine.
- Drag the photos to the storyboard and arrange them in the order you desire.
- If you want only images without transition effects, set the duration of each photo to the maximum and remove any added animations.
- After arranging the photos, click on “Finish video” to export your project.
Whilst not a traditional photo stitching tool, the Photos app is perfect for crafting a photo slideshow quickly. The downside is that you cannot create a seamless static image like a panorama.
Image Composite Editor (ICE)
Developed by Microsoft, ICE is an advanced tool for stitching photos, including panoramas.
- Download and install Image Composite Editor from the official Microsoft website.
- Open ICE, click “New Panorama from Images,” and upload the photos you wish to combine.
- The software will automatically process and stitch your photos.
- Once done, you can make adjustments or crop the image as desired.
- Save the final image by clicking on “Export to disk.”
ICE is user friendly and brilliant for creating high-quality panos. However, the software’s sophistication might be overwhelming for some first-time users.
Adobe Photoshop Express
Adobe Photoshop Express provides a feature-rich experience for photo editing, including photo merging.
- Download Adobe Photoshop Express from the Microsoft Store.
- Open the app and upload the images you want to merge.
- Use the “Collage” feature to select a layout.
- Drag and drop your images into the layout, adjusting their positions as necessary.
- Apply filters, adjust borders, and edit the photos within your collage.
- Save your work by clicking on the “Share” or “Save” icon.
Adobe Photoshop Express is ideal for creating artistic collages, but unlike ICE, it may not be the best for creating seamless panoramas.
Online Services
Numerous free online services allow you to stitch photos without installing any software.
- Search for online photo stitching services like Fotor, PhotoJoiner, or Canva.
- Choose the service of your preference and open their collage maker.
- Upload the images you want to combine.
- Select a grid or template and arrange your photos accordingly.
- Make any additional adjustments offered by the service.
- Save or download the final composition.
These services are convenient as they don’t require software installation, but internet connectivity is a must, and the output quality might vary.
Panorama Stitching Software
Specialized panorama software like Hugin offers dedicated features for seamless stitching.
- Download and install Hugin or a similar program.
- Open the software and import your images.
- The program will typically provide automated stitching processes.
- You can then fine-tune alignments and merge points if necessary.
- Export the final panoramic image following the software’s guidance.
These tools are designed for advanced stitching, but beginners may find the interface and options overwhelming.
Snipping Tool
The Snipping Tool isn’t designed for stitching but can be used creatively to combine screenshots.
- Arrange the photos on your screen you wish to combine.
- Open the Snipping Tool by searching for it in the Start menu.
- Take screenshots of portions of the images and save them.
- Combine these screenshots using Microsoft Paint or another editing tool following the steps provided earlier.
While this is a workaround, it’s not the most efficient and is limited to what fits on your screen.
Tips and Tricks
If the above solutions aren’t suitable, consider these tips to enhance your photo-stitching:
- Ensure that the photos you’re planning to stitch have some overlap for a smoother transition.
- Use a tripod when taking pictures you plan to stitch later to maintain consistent alignment and angles.
- Good lighting is crucial, as differing exposures among your photos can result in a noticeable stitch line.
These tips don’t solve all technical issues but can significantly improve the results of your photo stitching attempts.
In conclusion, Windows 10 offers a plethora of options for stitching photos together, catering to a range of users, from beginners to experienced photographers. From the simplicity of Microsoft Paint to the craftsmanship of specialized software like Hugin, you have the flexibility to choose the method that best fits your needs.
Frequently Asked Questions (FAQs)
-
Can I create a panoramic photo with just the Windows 10 built-in tools?
Yes, you can use the Microsoft Paint or Photos app for basic photo stitching tasks. -
Do I need to download software to stitch photos online?
No, online services like Fotor and Canva can be used without any software download but require an internet connection. -
Is there a completely free software for panoramic photo stitching?
Yes, there are free programs like Hugin and Microsoft’s ICE that offer comprehensive stitching features.