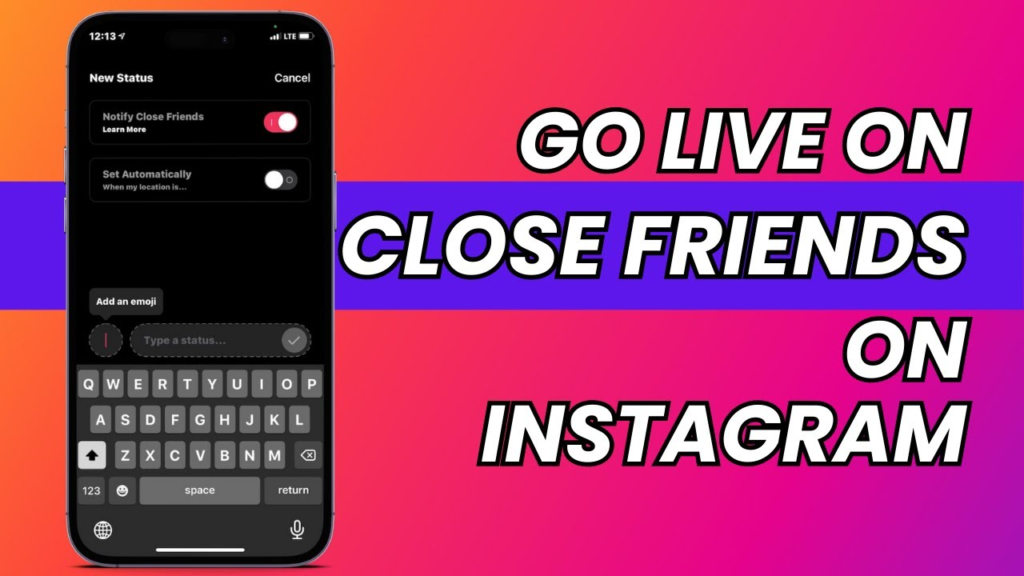
Are you excited to share special moments with a select group of people on Instagram? The “Close Friends” feature is just what you need! This exclusive option lets you go live and connect with a curated list of followers, ensuring a more intimate and controlled sharing experience. Whether it’s a casual catch-up, a secret announcement, or just some fun behind-the-scenes action, going live with your close friends creates a unique space for those meaningful interactions. Our step-by-step guide will walk you through the simple process of going live with your close friends on Instagram, making sure you can start sharing those special moments in no time.
Solution 1: Use the Close Friends Feature for Stories
Introduction
Instagram is a popular social media platform known for its diverse range of features, one of which allows users to share content with a select group of people through the ‘Close Friends’ option. This feature is particularly useful if you want to broadcast a live video to a limited audience without making it available to all of your followers. I will guide you through the process of setting up and using the Close Friends feature to go live on Instagram, catering specifically to a select group of followers whom you consider your close friends. The approach is quite straightforward, even if you’re not technically inclined.
Steps
- Access Your Profile: Open the Instagram app on your mobile device and navigate to your personal profile by tapping the profile icon in the bottom-right corner of the screen.
- Go to Close Friends List: Tap the menu icon (three horizontal lines) in the top-right corner of your profile page. Select ‘Close Friends’ from the list of options that appear. If this is your first time using the feature, Instagram will guide you with prompts.
- Add Close Friends: You’ll now see a list of suggestions or can search for specific users to add. Tap on ‘Add’ beside the names of the users whom you consider close friends. Remember, these are the people who will see your exclusive content.
- Manage Your List: Your Close Friends list can be updated at any time. Simply return to the list, and you can remove individuals by tapping the remove (-) icon next to each name.
- Start a Live Video: Go back to your Instagram home screen. Swipe right from the main feed or tap the camera icon in the top-left corner to access the camera.
- Go Live with Close Friends: Swipe through the options at the bottom of the screen until you get to ‘Live’. Tap it. Before you start broadcasting, look at the bottom of the screen where you typically see the audience selector. Usually, this will say ‘Public”but since you want to broadcast to only your Close Friends, tap on ‘Close Friends’ option.
- Begin Your Live Stream: Now that you’ve directed your Live Stream to only your Close Friends, tap the ‘Go Live’ button. A countdown from 3 will begin, after which you are live. Only the people on your Close Friends list will be notified and have access to view the Live video.
- End the Live Video: Once you’ve finished streaming, tap ‘End’ in the top-right corner of the screen, and then confirm by selecting ‘End Now’. You can choose to save the video to your camera roll or share it to IGTV if you wish.
Summary
The Close Friends feature is an excellent way to share more personal and exclusive content with a select group of Instagram followers. It affords privacy without compromising the live interactive experience. The benefits include enhanced control over your audience and the ability to foster a feeling of exclusivity and intimacy with your closest followers. However, it’s important to manage your list carefully, as only those categorized as Close Friends will be able to view and interact with your live video. Additionally, any changes to the Close Friends list might affect who can see your past and future content shared with this group. Keep these considerations in mind as you curate your list and communicate with your closest circle on Instagram.
Solution 2: Direct Message the Live Video to Close Friends
Introduction
Instagram has become a popular platform for sharing moments and experiences in real-time through live videos. However, sometimes you may wish to share these live moments with a select group of people, like your closest friends, rather than broadcast to everyone who follows you. While Instagram doesn’t have a feature that allows for a traditional live broadcast specifically to your Close Friends list, there’s a creative workaround. You can record a live video and send it to your close friends directly using Direct Messages (DMs). This method offers a semblance of live interaction, combined with the privacy of handpicking your audience. Moreover, it can be more controlled and less spontaneous, providing a certain comfort level for both the broadcaster and the audience.
Steps
1. Preparing Your Live Video Content:
- Before recording your video, plan what you want to share with your friends. You might want to jot down some notes or outline the main points to ensure your message is clear and concise.
2. Starting the Live Recording:
- Open the Instagram app on your smartphone and navigate to the camera by swiping right on your home feed or tapping the camera icon in the top left corner.
- Swipe over to the ‘Live’ mode to prepare for recording.
3. Recording Your Video:
- Press the ‘Record’ button to start capturing your live video. Remember to keep it engaging and interactive as if your close friends were watching live.
- Once you have finished recording, you can end the video by tapping the ‘End’ button on the screen.
4. Saving the Live Video:
- After ending the live recording, Instagram will give you the option to save the video to your camera roll. Make sure to tap ‘Save’ so you have the recording available to send as a DM.
5. Sending the Video via Direct Message:
- Go to your Instagram home feed and tap the paper plane icon in the top right corner to access Direct Messages.
- Tap the pencil and paper icon in the top right to create a new message.
- Select the close friends you want to share the video with by searching for their names or selecting them from the suggested list.
- Once you’ve selected your close friends, tap ‘Next.’
- Attach your previously recorded live video by tapping the image icon, selecting the video, and then tapping ‘Send.’
Summary
By following the steps outlined above, you can share a live video moment with your Close Friends on Instagram through Direct Messages. This solution’s benefits include controlled privacy, as it ensures that only the selected recipients receive the video. It allows for a more intimate sharing experience and can be less pressuring than broadcasting to a larger, public audience.
However, this method does come with a few downsides. The interaction isn’t truly live, as your friends will be viewing the video after it has been recorded rather than in real-time. Moreover, it lacks the immediate two-way interaction you get from live comments, which can be a significant part of the live video experience on Instagram. Despite these disadvantages, for users seeking a more private, selective sharing method, this approach serves as a viable option.
Solution 3: Create a Private Account
Introduction:
Creating a private account on Instagram is a straightforward way to control who has access to your content. When you switch your public account to private, only those who follow you ”and whom you approve ”can see what you post. This includes all your photos, videos, stories, and live broadcasts. By having a private account, you take the reins on your privacy, and it is particularly useful if you wish to share content with a smaller, more intimate circle of friends or followers. This solution is best for users who are not concerned about reaching a wide audience and prefer to foster a sense of a private community on Instagram. Let’s dive into the details of how to create a private account and go live solely for your close friends.
Steps:
- Open Instagram: Launch the Instagram application on your smartphone or tablet.
- Navigate to Your Profile: Tap on your profile icon at the bottom right corner of the screen to access your personal Instagram profile.
- Access Settings: Tap on the three horizontal lines (the menu icon) at the top right of your profile page. From the drop-down, select ‘Settings’ to enter the main settings menu of your account.
- Go to Privacy Settings: Within the settings menu, look for ‘Privacy’ and tap on it. This will take you to the privacy options for your account.
- Switch Private Account On: In the privacy settings, find the ‘Account Privacy’ section and you will see an option labeled ‘Private Account’. Toggle the switch beside this option to turn it on. If the switch turns blue, your account is now private.
- Approve Follow Requests: Once your account is private, you will begin to receive follow requests. You can approve or deny these requests by going to your profile, tapping on the heart icon (activity) at the bottom of the screen, and then selecting ‘Follow Requests’. Only accept those individuals you consider as close friends.
- Going Live for Close Friends: To go live, tap on the camera icon in the top left or swipe right from your Instagram home screen. Then, at the bottom of the screen, swipe to the ‘Live’ mode, and then tap the ‘Go Live’ button. Because your account is private, only the followers whom you’ve approved can watch the live broadcast.
- Ending the Live Broadcast: Once you’ve finished broadcasting, tap ‘End’ in the top right corner, and then confirm by tapping ‘End Now’. Instagram will give you the option to save the video to your camera roll or share it to IGTV.
Summary:
Creating a private Instagram account provides an excellent way to share live broadcasts exclusively with close friends. This option emphasizes intimacy, privacy, and control over your social media content. One of the most significant benefits of going live on a private account is that the session is more secure and personal. Additionally, followers may feel more valued and included in a tight-knit community, potentially leading to higher engagement.
However, the potential downside is the limitation on growing your audience should you wish to expand it in the future. Once private, new users cannot see your content without your approval, which may hinder the discovery of your account by new followers. If having a broad audience and reaching new people is part of your objectives, this might not be the best solution. Nonetheless, for those prioritizing privacy over popularity, creating a private account is an excellent way to share your moments with only your close friends on Instagram.
Utilize the Countdown Feature
Introduction
When you’re planning to go live on Instagram and want to ensure that only a select group of people, your close friends, know about it, the Countdown feature can be a strategic tool. Instagram’s Countdown feature is essentially a sticker that can be added to your Stories, presenting a timer counting down to a specific event. In this context, that event is your live video. By sharing a Countdown to your live event and restricting the visibility to only your Close Friends list, you are creating a sense of exclusivity and anticipation among the people who matter most to you. The following steps will guide you through how to effectively set up a Countdown for a live event and ensure that it is set for the eyes of your close friends only.
Steps
- Open Instagram: Launch the Instagram app on your smartphone and ensure you are logged in to your account.
- Access Stories: Swipe right from your feed or tap on your avatar in the top-left corner to start creating a new Story.
- Capture or Upload Content: You can either take a new photo or video, or swipe up to choose existing media from your camera roll that you want to use as a background for the Countdown.
- Select the Countdown Sticker: Tap on the sticker icon which looks like a smiley square at the top of the screen. Then, find and choose the ‘Countdown”sticker.
- Set Your Countdown: Name your countdown (something indicating the live event) and set the date and time when your live video will start. This will start the countdown timer.
- Customize Your Countdown: You can change the color of the Countdown sticker by tapping on it. This adds a bit of personal flair and can make it more eye-catching.
- Share to Close Friends Only: Once the Countdown is ready, tap on the ‘Close Friends”button at the bottom of the screen. If you haven’t set up your Close Friends list yet, you’ll need to select ‘Add to Close Friends List”and choose the followers you want to include.
- Post Your Story: After ensuring only your Close Friends can see the post, tap ‘Send to”followed by ‘Share”next to the Close Friends list. Your Story with the countdown is now active only for your Close Friends to view and anticipate.
Summary
The Countdown feature is a fantastic way to create excitement among the people you consider close friends about an upcoming live event. It has several benefits including the ability to prepare your audience, manage expectations, and ensure that those who care about your content are the first to know and can plan to attend your live session.
One downside is that Instagram’s Countdown feature cannot, in itself, restrict the live event to just your close friends; it’s designed to notify them about when the event will occur. Once you go live, controlling the actual audience depends on Instagram’s live video privacy settings, which may not allow for such precision. However, when used effectively, the Countdown feature is a powerful tool for fostering engagement and building a close community feel among your Instagram followers.
Introduction
Instagram offers a variety of ways to connect with friends and followers, keeping privacy in mind. One such feature is the ability to share posts or Stories exclusively with a list of close friends. Solution 5 revolves around leveraging this feature to inform and remind your close friends about an upcoming live session. By targeting a specific audience before broadcasting live, you create an exclusive atmosphere and ensure that those who are most important to you are aware and can join the live session. This method is straightforward yet efficient, especially for those who are looking to maintain a certain level of privacy and exclusivity on the platform.
Steps
To utilize this feature effectively, follow these detailed steps:
- Create Your Close Friends List
- Go to your profile and tap the menu icon (three horizontal lines) in the top right.
- Select ‘Close Friends’ from the menu.
- Choose the followers you want to add to this list by searching for their names or scrolling through the suggested list.
- Tap ‘Done’ when you have added all the desired friends.
- Prepare Your Announcement Post
- Consider the content of your announcement. Make it engaging and informative. Specify the time and, if necessary, the topic of the live session.
- Take a photo or choose one from your gallery that’s relevant to the live session’s theme. Or, if you prefer, craft a short and snappy text-based post.
- Share the Post or Story
- Go to the Instagram home screen and swipe right or tap your avatar to create a new Story or select the ‘+’ on your profile picture to create a post.
- Once you’ve created your post or Story, proceed to the sharing screen.
- For Stories, click on the ‘Close Friends’ option at the bottom of the screen. For posts, tap on ‘Advanced Settings’ and then switch on ‘Share to Close Friends Only’ before sharing.
- Go Live at the Scheduled Time
- When it’s time to go live, swipe left from your home screen or tap the camera icon in the top left.
- At the bottom of the screen, swipe over to ‘Live’ mode.
- Check if the title and other settings for your live video are correct.
- Press the white circle to start the live video. Inform your viewers that they are part of an exclusive group and begin your session.
- Engage With Your Viewers
- Start by acknowledging the presence of your close friends.
- Share the content or conversation you intended and interact with your viewers by responding to their comments and questions.
- Conclude and Share Your Live Session (optional)
- When you’re done, tap ‘End’ in the top right corner and then confirm by tapping ‘End Now’.
- After the live session ends, you can choose to share the live video to your Story so that anyone who missed it can watch it within the next 24 hours. Make sure to select ‘Close Friends’ again if you want to keep this replay exclusive.
Summary
Using Solution 5, you can effectively inform a select group of followers about your live event beforehand, creating a sense of exclusivity and community among your closest acquaintances. This approach is beneficial as it can help increase participation and engagement during your live sessions. It also helps in maintaining privacy, limiting the live experience to a circle of trusted individuals. There are no significant downsides to using this method, provided you keep your Close Friends list updated to reflect changes in relationships. Remembering that this method relies on the proactive creation of a Close Friends list and that viewers have enabled notifications for your posts can help ensure successful viewership.
Solution 6: Organizing a Live Event in Advance
Introduction
Going live on Instagram has become a popular way to connect with followers in real-time. But sometimes, you may want to share an event or moment exclusively with people you’re closest to—your “Close Friends.” Organizing a live event in advance for your Close Friends allows for a personalized and intimate experience. It also gives your friends sufficient notice so they can make sure to be online at the right time. This method ensures that only your selected audience is aware of the upcoming live video, creating an exclusive and private viewing experience.
Steps
- Set up your Close Friends list:
- Go to your profile and tap on the three lines at the top right corner.
- Tap on ‘Settings,’ then on ‘Privacy.’
- Find the ‘Close Friends’ option and add the people you’d like to share your live event with.
- Plan your live event:
- Decide on a date and time for your live event that is convenient for both you and your Close Friends.
- Consider the content of your live event. Make sure it’s something that will be of interest to the group you’re inviting.
- Notify your Close Friends:
- You can use the Stories or DMs to send out an invitation.
- Create a post or story explaining when the live event will take place and what it will be about.
- Mention in the post that this event is exclusive to Close Friends and that you’re looking forward to having them join.
- Send reminders:
- As the event approaches, use Instagram stories or DMs to send out gentle reminders about your live event.
- You might want to send a reminder 24 hours before and then another one an hour before the event starts.
- Go Live:
- When the time comes, open Instagram and swipe right or tap your avatar to enter the Stories camera.
- Select ‘Live’ from the options at the bottom, then double-check that your Close Friends setting is enabled.
- Tap ‘Go Live’ to start broadcasting to your Close Friends.
- Interact with viewers:
- While live, make sure to engage with your viewers by answering their questions and acknowledging their comments.
- This helps maintain the intimacy of your Close Friends group and makes the live experience more memorable.
Summary
Organizing a live event in advance for your Close Friends benefits by fostering a deeper connection through an exclusive shared experience. It provides privacy and a more controlled environment, which can be especially important if you’re discussing sensitive topics or just want to maintain a closer circle of trust.
However, since this method requires planning and communication in advance, it may not be the best for spontaneous live videos. Additionally, as friends’ availability can vary, scheduling might be a challenge, and there’s a chance that not all friends will be able to join. Nonetheless, for those who can attend, it creates a special and intimate event that strengthens bonds within your Close Friends group on Instagram.
Solution 7: Create a Secondary, Private Instagram Account
Introduction
Creating a secondary, private Instagram account can be an effective way to share content with a more controlled group of individuals such as close friends or family. This method involves establishing a new Instagram account that is set to private from the outset, which means that only users who are approved as followers can see the posts, Stories, and live videos shared on this account. With this strategy, users can maintain their public presence on their primary account while designating the secondary account for more personal, intimate interactions. This approach is particularly suitable for those who are concerned about privacy and wish to ensure that their live content is viewed only by those they trust.
Steps
- Sign out of your current Instagram account or switch accounts if you’re using the multi-account feature.
- To sign out, navigate to your profile, tap on the three lines in the upper right, select ‘Settings,’ scroll down, and tap ‘Log Out.’
- To switch accounts, long-press on your profile icon in the navigation bar and select ‘Add Account.’
- Create a new Instagram account.
- Download the Instagram app if not already installed on your device.
- Open the app and select ‘Sign Up.’
- Follow the prompts to create your account using a different email address or phone number from your main account.
- Set the new account to private.
- Once your account is created, go to your profile by tapping the person icon.
- Tap on the three lines at the top right, then select ‘Settings.’
- Go to ‘Privacy’ and toggle on ‘Private Account.’
- Build your Close Friends list on the new account.
- Can follow the same process as you would on your main account to add close friends.
- Navigate to your profile, tap on the three horizontal lines, select ‘Close Friends,’ and begin adding friends by searching for their usernames and tapping ‘Add’ next to each name.
- Announce your new, private account to your close friends.
- You can do this through a message, an email, or even by posting about it on your main account.
- Go live from your private account.
- To go live, simply swipe right from the main screen or tap on the camera icon in the top left corner.
- Scroll to the ‘Live’ option at the bottom, then tap ‘Start Live Video.’
- Only your approved followers (your close friends) will be notified and be able to watch the live video.
Summary
Finally, having a secondary, private Instagram account exclusively for close friends affords a level of intimacy and privacy unattainable on a public profile. Live broadcasts to a chosen few add a personal touch and can strengthen relationships through shared experiences that are not open to the public.
However, managing two accounts can have its drawbacks. It requires additional effort to maintain two sets of content, develop a following (even if it’s just close friends), and toggle between profiles. Nevertheless, if privacy is a priority and you want to ensure a personalized experience for your inner circle, the benefits of a secondary account can outweigh these challenges. Remember, the exclusivity of the content on this private account can create a unique and intimate atmosphere for those you consider close friends.
Solution 8: Send Out Reminders Before Going Live
Introduction
In the world of social media, engagement is king, and being able to effectively alert your audience about upcoming events is crucial for ensuring a good turnout. On Instagram, this becomes especially relevant when planning to go live, particularly for an audience that you cherish and want to keep continuously engaged, such as your Close Friends. Sending out reminders is a thoughtful and efficient way of making sure your Close Friends are aware of your upcoming live video and have the opportunity to join in. Unlike posting publicly, this approach takes a more personal and direct route to capture their attention and increase the chances of their participation. It’s like sending a friendly tap on the shoulder as opposed to making a general announcement.
Steps
- Finalize the Details of Your Live Session: Before you send out any reminders, finalize the date and time for your live video. Make sure it’s a time that might work well for most people you consider your close friends.
- Update Your Instagram App: Ensure that you have the latest version of Instagram installed on your device, as this will allow you to access the most current features available for sending reminders.
- Select Your Close Friends List:
- Navigate to your profile on Instagram.
- Tap the menu (hamburger icon) in the top right corner.
- Go to ‘Close Friends’ and make sure all the people you want to remind about your live session are on that list.
- Prepare a Reminder Post or Story:
- Create a post or story that will act as a reminder. This could be an eye-catching image or a short video clip with overlaid text stating the time of your live session.
- Include any additional details that might be relevant or persuasive, such as the topic of the live session or special mentions.
- Share the Reminder Exclusively:
- If using a story, begin to post it as you usually would by tapping on Your Story at the top of your feed and selecting the image or video you created.
- Before posting, tap on ‘Close Friends’ at the bottom of the screen to ensure only your selected audience will see the story.
- If it’s a post, consider sharing it through Instagram Direct (DM) to your Close Friends list or posting it on your timeline with access limited to your Close Friends.
- Sending Manual Reminders:
- If you prefer a more personal touch, you can also send reminder messages directly to your Close Friends through Instagram Direct (DM).
- Craft a message that includes the live session details and send it individually or create a group message to reach multiple people at once.
- Timing Your Reminders:
- Send out the initial reminder a day or two before the live session.
- Send a follow-up reminder a few hours before you go live.
- Consider sending a last-minute reminder about 10-15 minutes before starting, to catch those who might be available to tune in on short notice.
Summary
Sending out reminders before going live on Instagram to your Close Friends can significantly increase the chances of them attending your broadcast. It’s a proactive way of ensuring your special audience doesn’t miss out on the exclusive content you’re preparing for them. The benefits of this approach are increased visibility, personal touch, and a sense of exclusivity for your Close Friends, making them feel valued.
The potential downside is that it requires a bit more effort and personalization, which might be slightly time-consuming. Also, over-reminding could become intrusive if not done thoughtfully, so it is crucial to balance the frequency of reminders sent. Nevertheless, if done right, this strategy can foster stronger connections and ensure a more engaged and interactive live session.
Solution 9: Restrict Who Can See Your Live Video
Introduction
As an Instagram user, your live videos are a great way to connect with followers in real time. However, there might be occasions where you want to share moments with a selected group rather than everyone who follows you. While Instagram’s Close Friends feature is tailored for Stories, there’s no direct counterpart for live videos yet. Nonetheless, you can still manage your privacy settings to limit the visibility of your live broadcasts. This can create a more exclusive atmosphere, similar to the Close Friends feature. Here, we will guide you through the steps on how to restrict viewership for your live videos, which offers a way to share content selectively without broadcasting to everyone.
Steps
- Review Your Followers List:
- Begin by auditing your followers list. Remove any followers that you’re not comfortable sharing live videos with. This can be time-consuming but is essential for maintaining privacy during your live sessions.
- Adjust Your Account Privacy:
- If your account is public, go to your profile by tapping on your avatar in the bottom right corner.
- Tap on the three lines or your profile icon in the top right corner to open Settings.
- Navigate to ‘Privacy’ and tap on ‘Account Privacy’.
- Switch your account to a Private Account. By doing this, only your current followers and any future users you approve can view your live videos.
- Remove Unwanted Viewers During the Live Session:
- Once your live session is active, tap on the number of viewers to see who’s watching.
- If you notice a viewer you’re not comfortable with, tap on their username and select ‘Remove From Live Video’. They won’t be able to view the session unless you add them back.
- Make Use of the Restrict Feature:
- Apart from removing unwanted viewers during a live session, you can also ‘Restrict’ users even before going live. Restricted users can still follow you and send you messages, but their comments on your posts and live videos won’t be visible to anyone but themselves.
- To Restrict a user, visit their profile, tap on the three dots icon, and select ‘Restrict’.
- Block Users if Necessary:
- If there are followers you want to permanently prevent from viewing your live videos or any of your content, you can block them entirely.
- To block a user, go to their profile, tap the three dots in the top right, and select ‘Block’.
Summary
By tweaking your privacy settings and being vigilant about who can view your live streams, you can mimic the Close Friends functionality for live videos. The benefits here include enhanced privacy and sharing content with a handpicked audience, much like you would with a Close Friends Story. A potential downside is that this method requires more effort as you’ll need to manually manage your followers list and might have to take action during the live video if an unwanted viewer joins. However, these steps go a long way in helping you create a safer and more closed environment for your live interactions on Instagram.
Solution Name:
Leverage Third-Party Tools
Introduction:
Instagram is a powerful platform for sharing moments and engaging with an audience in real-time through live video. However, Instagram’s native features may not offer the level of specificity you desire when it comes to choosing who can see your live broadcasts. This is where third-party tools come into play. These applications or services can integrate with Instagram and provide enhanced control over your live audience, enabling you to broadcast exclusively to your Close Friends list or a select group of followers. Before using any third-party tool, it’s essential to ensure that it complies with Instagram’s terms of service to avoid any potential issues with your account.
Steps:
Step 1: Research Third-Party Tools
- Start by researching third-party tools that offer live streaming features compatible with Instagram.
- Look for reviews or recommendations from trusted sources to find the most reliable options.
Step 2: Verify Compliance with Instagram’s Terms of Service
- Before choosing a tool, read Instagram’s terms of service regarding third-party applications.
- Ensure that the tool does not violate any of Instagram’s policies, which could jeopardize your account.
Step 3: Choose a Third-Party Tool
- Select a third-party tool that meets your requirements and is deemed safe and compliant with Instagram’s rules.
- Keep an eye out for features like audience selection, invitation capabilities, and privacy settings.
Step 4: Set Up and Test the Tool
- Follow the third-party tool’s instructions to set it up with your Instagram account.
- Test the tool by doing a trial run to familiarize yourself with the settings and features.
Step 5: Curate Your Audience
- Use the tool to curate the list of people who will have access to your live broadcast.
- You may either import your Close Friends list from Instagram or manually select individuals within the third-party app.
Step 6: Schedule Your Live Broadcast
- Schedule your live video for the desired date and time through the third-party tool.
- Ensure your selected audience is alerted about the upcoming broadcast, if the tool allows for notifications.
Step 7: Go Live
- When it’s time, go live using the third-party tool, following the steps provided within the app or service.
- Communicate with your audience as you would in a standard Instagram Live session, with the added confidence that only your chosen viewers are present.
Step 8: Monitor and Engage
- Throughout the live session, monitor the viewers to ensure that the broadcast remains private.
- Engage with your audience to create an intimate and interactive experience.
Step 9: Conclude the Live Session
- Once you’ve finished streaming, follow the necessary steps to end the live session.
- The tool may offer analytics or feedback from the stream, which can be valuable for future broadcasts.
Summary:
Leveraging third-party tools to go live for a Close Friends audience on Instagram allows you to create an intimate and exclusive live video experience. This can beneficially lead to more personal interactions and a controlled environment, fostering a closer connection with your audience. However, it’s crucial to keep potential downsides in mind, such as the learning curve associated with new software, reliance on external applications that may have different privacy standards, and the need to ensure compliance with Instagram’s terms of service. Always prioritize the safety and privacy of your account and followers by selecting well-reviewed, trustworthy tools.
Conclusion:
Going live on Instagram with just your close friends is a fantastic way to share more personal experiences with a select group of people. It’s a feature that brings exclusivity to your live interactions, making them feel more intimate and meaningful. By following the detailed steps in this guide, you’ll be able to confidently navigate the Instagram app and enjoy private live moments with those who matter most to you. Remember, social media is all about connecting with others, and this feature lets you do just that, with the added comfort of knowing it’s just for your closest friends.
FAQs:
- Can I change my Close Friends list while I am live?
Yes, you can modify your Close Friends list before or after going live, but not during the broadcast. To make changes while live, you’ll need to end the session, adjust your list, and then start a new live video. - Will my regular followers be notified when I go live with close friends?
No, only the people on your Close Friends list will receive a notification that you have gone live. - Can I save the live video after broadcasting it to Close Friends?
Yes, after ending the live video, you’ll have the option to save the video to your camera roll or share it to IGTV for your Close Friends to watch later, depending on your preferences and privacy settings.