Ever wondered how to revisit who you’ve called, or who called you, on your Boost Mobile phone? Whether you’re tracking your phone usage or simply trying to remember a missed call, accessing your call history can seem complicated if you’re not sure where to start. Don’t worry; by following a few straightforward methods, you can easily retrieve the details of your incoming, outgoing, and missed calls. Let’s walk through the various ways to check your call history on Boost Mobile.
Online Through My Boost Account
My Boost is your go-to online portal for managing many aspects of your Boost Mobile service, including call history. With a user-friendly interface, it allows you to view detailed call records from any internet-connected device.
- Open your preferred web browser and navigate to the Boost Mobile My Account login page.
- Enter your Boost Mobile phone number and account PIN to sign in.
- Once you’re logged in, locate the ‘My Activity’ or ‘Call History’ section.
- Select the time frame for which you wish to view call history; this can be the current month, the past month, or a custom date range.
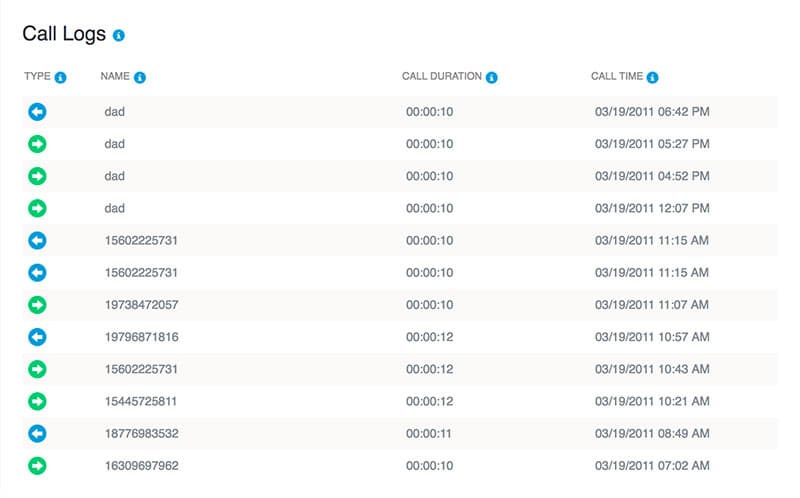
- Your call history will display on the screen, categorized by incoming, outgoing, and missed calls, along with details such as date, time, and duration of each call.
Summary: My Boost provides a comprehensive way to check your call history from anywhere. The main advantage is the ease of access and the ability to view detailed records. However, bear in mind that you’ll need internet access to use this service.
Boost Mobile App
The Boost Mobile app is a convenient tool that allows you to manage your account straight from your smartphone.
- Download the Boost Mobile app from the Google Play Store or Apple App Store if you haven’t done so already.
- Open the app and log in using your Boost Mobile phone number and account PIN.
- Navigate to the ‘Activity’ or ‘Call History’ section within the app.
- Here you can view your call history. You can typically filter by time period, as well as view specifics of each call.
Summary: Using the Boost Mobile app is perfect for quick access to your call history. It’s convenient and always at your fingertips, as long as you have your phone and a stable data connection. However, users not comfortable with apps may find it challenging initially.
From Your Device Call Log
Most mobile phones keep a record of your call history directly within the phone’s call log.
- Open the Phone app on your Boost Mobile device.
- Tap on the ‘Recent’ tab, which might also be indicated by a clock icon, depending on your device.
- Browse through the listed calls which include all incoming, outgoing, and missed calls with timestamps.
Summary: Checking call history directly from your device call log is native and simple, without needing internet. However, it’s limited by the phone’s storage; older calls may be automatically deleted after a certain period or number of new calls.
Customer Service
Sometimes the easiest way to get information is to ask someone directly. Boost Mobile’s customer service can help.
- Dial Boost Mobile Customer Service at 1-888-BOOST-4U (1-888-266-7848).
- Follow the voice prompts to speak with a representative.
- Ask the representative to provide you with the call history details you need.
Summary: This personal touch is reassuring and doesn’t require any technical know-how. The downside is longer waiting times and depending on customer service hours.
Account Billing Statements
For an official record of your call history, you can use your Boost Mobile billing statements.
- Log into My Boost Account online or through the app.
- Navigate to the ‘Billing’ section.
- Download your past monthly statements, which will include a detailed call log.
Summary: Billing statements are great for keeping records and are very detailed, but they aren’t as real-time as other methods.