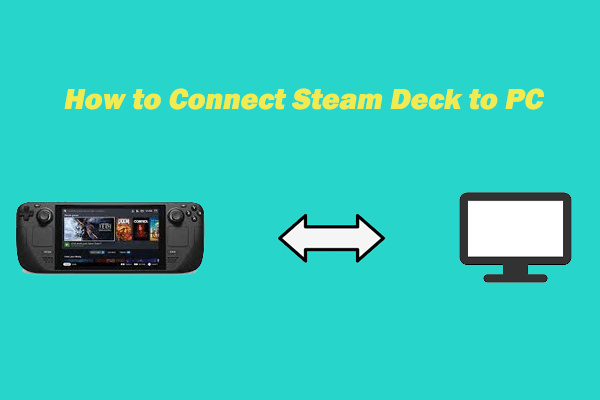
Connecting your Steam Deck to a PC can open up new ways to enjoy your games, manage files, or even expand your device’s capabilities. As portable as the Steam Deck is, there are times when you might want to use it with your PC for various reasons such as easier game installation, transferring files, or using the PC’s hardware to boost the performance of your games. While the process can seem daunting at first, especially if you’re not familiar with tech gadgets, this guide will walk you through each step with simplicity and ease.
Remote Play Together
With Steam’s Remote Play Together feature, you can stream and play your games from your Steam Deck to your PC. This is ideal when you want to enjoy your games on a larger monitor or with better speakers.
- Ensure that both your Steam Deck and your PC are connected to the same high-speed internet connection.
- Log in to your Steam account from both devices.
- On your PC, open the Steam client and go to the ‘View’ menu, then select ‘Big Picture Mode.’
- From the Steam Deck, navigate to your Steam Library, select the game you want to play, and choose ‘Play Remote Play Together.’
Summary: Remote Play Together is great for enjoying games on a larger screen and utilizing the PC’s audio and visual outputs. Note that a stable and speedy internet connection is crucial for a smooth experience.
File Transfer via USB-C
You might want to transfer files between your Steam Deck and PC. The easiest way to do this is through a USB-C connection.
- Connect your Steam Deck to your PC using a USB-C cable.
- On your Steam Deck, select ‘System’ in the settings menu, then ‘USB’ in the sidebar, and set it to ‘Data Transfer Mode.’
- Your PC will recognize the Steam Deck as a portable device. You can now transfer files using your PC’s file manager.
Summary: This method provides a straightforward way to transfer files, but do note the types of files, as not all can be transferred directly and may require additional steps.
Steam Deck as a Controller
Let’s transform your Steam Deck into a game controller for your PC games.
- Connect the devices using a USB-C cable or via Bluetooth.
- For a Bluetooth connection, hold the Steam button down and select the ‘Bluetooth’ quick setting to make your device discoverable.
- From your PC, go to Bluetooth settings and pair with your Steam Deck.
- Once connected, launch any game on your PC, and it should recognize your Steam Deck as a controller.
Summary: Using the Steam Deck as a controller can be very convenient, but it’s worth noting that not all games may support this function flawlessly.
Display Mirroring via USB-C
Another great way to utilize your Steam Deck with your PC is through display mirroring.
- Connect your Steam Deck to your PC using a USB-C to HDMI cable.
- Once connected, the Steam Deck will prompt you to choose ‘Mirror or Extend.’ Select ‘Mirror.’
- Your PC’s display will now be mirrored onto your Steam Deck, allowing you to see the same content on both screens.
Summary: Mirroring the display can be useful for presentations or media sharing, although it won’t increase gaming performance or resolution.
Network Sharing
Network sharing is useful for transferring files over your local network without a physical connection.
- On your PC, ensure file sharing is enabled through the ‘Network and Sharing Center’ in your control panel.
- Make sure both devices are connected to the same network.
- From your Steam Deck, navigate to the ‘Desktop mode’ and access ‘Files.’
- In the file browser’s ‘Network’ section, locate your PC, and you should be able to access shared folders.
Summary: Network sharing avoids the need for cables but requires a bit of setup time. Slower network connections can also impede file transfer speeds.
External Keyboard and Mouse
Using an external keyboard and mouse can help turn your Steam Deck into a more traditional PC.
- Connect a USB-C hub to your Steam Deck.
- Plug your keyboard and mouse into the hub.
- Your device should recognize the peripherals automatically, allowing you to use them instead of the built-in controls.
Summary: This setup is great for turning your Steam Deck into a workstation, but it reduces the device’s portability and may require you to purchase additional accessories.
Game Installation via PC
Installation of games through a PC can be beneficial if you’re having trouble doing so directly on the Steam Deck.
- On your PC, use the Steam client to download the game you want to install.
- Locate the downloaded game files on your PC.
- Transfer the files to your Steam Deck using one of the previously mentioned file transfer methods.
- On your Steam Deck, navigate to your Steam Library and click ‘Install’ on the transferred game.
Summary: Using a PC for game installation can sometimes be quicker, but it’s more involved than directly downloading games on the Steam Deck.
Use PC to Manage Steam Deck Storage
Managing your Steam Deck’s storage from your PC can make organizing and deleting files easier.
- Connect your Steam Deck to your PC with a USB-C cable.
- Enter ‘Data Transfer’ mode on your Steam Deck.
- Open your PC’s file browser, and you should be able to access the Steam Deck’s storage.
- From here, you can add, move or delete files as needed.
Summary: This method allows for easier management of files, though it requires a cable and can be slower than doing it directly on the device.
Steam Library Streaming
Stream games from your PC’s Steam library to play on your Steam Deck without taking up the Deck’s storage.
- Log into the same Steam account on both devices.
- On your PC’s Steam client, go to ‘Settings’ then ‘Remote Play’ and enable it.
- From your Steam Deck, navigate to your Steam Library, and you should see your PC’s games listed for streaming.
Summary: This function lets you enjoy your PC’s game library on your Deck’s portable screen, but it will depend on a reliable high-speed internet connection.
Updating Firmware via PC
Keeping the Steam Deck’s firmware updated can be crucial for the best performance and compatibility.
- Visit the official Steam Deck website for the latest firmware files.
- Download the necessary updates to your PC.
- Connect your Steam Deck to your PC and transfer the firmware files.
- Reboot your Steam Deck and follow the prompts to install the updates.
Summary: While updating firmware this way ensures you’re getting the updates even if your Deck’s Wi-Fi is problematic, it’s a more manual process that could be intimidating for less tech-savvy users.
In conclusion, connecting your Steam Deck to a PC is a versatile process that offers numerous benefits, from improved game management and easier file transfers to expanded gameplay options. Each method listed here is tailored to overcome specific challenges, and while some solutions are simpler than others, they each have their own merits and potential drawbacks. The key is to find the right connection that works best for your needs.
FAQs:
Q1: Can I connect my Steam Deck to any PC?
Yes, you can connect your Steam Deck to any PC that has a compatible port for USB-C or Bluetooth capabilities if you’re using it as a controller.
Q2: Do I need special software to connect my Steam Deck to a PC?
Most connections require no special software as long as you have Steam installed on your PC. For file transfers, your operating system’s file manager is typically enough.
Q3: What should I do if my PC doesn’t recognize my Steam Deck?
First, ensure that the USB-C cable you’re using supports data transfer. Then check if ‘Data Transfer Mode’ is enabled on your Steam Deck. If it still doesn’t work, restart both your PC and Steam Deck and try again.