The PlayStation 5 (PS5) has been designed with social interaction in mind, including a built-in microphone in its controllers for easy communication during gameplay. However, sometimes you might prefer not to broadcast every sound in your environment or want to ensure your privacy is maintained by keeping the microphone muted by default. Whether it’s avoiding accidental noise sharing or ensuring your gaming sessions remain private, controlling the microphone setting is essential. With a few simple steps, you can set your controller to mute by default, and I’m here to walk you through it.
Adjusting Default Microphone Setting
When you start your PS5, the controller’s microphone is on by default. This can be a nuisance, or a privacy concern for some users. Fortunately, Sony has provided an option to adjust the default microphone behavior.
Detailed steps:
- Turn on your PS5 and log in to your user profile if prompted.
- Navigate to the PS5 home screen.
- From the home screen, go to the “Settings” icon at the top right corner of the screen and select it.
- In the Settings menu, scroll down and select “Sound”.
- Within the Sound menu, locate and select “Microphone” on the left-hand side.
- On the Microphone settings page, you’ll see an option labeled “Microphone Status When Logged In”. Select it.
- You are now presented with two options: “Mute” and “Unmute”. Choose “Mute” to ensure the microphone is turned off by default.
Summary:
By adjusting the default microphone setting to mute, you ensure your privacy is protected as your controller will not pick up any sound until you decide to unmute it. This is helpful in preventing any unintended background noise from being transmitted. However, remember that you’ll need to manually unmute the microphone when you want to use it in-game or for any other purpose.
Use Mute Button on the Controller
The PS5 DualSense controller comes with a built-in mute button that allows you to quickly mute and unmute the microphone during gameplay.
Detailed steps:
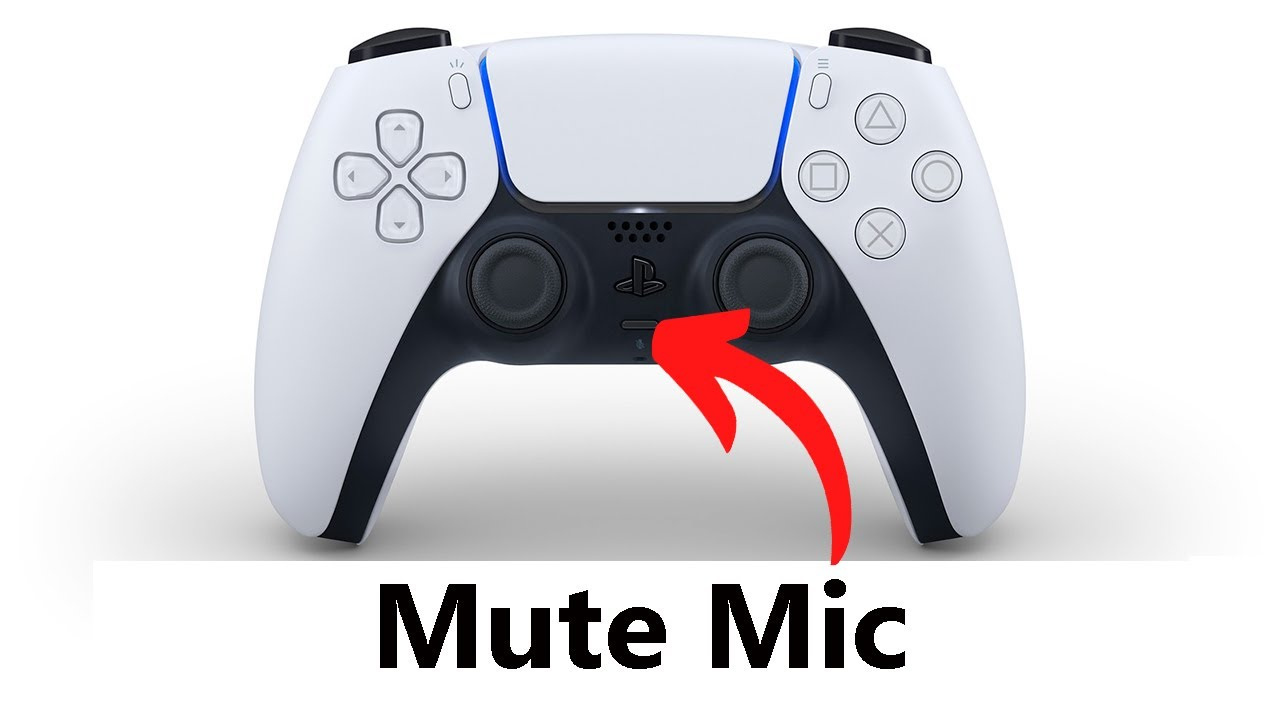
- Pick up your DualSense controller and locate the small button beneath the PlayStation logo—it’s the mute button.
- Press this button once; when the microphone is muted, the button will light up, indicating that the mic is off.
- To unmute the microphone, simply press the button again, and the light will turn off, indicating that the mic is active.
Summary:
This solution provides an immediate way to control your microphone’s activity, making it perfect for on-the-fly situations. The downside is that it requires manual input each time you turn on your console, as this method doesn’t change the default setting.
Control Center Customization
The Control Center on your PS5 is a quick-access menu that appears at the bottom of your screen when you press the PlayStation button on your controller.
Detailed steps:
- Press the PlayStation button on your DualSense controller to bring up the Control Center.
- Navigate to the “Sound” control, which looks like a small speaker icon.
- Here, you can adjust volume settings and mute or unmute your microphone with ease.
Summary:
This method encourages flexibility and easy access during gameplay. On the downside, it, too, doesn’t change the default setting and must be done each time you start up your PS5 or want to change the microphone status during a game session.
Setting Up Parental Controls
If you’re a parent and want to manage your child’s ability to use the microphone on the PS5, you can do so through parental controls.
Detailed steps:
- In the Settings menu, go to “Family and Parental Controls.”
- Select “PS5 Console Restrictions.”
- You will be prompted to enter your passcode. If you haven’t set one up before, the default passcode is “0000”.
- After entering the passcode, you will see various options to control your PS5. Navigate to and select “Communication and User-Generated Content”.
- Here, you can adjust the settings to restrict or allow voice chat.
Summary:
Parental controls provide peace of mind by restricting microphone usage according to the settings you apply. The downside is that it isn’t tailored for individual profiles and applies to the entire system.
Checking Microphone Levels
Ensuring the microphone levels are set appropriately can help mitigate unintentional noise sharing even if the microphone isn’t entirely muted.
Detailed steps:
- Access the Sound settings from the main Settings menu.
- Select “Microphone” from the menu on the left.
- Choose the microphone you want to adjust; for the controller, select “Wireless Controller Device”.
- Use the slider to adjust the Microphone Level to your preferred sensitivity.
Summary:
By adjusting the microphone level, you can limit the amount of background noise picked up. Although this doesn’t mute the microphone by default, it can help keep unintended noise to a minimum.
Tips and Tricks for Responsible Microphone Use
- Personal Awareness: When not in use, make it a habit to manually mute your controller’s microphone.
- Audio Cues: Learn the audio cues for muting and unmuting, which can signal the microphone’s status even when you’re not looking.
- Visual Indicators: Familiarize yourself with the light patterns on your controller that indicate when the microphone is live or muted.
- Regular Checks: Occasionally check your microphone settings to ensure they haven’t been changed inadvertently.
- Controller Firmware Updates: Keep your controller’s firmware updated to benefit from improvements and new features related to audio and microphone settings.
- Privacy Considerations: When playing in public or shared spaces, be mindful of your surroundings and mute your microphone to maintain privacy.
Each of these methods or pieces of advice offers unique advantages, but they may also require periodic checks or manual adjustments to maintain your desired microphone status.
In conclusion, managing the microphone settings on your PS5 controller is a simple process that enhances your privacy and the overall gaming experience. Whether you choose to mute your microphone by adjusting the default settings, using the quick-access mute button, customizing your control center, setting up parental controls, or simply being vigilant about your microphone levels, each method has its advantages. Bear in mind that practice and habitual checks can ensure your settings remain consistent and to your preference.
FAQs
1. Can I mute other players while keeping my microphone on?
Yes, you can mute other players individually or collectively in most games by accessing the in-game menu and selecting the appropriate settings.
2. Will the mute setting remain after restarting the PS5?
If you adjust the default microphone setting to mute, it will stay muted across sessions. However, if you use the mute button or the control center, you’ll need to mute the microphone each time you start up your PS5.
3. How can I tell if my PS5 controller’s microphone is muted or unmuted?
There is a built-in light indicator on the mute button on the PS5 controller. If the light is on, the microphone is muted; if the light is off, the microphone is active and ready to pick up sound.