In the digital age, managing your online security is crucial. Google, as one of the largest service providers, offers a feature allowing you to add or remove trusted devices from your account. A trusted device is one that Google recognizes as being secure for use without prompting for verification each time you access your account. Understanding how to manage these devices keeps your personal information safe and your experience seamless. Here is a guide to help you through the process, whether you’re securing a new device or removing an old one that’s no longer in use.
Adding a New Trusted Device
When you sign in to your Google account on a new device, you have the option to make it a trusted one. This means you won’t need to perform two-step verification to prove it’s you on that device in the future.
- Sign in to your Gmail or any Google service.
- A prompt will appear asking if you want to trust this device. Select ‘Yes’ if you want to trust it.
- If you don’t see the prompt, navigate to your Google Account Security settings.
- Locate the “2-Step Verification” section and click on it.
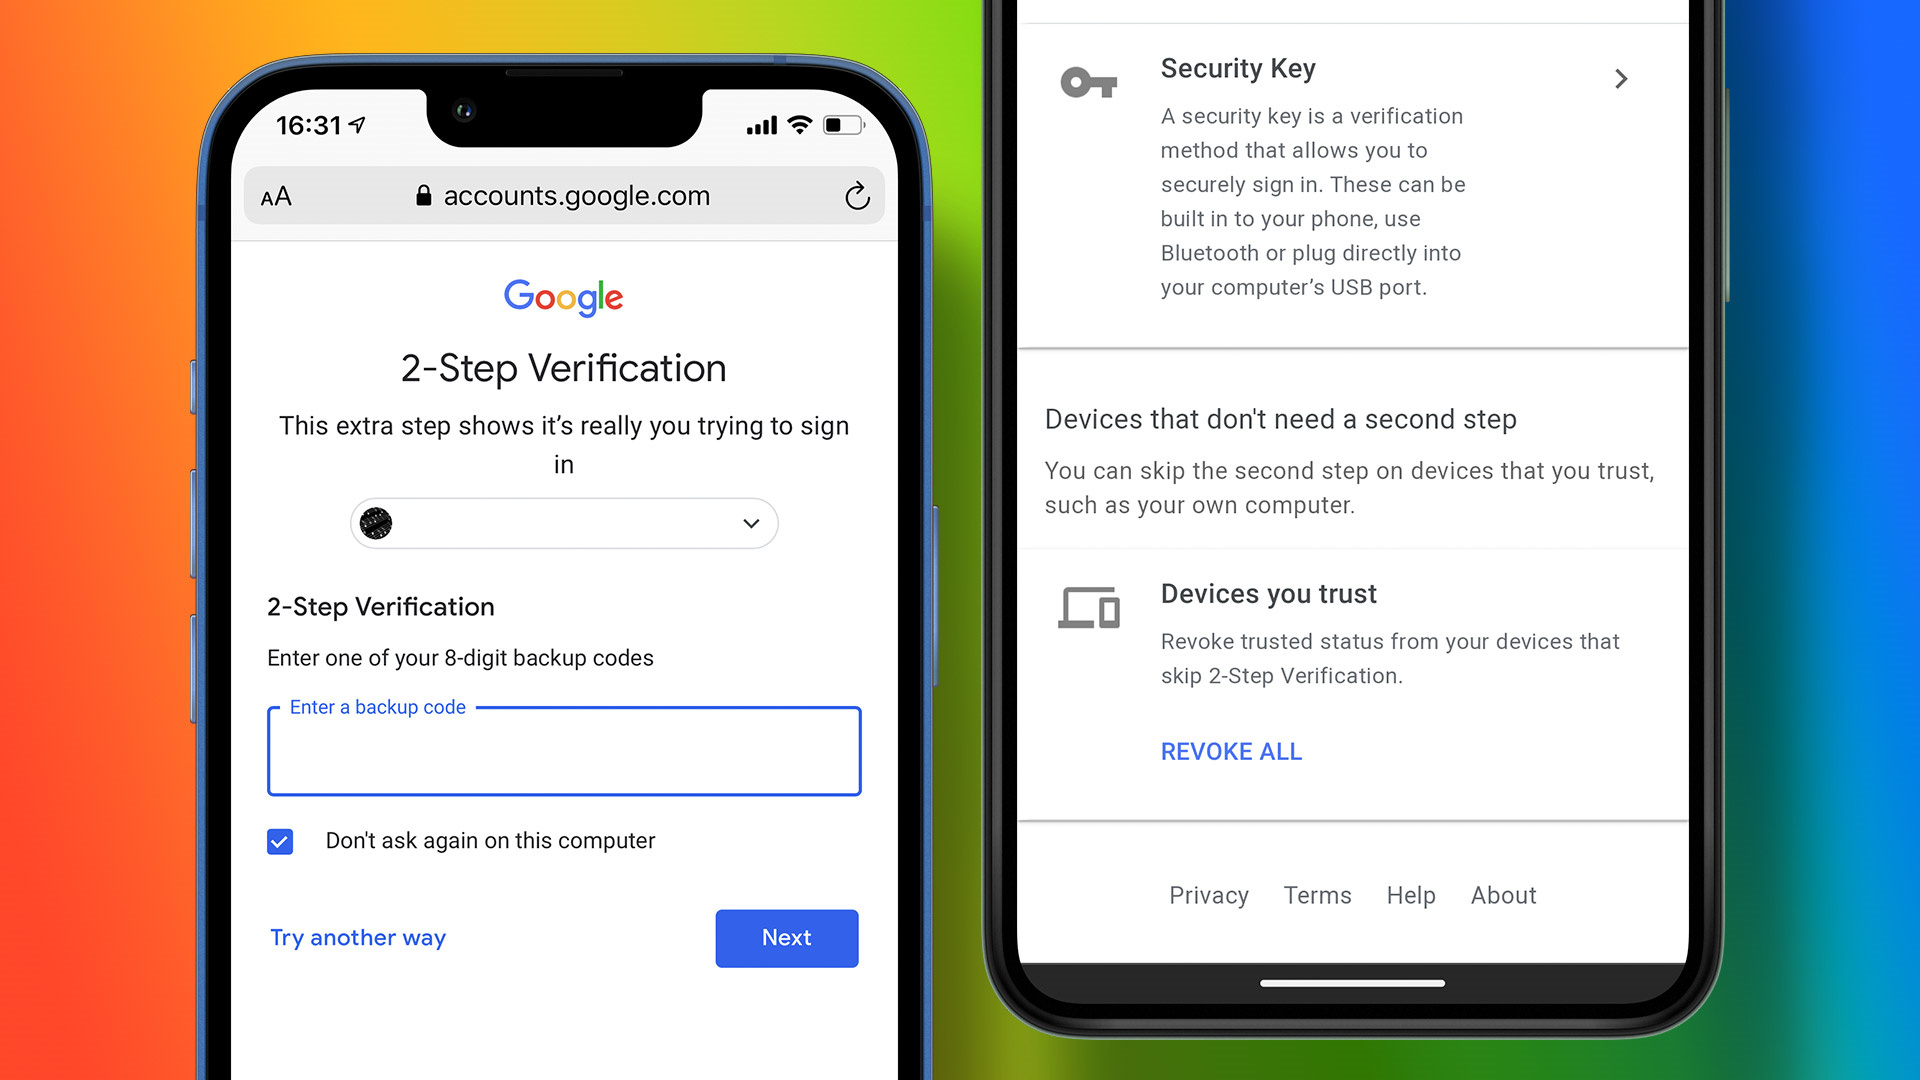
- Scroll down to the “Trusted Devices” section and look for the option to add a device.
- Follow the on-screen instructions to verify the device you’re using.
By adding a new device as trusted, you streamline your login process for future use. Do remember, though, that this should only be done with personal devices that others do not have access to, to maintain security.
Removing a Trusted Device
To keep your account secure, it’s essential to remove devices that are either no longer in use or are accessible by others.
- Go to your Google Account Security settings.
- Find the “Your Devices” section and click on “Manage devices”.
- You will see a list of devices that have accessed your account.
- Find the device you wish to remove and click on it.
- Select ‘Remove’ or ‘Sign out’ to remove the device from the list of trusted devices.
Removing old or unneeded devices helps to ensure that only current, secure devices have access to your account. Removing access is particularly important if a device has been lost, sold, or given away.
Review Trusted Devices Regularly
For optimal security, make it a habit to check the devices connected to your Google Account regularly.
- Visit your Google Account Security settings.
- Click on “Your Devices”.
- Browse through the list of devices and ensure you recognize all of them.
- If any device looks unfamiliar, remove it immediately following the steps listed in “Removing a Trusted Device”.
Regular checks help to spot any unusual activity and take immediate action to safeguard your personal information. It’s a simple yet effective routine for any digital user.
Update Device Names for Clarity
To ease the managing process, ensure that each device has a recognizable name.
- Access your Google Account Security settings.
- Find and click on “Your Devices”.
- Choose a device and review its details.
- If the name is not clear, click on the device and select “Sign out.”
- Sign back into your Google account on the device and assign a name you can easily recognize.
By having clear device names, you can quickly identify them in the future, making the management process less confusing.
Double-Check Device Security After Removal
After removing a device from your trusted list, ensure you’ve signed out completely and consider changing your password.
- Remove the device following the steps from “Removing a Trusted Device”.
- Verify that the device is no longer on the list of trusted devices.
- Consider changing your Google Account password for added security.
This step ensures complete removal and adds an extra layer of security in case someone still tries to access your account from the removed device.
The Importance of Two-Step Verification
Activating two-step verification adds an extra layer of security to your account beyond just a password.
- Visit the “2-Step Verification” section in your Google Account Security settings.
- Click “Get Started” and follow the on-screen instructions to set up verification.
- Decide on the second verification step, like a text message or Google Prompt.
Two-step verification ensures anyone attempting to sign in must have both your password and access to the verification method you’ve selected.
Managing Account Access for Others
If you’ve allowed someone else to use your device and sign in to Google, it’s important to manage these access permissions carefully.
- Go to your Google Account settings on the device.
- Scroll to the “Device Activity & Notifications” section.
- Look for “Recently used devices” and review the list.
- Remove any unknown or unused devices using the removal steps.
Granting access should be done cautiously and revoked when that access is no longer needed.
Regular Password Changes
Regular password updates heighten your account’s security—even for trusted devices.
- Navigate to the “Security” section of your Google Account settings.
- Click on “Password” under “Signing in to Google”.
- Follow instructions to enter your current password and create a new one.
This step adds a valuable layer of security, as trusted devices will prompt for the new password upon next login.
Set Up Recovery Information
Ensure you have recovery information set up for your account to recover it if you lose access.
- Go to the “Security” section of your Google Account settings.
- Click on “Recovery email” or “Recovery phone”.
- Follow the prompts to add or update this information.
Recovery information is vital for account security and access restoration, especially if you’re locking and trimming your trusted devices.
Monitor Your Gmail for Security Alerts
Google sends alerts for security-related events. Keep an eye on your Gmail inbox for any such notifications.
- Regularly check your Gmail inbox.
- Look for emails from Google about security concerns.
- Follow any recommended actions immediately.
Staying alert to notifications ensures you can respond quickly to any potential threats to your account security.
In conclusion, maintaining a secure Google Account is a continuous process that involves being vigilant about the devices you trust. By following the steps detailed above to add or remove trusted devices, regularly updating security settings, and monitoring account activity, you’ll create a strong defense against unauthorized access. Security is all about layers, and by managing your trusted devices, you’re adding an important one.
FAQs
Q: How often should I review my list of trusted devices?
A: It’s wise to review your trusted devices at least every few months or anytime you change or stop using a device.
Q: What should I do if I notice an unfamiliar device on my account?
A: Immediately remove the unfamiliar device from your list and change your Google Account password as an extra precaution.
Q: Is there a limit to the number of trusted devices I can have on my Google Account?
A: Google doesn’t specify a limit, but it’s best to only have a few personal devices listed for optimal security.