In the world today, smart homes are no longer just about convenience; they have become integral in managing energy efficiently and ensuring our comfort. One gadget that’s central to the smart home ecosystem is the programmable thermostat. A popular choice in many homes is the Honeywell thermostat, known for its reliability and advanced features. But, to make the most out of your Honeywell thermostat, connecting it to your Wi-Fi network is essential. This allows you to control your home’s temperature remotely, program settings easily, and integrate with other smart home devices. Fear not, even if you’re not tech-savvy, this guide is specially crafted to help you through the process.
Preparing Your Thermostat for Connection
Before you can connect your Honeywell thermostat to your home Wi-Fi, it’s important to ensure that it’s ready for the process. Some models come with Wi-Fi capabilities built-in, while others might require an additional module.
Detailed Steps:
- Check your thermostat model’s specifications to confirm if it has Wi-Fi capacity.
- If needed, purchase the Wi-Fi module that’s compatible with your thermostat model.
- Install the module according to the manufacturer’s instructions. This usually involves turning off your thermostat, inserting the module into the designated port, and turning the thermostat back on.
- Confirm that the display indicates the module has been recognized and is ready for setup.
Summary:
Preparing your thermostat for connection is a crucial first step. While there are no real downsides to this, the benefits include paving the way for successful Wi-Fi connectivity, giving you access to all smart features your thermostat has to offer.
Checking Wi-Fi Network Compatibility
Honeywell thermostats require a 2.4 GHz Wi-Fi network to operate correctly. Most modern routers can broadcast on both 2.4 GHz and 5 GHz frequencies, so it’s important to ensure you’re connected to the right frequency for your thermostat.
Detailed Steps:
- Identify if your router supports 2.4 GHz, as some new ones only support 5 GHz.
- If your router broadcasts on both frequencies, make certain it’s configured to allow 2.4 GHz operations.
- If possible, set a distinct name (SSID) for your 2.4 GHz network to avoid confusion during the connection process.
Summary:
The benefit of ensuring network compatibility is minimizing connectivity issues. However, it may involve tweaking router settings, which could seem daunting but is quite manageable with the router’s user manual or online support.
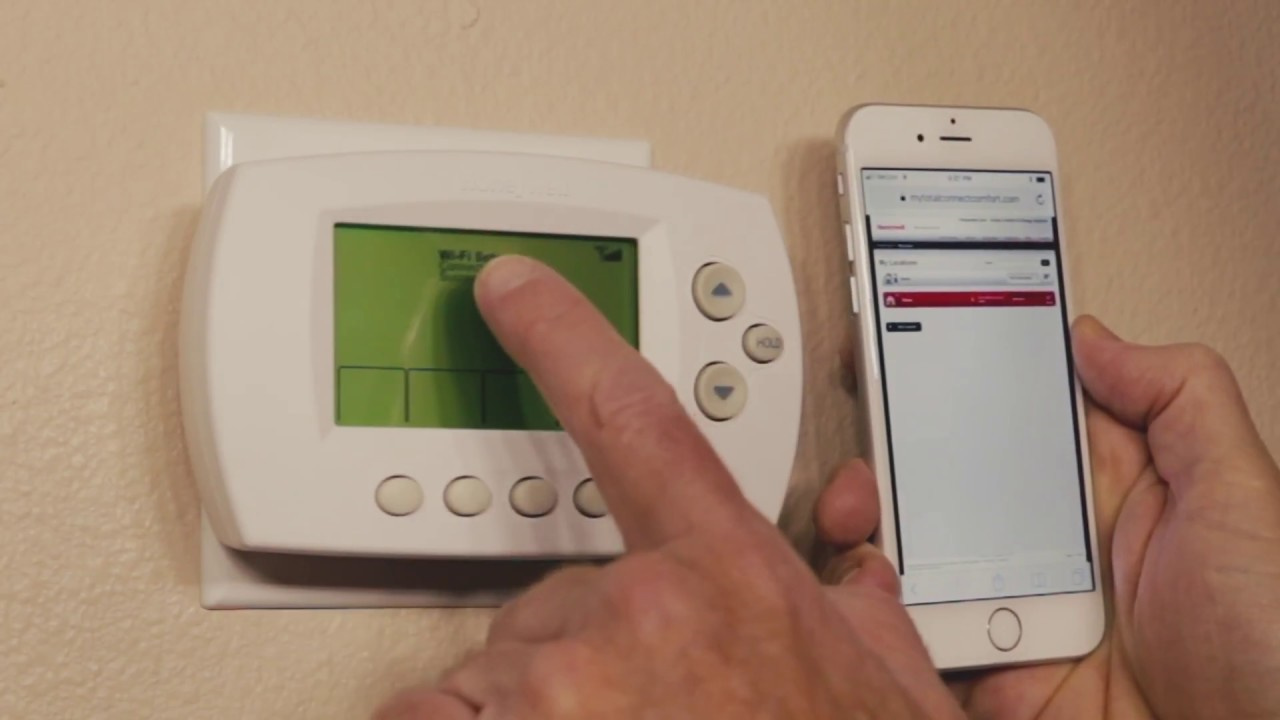
Initiating the Wi-Fi Setup Mode
To connect your Honeywell thermostat to your Wi-Fi network, you must first put it into Wi-Fi Setup mode. This will allow your thermostat to find and connect to your home network.
Detailed Steps:
- On your thermostat’s screen, press the ‘Menu’ button.
- Navigate through the menu until you find the ‘Wi-Fi Setup’ option.
- Select this option, and your thermostat should display an on-screen prompt indicating that it is in Wi-Fi Setup mode.
Summary:
Initiating Wi-Fi Setup mode is simple and essential for setting up the connection. While some may find navigating the digital menu challenging, it generally offers a user-friendly interface, and completing this step enables access to control your thermostat remotely.
Connecting to Your Home Wi-Fi Network
With your thermostat now in Wi-Fi Setup mode, it can connect to your home’s Wi-Fi network. Ensure you have your network name and password on hand before starting this process.
Detailed Steps:
- From the Wi-Fi Setup screen on your thermostat, you’ll see a list of available networks.
- Use the thermostat’s interface to select your home network (SSID) from the list.
- You will then be prompted to enter your network’s password. Carefully input the password using the on-screen keyboard.
- Confirm the details, and the thermostat should start connecting to your Wi-Fi network.
Summary:
Connecting to your Wi-Fi network allows you to control the thermostat remotely, although the initial connection may take a few attempts. This process is usually straightforward, but typing errors can cause frustration for some.
Completing the Connection
After you’ve entered your Wi-Fi network details, your thermostat will attempt to establish a connection. A confirmation message will appear upon successful connection.
Detailed Steps:
- Wait for the thermostat to confirm the connection. This may take a few moments.
- Once connected, a confirmation message or symbol will show on the thermostat’s display.
- If unsuccessful, you may be prompted to re-enter your Wi-Fi details or troubleshoot your Wi-Fi network’s connectivity.
Summary:
Successfully completing the Wi-Fi connection unlocks advanced thermostat features. Difficulties here may stem from incorrect Wi-Fi credentials or issues with the network itself.
Registering Your Thermostat Online
To gain remote access and full functionality, you’ll need to register your Honeywell thermostat online. This typically involves creating an account on the Honeywell Home app or website.
Detailed Steps:
- Download the Honeywell Home app on your smartphone or visit the website on your computer.
- Create a new account or log in if you already have one.
- Follow the on-screen instructions to register your thermostat using its model number and unique MAC ID/CRC code.
Summary:
Registering your device is the key to enabling all its features, including remote access via the app. The process is simple, but ensuring the correct input of device information is crucial to avoid any interruptions in service.
Customizing Thermostat Settings
Once your Honeywell thermostat is connected, customize its settings to fit your lifestyle. This includes setting schedules and preferences through the Honeywell Home app.
Detailed Steps:
- Explore the app’s interface to find the ‘Schedules’ or ‘Preferences’ options.
- Follow the on-screen prompts to set your preferred temperature for various times and days.
- Save these settings, and your thermostat will adjust automatically according to the schedule.
Summary:
Customizing your thermostat ensures comfort and energy efficiency. The process may seem overwhelming due to the various options available, but the app’s guidance makes it easier.
Updating Firmware
To ensure your thermostat functions optimally, it should run the latest firmware. Check for updates regularly and install them as needed.
Detailed Steps:
- In the Honeywell Home app, go to the ‘Thermostat’ section.
- Look for an option indicating an update is available.
- Follow the instructions to download and install the firmware update.
Summary:
Updating firmware provides performance improvements and bug fixes. Some may find it tedious to check for updates, but it’s a passive process that requires minimal interaction.
Troubleshooting Wi-Fi Connectivity Issues
If you encounter Wi-Fi connectivity issues, a few simple troubleshooting techniques can often resolve them.
Detailed Steps:
- Verify that your Wi-Fi network is working by connecting another device.
- Restart your router and thermostat to reset the connection.
- Double-check your network’s compatibility and signal strength.
Summary:
Troubleshooting can be frustrating, but it’s necessary for maintaining a reliable connection. These steps usually resolve the most common Wi-Fi issues.
Contacting Honeywell Support
Should you need further assistance, Honeywell’s customer support team is there to help.
Detailed Steps:
- Gather relevant details about your thermostat model and Wi-Fi setup.
- Reach out to Honeywell Support via phone, email, or live chat.
- Follow their expert guidance to resolve any persistent issues.
Summary:
Contacting support provides peace of mind for complex issues. It’s a vital resource when self-troubleshooting doesn’t work, offering professional solutions.
Taking Advantage of Advanced Features
With your Honeywell thermostat connected, explore its advanced features, such as geofencing, energy reports, and integration with voice assistants.
Detailed Steps:
- Read up on your thermostat’s capabilities in the user manual or app.
- Enable and configure additional features of interest.
- Integrate your thermostat with other smart home devices for a seamless experience.
Summary:
Leveraging advanced features maximizes your thermostat’s potential, enhancing convenience and efficiency. The learning curve for these features may be steep for some, but the long-term benefits are valuable.
In conclusion, connecting your Honeywell thermostat to Wi-Fi might seem like a task reserved for the technologically inclined, but following these step-by-step solutions will simplify the process. From preparing your device to advanced customization, these guidelines are designed to empower you to make the most of your smart thermostat’s features and enjoy the convenience and energy savings it has to offer.
Frequently Asked Questions:
Q: What can I do if my Honeywell thermostat won’t connect to Wi-Fi?
A: Start with basic troubleshooting: confirm your Wi-Fi network’s functionality, restart the router and thermostat, and ensure your thermostat is within range of the router. If problems persist, follow detailed troubleshooting steps or contact Honeywell Support for personalized assistance.
Q: Can I connect my Honeywell thermostat to Wi-Fi without the Honeywell Home app?
A: While the app provides the easiest setup and management, some Honeywell thermostat models allow for web-based setup through a browser. Check your thermostat’s user manual for specific instructions.
Q: How can I ensure my connection to the thermostat remains secure?
A: Always use a strong, unique password for your home Wi-Fi network. Keep your Honeywell app up-to-date and, if available, enable two-factor authentication for an additional layer of security. Regular firmware updates for your thermostat are also crucial for security.


