Email management can often seem like a daunting task, but Gmail’s intuitive folder system, known as labels, offers a tidy solution. By creating new folders, you can easily categorize and organize your messages, transforming a cluttered inbox into a streamlined workspace. Whether for personal or professional use, mastering this simple yet effective feature can greatly enhance your email productivity.
Organizing with Labels
In Gmail, folders are essentially labels that can be applied to your emails. This approach allows for greater flexibility as an email can have multiple labels, functioning differently from traditional folder systems you might find in other email services or on your computer.
Detailed Introduction
Gmail’s labels allow users to categorize emails by project, sender, topic, or any other system that suits their workflow. Unlike traditional folders, an email can live under multiple labels, making it easier to find later on without creating duplicate messages.
Detailed Steps
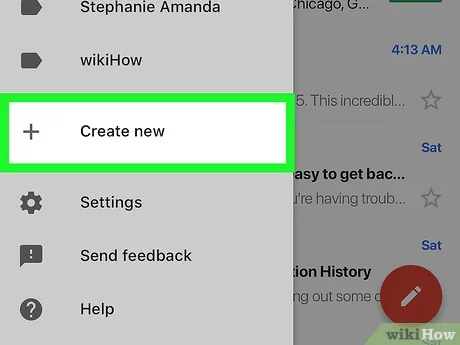
- Sign in to your Gmail account.
- On the left side of the page, scroll down and click “More” if necessary to see additional options.
- Look for the “Create new label” option and click on it.
- In the pop-up window, enter the name for your new label.
- If you want this label to be nested under another, check the box next to “Nest label under:” and select the parent label from the dropdown menu.
- Click “Create” to establish your new label.
Summary
Creating labels (folders) in Gmail can help you achieve a more organized inbox, making it easier to locate specific emails when needed. This system’s flexibility means that it requires a bit of strategy to use effectively. There’s no real downside except that it might take some time to get used to if you’re more familiar with traditional single-folder filing systems.
Email Filters for Automatic Organization
Automatically sort incoming emails into designated labels as they arrive, taking a proactive approach to email management.
Detailed Introduction
Gmail’s filter feature can automatically apply labels to incoming emails based on criteria you set, such as sender, subject line, or keywords. This can save you tremendous time and ensure your emails are organized from the moment they hit your inbox.
Detailed Steps
- Click the gear icon in the top right corner and select “See all settings.”
- Go to the “Filters and Blocked Addresses” tab.
- Click “Create a new filter.”
- Enter the criteria for your filter (e.g., from a particular sender).
- Click “Create filter with this search.”
- Choose “Apply the label,” select the label you created, and then choose additional actions if needed.
- Click “Create filter” to activate it.
Summary
Email filters are a dynamic tool for keeping an organized Gmail account. They can dramatically reduce the time spent sorting emails, but setting them up does require a bit of upfront effort. Over-filtering can also accidentally bury important emails if not set up correctly, so it’s best to review filters periodically.
Gmail’s Multiple Inboxes
Simultaneously manage and view emails from various labels in a single window using Gmail’s Multiple Inboxes feature.
Detailed Introduction
Multiple Inboxes in Gmail enable users to split their main inbox view into sections based on different labels, each acting as a ‘sub-inbox’. This is highly productive for keeping an eye on different email categories without needing to click through your label list.
Detailed Steps
- Click the gear icon and select “See all settings.”
- Navigate to the “Inbox” tab.
- In the “Inbox type” dropdown menu, select “Multiple inboxes.”
- Define the sections you want by labeling criteria in the “Search query” field.
- Customize the panel titles and decide how many conversations each panel should display.
- Save changes at the bottom of the page.
Summary
Multiple Inboxes are great for people who need to see different streams of emails at a glance. However, it can make your inbox look busier and may be overwhelming if overused.
Color-Coding Labels
Visually distinguish your email categories by assigning colors to your Gmail labels.
Detailed Introduction
Color-coding your labels adds a visual dimension to your organization system, making it quicker and easier to identify emails by category at a glance. This can be a significant time-saver, especially if you deal with high volumes of email.
Detailed Steps
- In the Gmail sidebar, hover over the label you want to color-code.
- Click the three dots icon that appears next to the label.
- Select “Label color,” and choose your preferred color.
- If you want a custom color, click “Add custom color.”
Summary
Color-coding is a simple yet effective way to enhance organization without any real downsides, although too many colors might lead to visual clutter if not chosen carefully.
The Importance of Regular Label Maintenance
Keep your Gmail account streamlined by periodically reviewing and cleaning up your labels.
Detailed Introduction
As you use Gmail, you may accumulate a large number of labels that can become overwhelming or redundant. Regular maintenance helps keep your label list relevant and manageable.
Detailed Steps
- In your Gmail settings, go to the “Labels” tab.
- Scan through your list of labels.
- For any label you no longer need, click “remove.”
- Confirm the deletion and repeat for any other labels you wish to delete.
Summary
Regular maintenance keeps your label system efficient, although it might mean letting go of labels that could potentially be useful later.
Mastering Label Hierarchy
Use nested labels to create a structured, hierarchal organization system for your emails.
Detailed Introduction
Nested labels function like sub-folders, allowing you to create more detailed categorization under broader label headings.
Detailed Steps
- While creating or editing a label (as outlined in the first tip), check “Nest label under” and select which existing label it should fall under.
- To adjust nesting after creation, hover over the label in the sidebar, click the three dots, and choose “Edit.” Then alter the nesting option as needed.
Summary
A hierarchical system is excellent for detailed categorization but can get confusing if too many layers are created.
Quick Label Application
Apply labels to multiple emails efficiently using checkboxes and the label button.
Detailed Introduction
You can quickly categorize several emails at once by selecting them and applying a label in bulk, which is a lot faster than labeling each email individually.
Detailed Steps
- Check the box next to the emails you want to label in your inbox.
- Click the label icon at the top of the inbox (it looks like a tag).
- Select the label you want to apply and click “Apply.”
Summary
This bulk action is a huge time-saver, though it does require an initial setup of relevant labels.
Keyboard Shortcuts for Labeling
Utilize Gmail’s keyboard shortcuts to rapidly assign labels to your emails.
Detailed Introduction
When enabled, keyboard shortcuts in Gmail allow for much faster navigation and action-taking, including labeling emails without reaching for the mouse.
Detailed Steps
- Enable keyboard shortcuts in Gmail settings under the “General” tab.
- Use ‘l’ (lowercase ‘L’) to bring up the label menu when an email is open or selected.
- Type the label name and hit enter to apply.
Summary
Keyboard shortcuts are efficient, but they require memorization and are not intuitive for every user.
Unsubscribe from Unnecessary Emails
Reduce the need for excessive labeling by unsubscribing from unwanted subscriptions, keeping your inbox lighter and more manageable.
Detailed Introduction
Cutting down on the influx of unimportant emails makes email management simpler. Unsubscribing to newsletters or promos you don’t read will decrease the volume of emails to label.
Detailed Steps
- Open an email from a sender you no longer wish to follow.
- Look for an “Unsubscribe” link, typically at the bottom of the email.
- Click the link and follow the prompts to unsubscribe.
Summary
Unsubscribing can dramatically reduce inbox clutter, though you should be cautious about unsubscribing from potentially important senders.
Consolidating Similar Labels
Merge similar labels to create a more efficient and less confusing Gmail experience.
Detailed Introduction
If you find yourself with multiple labels that serve similar purposes, it might be time to consolidate them into a single, unified label.
Detailed Steps
- Determine which labels are similar enough to merge.
- Reassign all emails from the less necessary label to the more encompassing one.
- Delete the now-empty label.
Summary
Consolidation streamlines your labeling system but requires careful consideration to avoid losing track of essential categorizations.
In conclusion, mastering the creation and management of Gmail folders (labels) is not only about keeping your inbox tidy but an ongoing process to enhance efficiency. With the guidance provided, even those new to Gmail can adopt a system that works seamlessly for their needs, altering it as their workflow evolves. As users become more comfortable with these steps and tips, they can further experiment with Gmail’s other organizational features to cultivate an email management system that saves time and reduces stress.
FAQs
-
Can I convert a label into a traditional folder in Gmail?
Gmail doesn’t have traditional folders like some other email systems, but labels function similarly. You can’t convert a label into a “folder”, but you can use labels to organize your emails as if they were in separate folders. -
How many labels can I create in Gmail?
Gmail allows users to create up to 5,000 labels, including nested labels, which should be more than sufficient for personal and most business users. -
What happens to my emails if I delete a label in Gmail?
Deleting a label does not delete your emails. Any emails that had the label will remain in your inbox or other locations where they were filed. The label is simply removed from the emails.


