Keeping notes organized and easily accessible is crucial, especially when multitasking on your computer. One efficient way to manage your reminders and to-dos while working on a Windows 10 or Windows 11 machine is to use sticky notes. But what happens when these notes disappear behind open windows, leaving you scrambling to find them? The ability to keep sticky notes always on top is a game changer, ensuring your important notes remain visible as you navigate between different tasks and applications. In this guide, we’ll explore various methods to help make your sticky notes stay on top, ensuring your productivity remains uninterrupted.
Use Built-in Stay on Top Feature
With the latest updates, Sticky Notes, a built-in Windows app, has a feature to keep your notes on top of other windows.
Detailed Introduction
Sticky Notes has evolved from being a simple note-taking app to a more robust tool, now offering the functionality to keep notes on top of other windows. This built-in feature in Windows is especially useful when you’re working on tasks that require constant reference to notes.
Detailed Steps
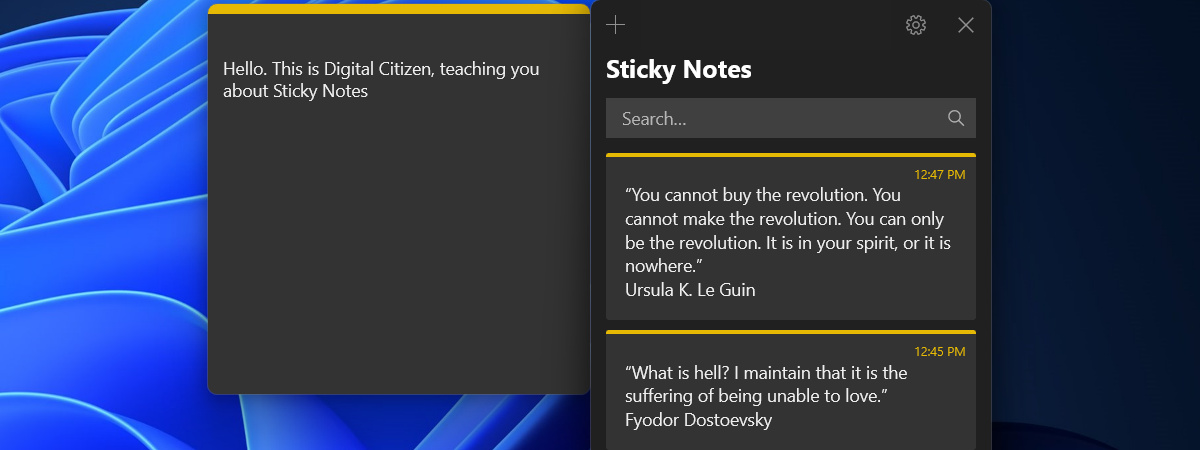
- Click on the Start menu, type “Sticky Notes”, and open the app.
- Create a new note or click on an existing one to select it.
- On the note window, you will find a toolbar on the top.
- Look for the “Always on top” pin icon in the upper right corner of the note.
- Click the “Always on top” pin icon. The note will now remain visible above all other windows.
Summary
Having sticky notes always visible is convenient, reducing the need to switch windows. However, it may clutter your screen if you have multiple notes or need to work in a distraction-free environment.
Third-Party Sticky Note Apps
Some third-party applications provide more features than the default Sticky Notes app, including the stay on top functionality.
Detailed Introduction
Third-party sticky note applications often come with a host of additional features, such as customizable skins, advanced formatting, and the ability to set each note to always stay on top.
Detailed Steps
- Research and download a reputable third-party sticky note application that supports the “Always on top” feature, such as Stickies, Notezilla, or Simple Sticky Notes.
- Install and launch the application.
- Create a new note or open an existing one within the app.
- Look for an option that says “Stay on top,” “Always on top,” or a pin icon similar to the built-in Sticky Notes app.
- Select this option to keep the note in view at all times.
Summary
Third-party apps may provide more versatility and customization than the default app. However, downloading from unknown sources might pose security risks, and these applications may consume more system resources.
Keyboard Shortcuts with Built-in Sticky Notes
Keyboard shortcuts can streamline the process of toggling the “Always on top” feature in Sticky Notes.
Detailed Introduction
Keyboard shortcuts are a quick and efficient way to manage various features in software applications without having to navigate through menus. Sticky Notes supports certain shortcuts that can enhance your productivity and control note visibility.
Detailed Steps
- Open your Sticky Notes app by searching for it in the Start menu.
- Select the note you want to keep on top.
- Press “Ctrl + Shift + T” on your keyboard. The note should now remain on top of other windows until you undo the action.
Summary
Leveraging keyboard shortcuts can significantly speed up your workflow. However, remembering these combinations can be challenging for some users, and they don’t offer visual guidance like menu options do.
Adjusting Window Sizes
A manual method involves resizing and positioning the Sticky Notes and work windows to keep notes in view.
Detailed Introduction
If you prefer not to have a note permanently on top but still want it visible, carefully adjusting the size of your work windows alongside your sticky notes can be a practical solution. This method doesn’t require any special features or third-party apps.
Detailed Steps
- Open the Sticky Notes application.
- Click and drag the edges of your sticky note to resize it according to your preference.
- Carefully adjust the size and position of other open application windows so that they don’t cover your sticky note.
- Arrange the windows to create a workspace that allows you to see both your applications and sticky note simultaneously.
Summary
This no-frills method imposes no additional software load and offers straightforward visibility of notes. However, it can be less flexible if you frequently open new windows or applications that may overlap with your notes.
Using Always On Top Utilities
Small utility programs created specifically for forcing windows to stay on top are another solution.
Detailed Introduction
Always On Top utilities are lightweight programs designed to force any window, including Sticky Notes, to stay on top. These are useful when in-built features are not available or if you desire more control.
Detailed Steps
- Download a reputable Always On Top utility, such as “TurboTop” or “DeskPins.”
- Install and run the utility.
- Follow the instructions provided by the utility to select the Sticky Notes window and set it to always be on top.
Summary
Utilities like these are a straightforward way to manage window layers, but running too many utilities can slow down your system, and not all utilities are created by trusted developers, which could pose security risks.
AutoHotKey Scripting
AutoHotKey is a powerful scripting language for Windows that can automate setting any window, including Sticky Notes, to stay on top.
Detailed Introduction
For those who are comfortable with scripting or want to try their hand at basic programming, AutoHotKey provides a flexible way to customize the behavior of windows, among other tasks. With a simple script, you can toggle the “Always on top” property of your sticky notes.
Detailed Steps
- Download and install AutoHotKey from the official website.
- Create a new script file (with an .ahk extension) using a text editor like Notepad.
- Write or paste a script that can toggle the “Always on top” state for the active window. A basic example is:
^SPACE:: ; Control+Space to toggle window always on top.Winset, Alwaysontop, , Areturn- Save the file and double-click it to run the script.
- With your Sticky Notes active, press the designated shortcut (e.g., Control+Space) to set it to always stay on top.
Summary
AutoHotKey scripts provide a high degree of customization and once set up, they can be incredibly efficient. However, scripting requires some technical know-how, and improper scripts can cause unexpected behavior.
Windows Settings for Multiple Desktops
Using Windows’ built-in virtual desktop feature, you can dedicate one desktop to sticky notes, keeping them separate but accessible.
Detailed Introduction
Windows 10 and Windows 11 have a feature called “Task View” which allows users to create multiple virtual desktops. This means you can have a whole desktop dedicated to your sticky notes, allowing you to switch to it when needed.
Detailed Steps
- Press the “Task View” button on the taskbar (next to the search bar) or press “Windows key + Tab” to open the Task View interface.
- Click on “New desktop” to create a new virtual desktop.
- On your new desktop, open Sticky Notes and arrange them as desired.
- Switch between desktops using “Task View” or by pressing “Ctrl + Windows key + Left/Right arrow” to view your sticky notes or other applications.
Summary
This feature allows for an organized workspace and can declutter your main desktop. However, it requires you to switch between desktops to see your notes, and you might miss real-time reminders if you’re working on a different desktop.
Grouping Notes
Organizing sticky notes by grouping them can help manage multiple notes and keep them visible.
Detailed Introduction
When using multiple sticky notes, it can become cumbersome to keep track of them all, especially if you want them to stay on top. Grouping related notes together can help you manage them more efficiently.
Detailed Steps
- Open Sticky Notes and create or navigate to the notes you want to group.
- Click and drag each note’s title bar and position them closely together on your screen.
- Resize each note and the cluster of notes as needed to ensure visibility while working in other applications.
Summary
Grouping notes can be a natural way to keep related information together and ensure notes don’t get buried under other windows. The downside is that it may take up more screen real estate and could become overwhelming if not managed well.
Personalizing Note Color and Size
Changing the color and size of sticky notes can help differentiate important notes and make them more visible.
Detailed Introduction
Sticky Notes allows for some degree of personalization, which can be leveraged to make certain notes stand out, prompting you to pay more attention to them – even if they are not set to always stay on top.
Detailed Steps
- Open the Sticky Notes app.
- Right-click on the note you want to personalize and choose a color that will stand out against your usual applications.
- Resize the note by clicking and dragging the edges.
- Reposition the note to a part of the screen where it is less likely to be covered by other windows.
Summary
Personalizing the look of your sticky notes can make them more noticeable, which could reduce the necessity of keeping them on top. This method may not work for everyone’s organizational style and can become less effective if you have many notes.
Adjusting Opacity of Notes
Some third-party sticky note applications allow you to change the opacity of your notes to enable you to see through them.
Detailed Introduction
Changing the opacity, or transparency, of your notes can be an effective way to keep them visible without them entirely blocking the view of your other work. This can be especially helpful if you are dealing with a crowded workspace.
Detailed Steps
- Download and install a third-party sticky note application that supports adjustable opacity.
- Open the app and select or create a note.
- Find the option to adjust the note’s opacity, often available in the application’s settings or by right-clicking the note.
- Adjust the slider or enter a value to make the note more or less transparent.
Summary
The adjustable opacity feature can help maintain visibility while minimizing distraction. Nevertheless, not all users may find transparent notes appealing or easy to read, and it depends on third-party app availability and reliability.
Conclusion
Efficiently managing your digital workspace can significantly impact productivity and mental clarity. Sticky notes have always been a popular tool for keeping track of small pieces of information. By exploring several methods to keep sticky notes always on top in Windows 10 and Windows 11, you can ensure that these valuable reminders stay within sight. Whether you opt for the built-in feature, third-party apps, or creative management of your desktop space, each approach has its benefits and potential drawbacks. The key is to find the solution that fits seamlessly with your workflow and aids in your daily tasks.
FAQs
Q1: Will using third-party sticky note applications pose a security risk to my computer?
A1: It can, which is why it’s important to download apps only from reputable sources. Always ensure that the software you’re choosing is well-reviewed and from a legitimate provider.
Q2: Are there any limitations to the number of sticky notes I can keep on top?
A2: Technically, there are no inherent limitations, but too many notes might clutter your screen and affect usability. It’s generally more practical to keep a limited number of critical notes on top.
Q3: Will keeping sticky notes always on top slow down my computer?
A3: The impact on system performance is usually minimal for the built-in Sticky Notes app or small third-party applications. However, if your computer is already running low on resources, adding more processes might slow it down.


