Many smartphones and tablets offer the convenience of expanding their storage capacity with a simple addition—an SD card. It’s like giving your device a new space to store photos, videos, apps, and more. But before you can start reaping the benefits of extra storage, it’s crucial to properly mount the SD card on your Android device. Mounting is essentially telling your device to recognize and prepare the new card so it can be used seamlessly. Here’s a comprehensive guide on how to do this, ensuring your expanded storage works correctly from the outset.
Checking Device Compatibility
Before attempting to mount an SD card, you should verify whether your Android device supports expandable storage. Many modern devices are equipped with a dedicated SD card slot, while others might not facilitate additional storage at all.
- Locate your device’s specifications by searching online or consulting the user manual.
- Check for an SD card slot. This is typically found on the side of the device or behind the battery cover.
- Determine the maximum SD card capacity your device can handle—this is important to avoid purchasing a card that’s too large for your device to support.
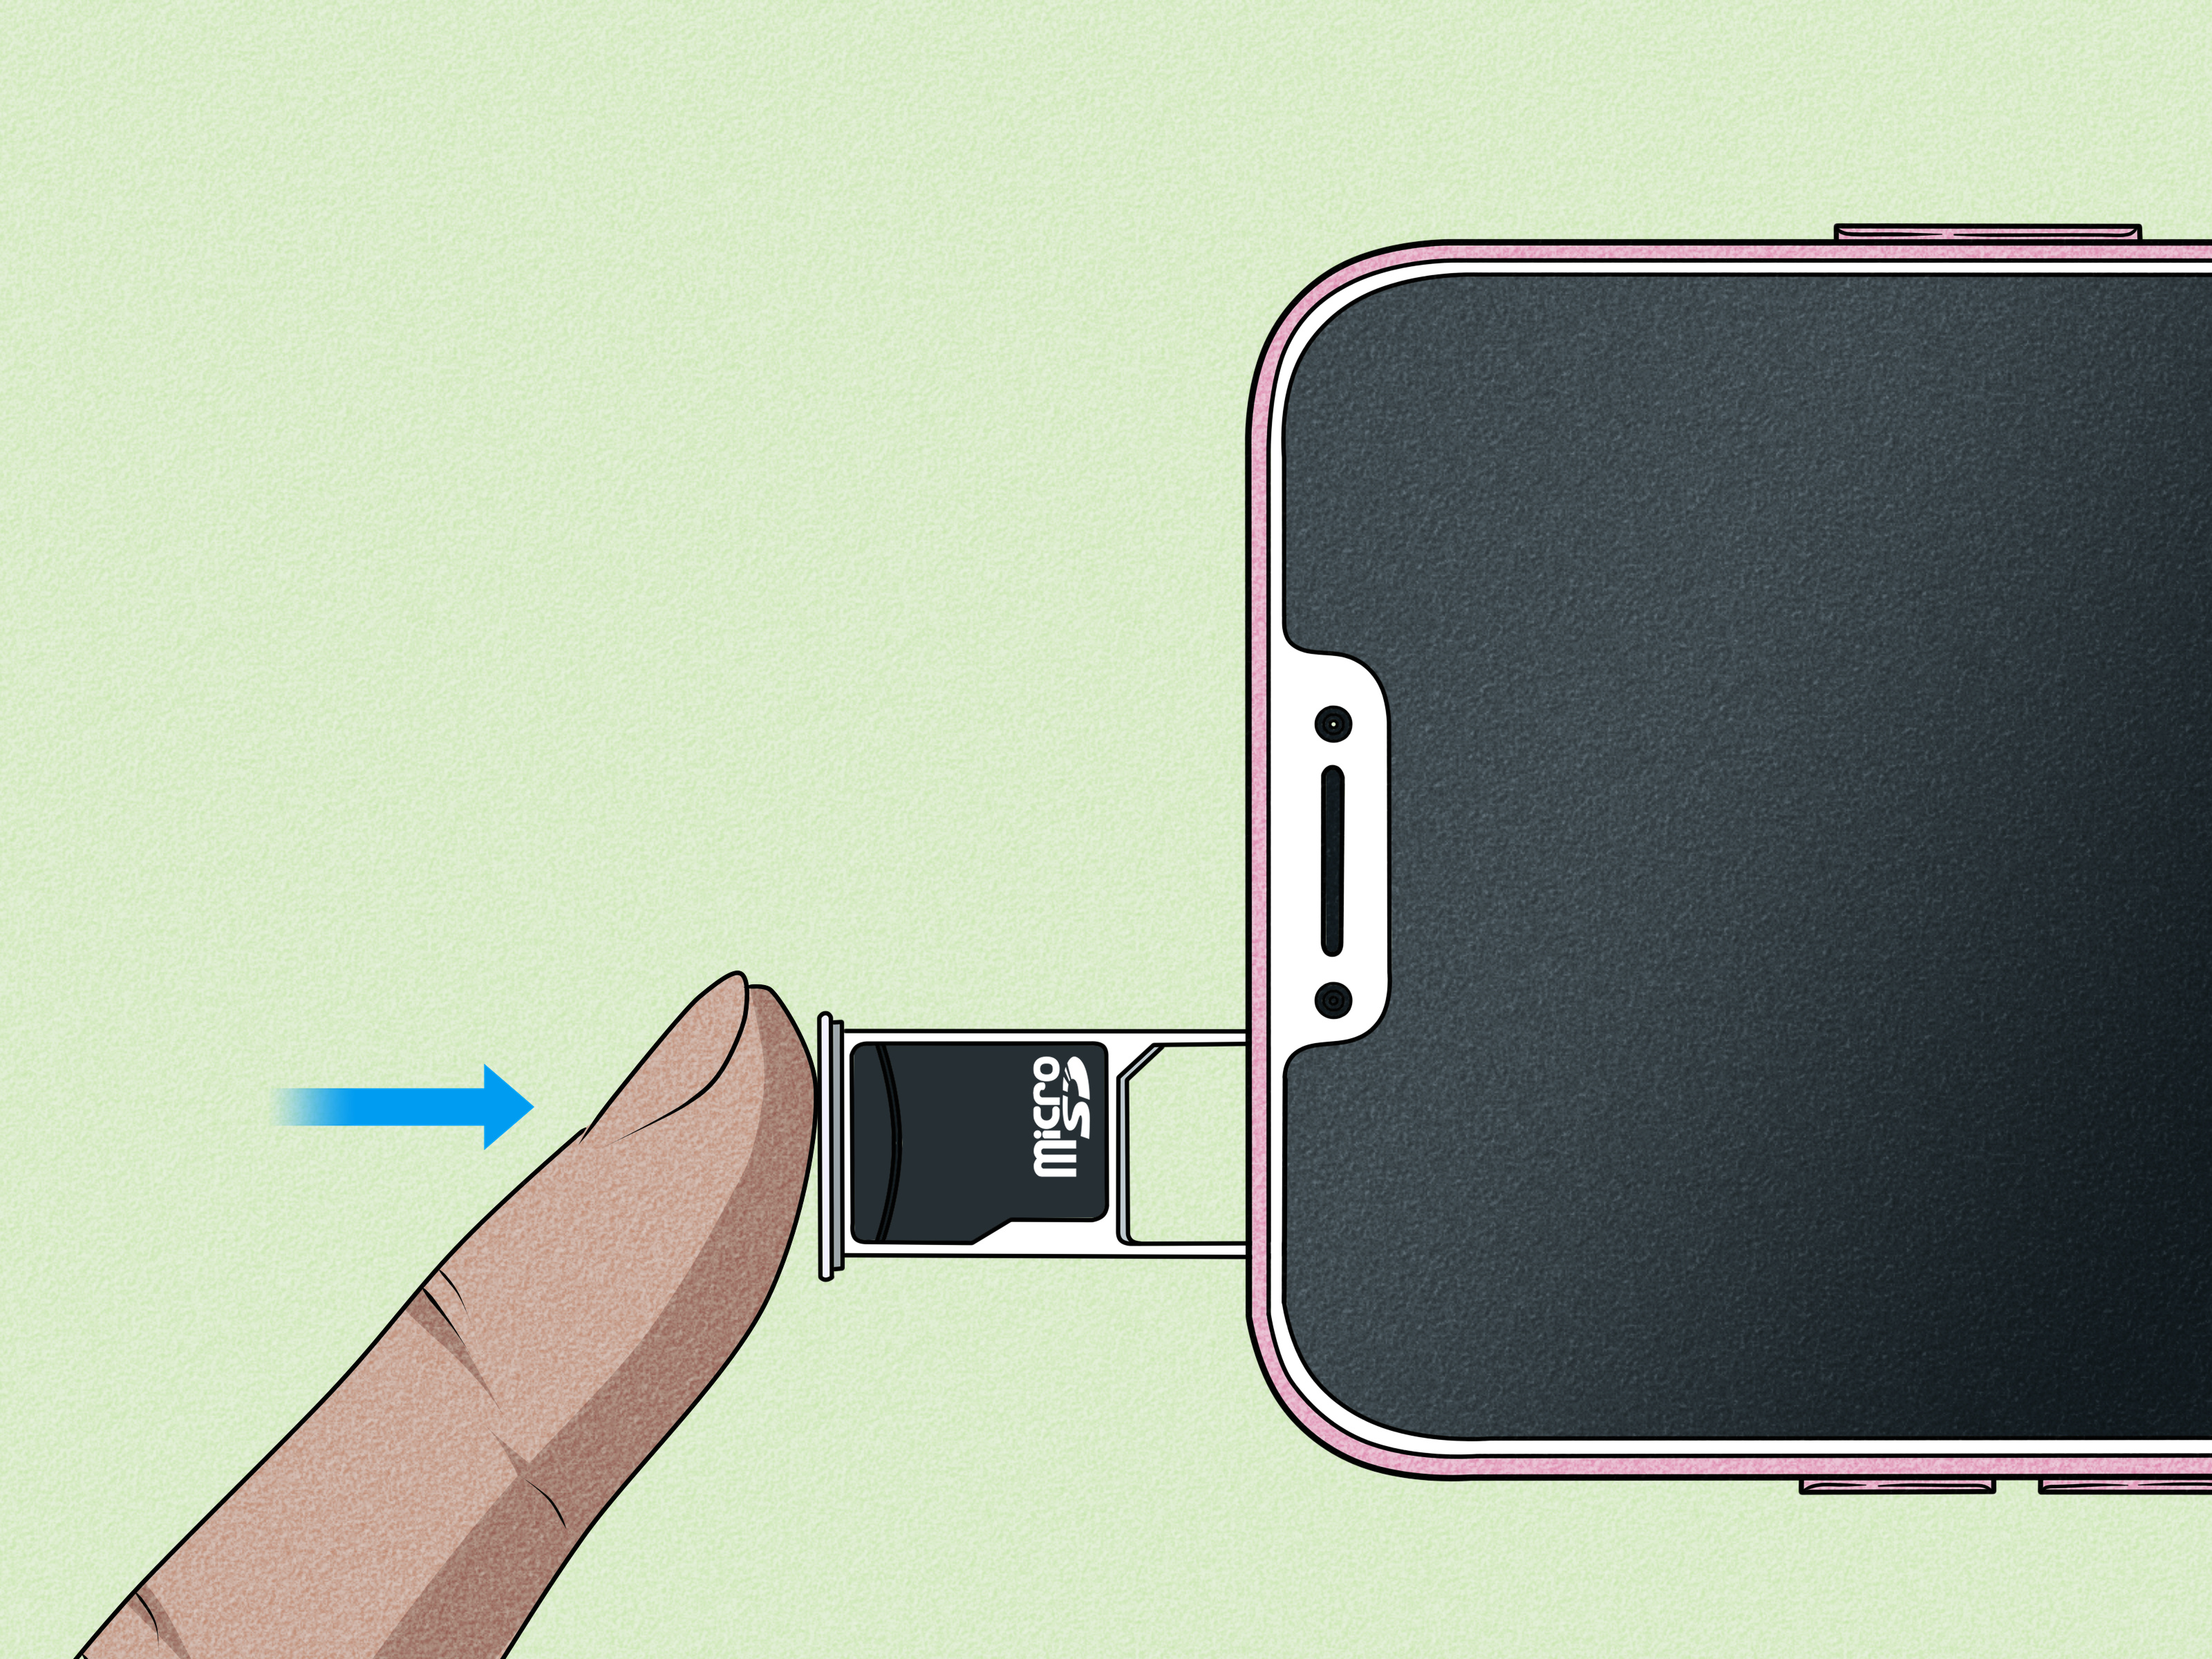
Inserting the SD Card
Inserting the SD card correctly is crucial to ensure it’s recognized by your device and doesn’t sustain damage.
- Power off your device before starting.
- Locate the SD card slot and gently insert the SD card with the metal contacts facing downwards and towards the phone.
- Push the card in until it clicks into place. If your device has a tray system, place the card into the tray and slide it back into the slot.
- Power your device back on.
Formatting the SD Card
Sometimes, to ensure proper functionality, you might need to format the SD card, which will erase any existing content on the card.
- Navigate to your device’s settings menu usually represented by a gear icon.
- Scroll down to ‘Storage’ and tap it.
- Find your SD card listed and select it.
- Tap on ‘Format’ or ‘Format as portable storage’. Follow any additional prompts to complete the formatting.
Summary:
Formatting is a good practice for new SD cards to avoid errors, but be aware that it deletes all data on the card. Always back up your data if the card was previously used elsewhere.
Setting Up as Internal Storage
Some Android devices allow you to treat the SD card as internal storage, enabling you to install apps on the card.
- Insert the SD card and navigate to ‘Settings’ > ‘Storage’.
- Select the option to ‘Set up as internal storage’ or ‘Adoptable storage’.
- Follow the on-screen instructions to format and encrypt the card.
Summary:
This is great for extending your device’s internal memory but remember that the card will only work with that specific device unless it’s reformatted.
Setting Up as Portable Storage
Setting up the SD card as portable storage is ideal for transferring files between devices.
- Insert the SD card and head to ‘Settings’ > ‘Storage’.
- Tap on ‘Set up as portable storage’.
- Follow any additional prompts to finalize the setup.
Summary:
Portable storage offers flexibility, but unlike internal storage, it may not be suitable for apps that require faster data access.
Checking for Errors
If your device is not recognizing the SD card, it may have errors that need fixing.
- Unmount the SD card from ‘Settings’ > ‘Storage’ > ‘Unmount SD card’.
- Remove the card and insert it into a computer using a card reader.
- Use the computer’s repair tool to fix any errors found on the card.
- Reinsert the card into your Android device and mount it.
Summary:
Repairing errors can help extend the card’s life, but recurring errors might indicate the need for a replacement.
Updating Default Storage
For ease of use, you might want to set the SD card as the default storage location for photos, videos, and downloads.
- Go to the ‘Camera’ app settings to change the default storage for photos and videos to the SD card.
- In your browser or download manager app, set the SD card as the default download location.
Summary:
This automatic redirection helps manage device storage better, though be aware that if the card is removed, you won’t be able to access those files until the card is remounted.
Using a Third-Party App
Sometimes using a third-party app can help manage and mount the SD card more efficiently.
- Download a file manager app from the Google Play Store.
- Open the app and use it to navigate to the SD card.
- Follow the app’s instructions to mount and manage files on the SD card.
Summary:
Third-party apps can offer additional features and a user-friendly interface, just ensure that you download a reputable app to avoid security risks.
Regularly Unmounting the SD Card
Regularly unmounting the SD card can avoid potential data corruption.
- Navigate to ‘Settings’ > ‘Storage’.
- Select ‘Unmount SD card’ before removing it.
- Power off your device before physically removing the card.
Summary:
This practice keeps your data secure, though it might seem like an inconvenience. Regular unmounting is not strictly necessary unless you’re actually removing the SD card.
Keeping the SD Card Healthy
Maintaining the health of your SD card ensures data integrity and longevity.
- Avoid exposing the card to extreme temperatures.
- Keep the SD card away from magnets.
- Do not remove the card while files are being transferred.
Summary:
Proper maintenance can substantially prevent data loss and hardware issues.
Troubleshooting Common Issues
When issues arise, simple troubleshooting can often resolve them.
- Reboot your device with the SD card inserted.
- Check for dirt or debris in the SD card slot and clean it carefully.
- Try another SD card to determine if the issue is with the card or the device.
Summary:
Regular troubleshooting helps maintain optimal device performance but can be time-consuming for the non-tech-savvy user.
In conclusion, mounting an SD card on your Android device is a relatively simple process that can greatly enhance your device’s functionality. Although technology can sometimes be a little intimidating, following this guide step by step will allow you to expand your device’s storage capability confidently. Remember to handle your SD card carefully and perform regular maintenance to ensure the longevity of your data and device.
FAQs
-
What is the difference between portable storage and internal storage?
Portable storage allows you to move your SD card between devices, carrying files with you. Internal storage, or adoptable storage, integrates the card more deeply into the Android system, allowing apps to be installed on it but restricts its use to one device. -
What should I do if my device isn’t recognizing my SD card?
First, ensure that the card is properly inserted. If it is, try unmounting and remounting the card. Check for dirt within the card slot and clean if necessary. Use a computer to check for errors on the card or try a different card to see if the issue persists. -
How do I switch the SD card back to portable storage after using it as internal storage?
To switch the SD card back to portable storage, it will need to be reformatted, which will erase all data on the card. Always back up your data first. Then, go to ‘Settings’ > ‘Storage’, select the card, and find the option to reformat it as portable storage.


