Navigating through files and folders in Windows 10 is made easier with the use of the Preview Pane feature. It allows users to take a quick glance at file contents without having to open them fully. However, there are times when the Preview Pane may not work as expected, causing inconvenience and reducing productivity. To ensure you can get back to using this useful feature promptly, the following guide will walk you through various troubleshooting methods, each aimed at addressing common issues that could be preventing the Preview Pane from functioning properly.
Check File Explorer Options
Before diving into more complex solutions, it’s essential to first make sure that the Preview Pane is enabled in your File Explorer settings. Sometimes, the solution can be as simple as toggeling on an option.
- Open File Explorer by clicking on the folder icon in your taskbar or by pressing Windows key + E on your keyboard.
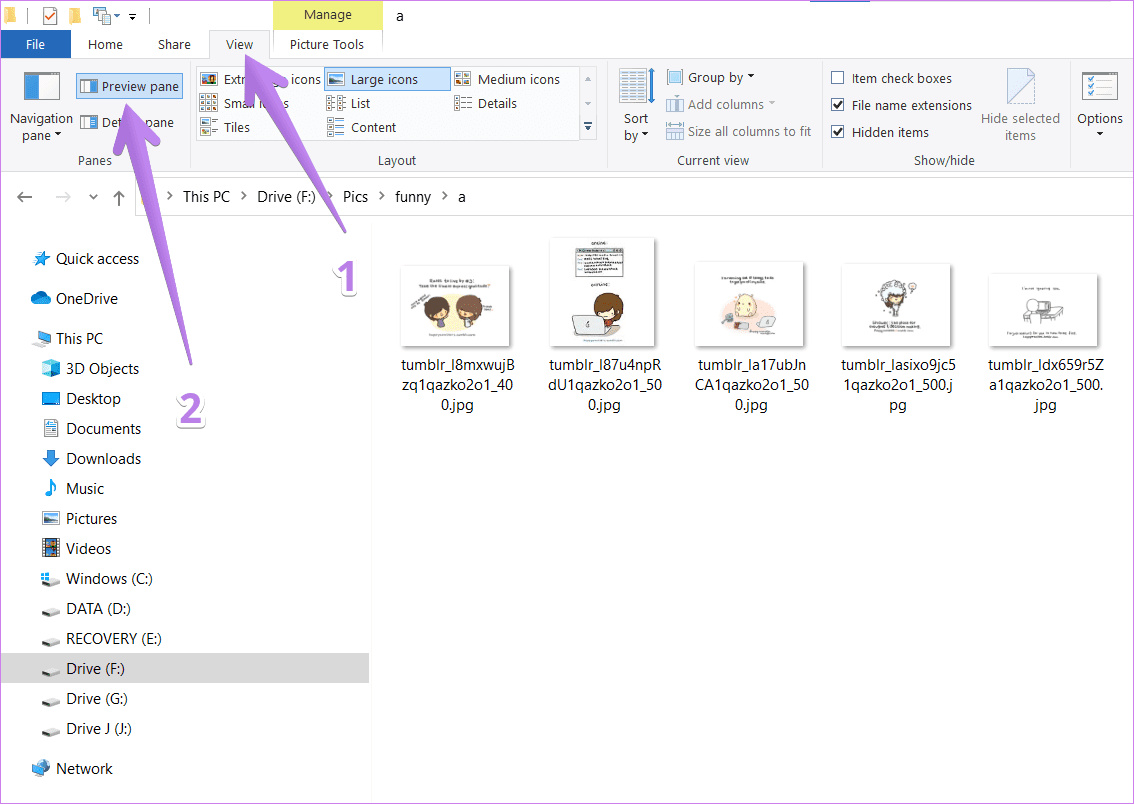
- Click on the ‘View’ tab at the top of the window.
- Look towards the upper-left corner of the window and find the ‘Preview Pane’ button.
- Click on ‘Preview Pane’ to enable it. If it’s already enabled, try clicking it off and on to refresh the setting.
By enabling the Preview Pane, you allow for quick access to view the content of your files without opening them, which can streamline your workflow. However, if this feature is misused or overused with large or complex files, it may sometimes slow down your computer.
Restart Windows Explorer
Occasionally, the root of the issue could be a minor glitch in the Windows Explorer process. A simple restart of this process can often resolve the Preview Pane not working.
- Right-click the Taskbar, and select ‘Task Manager’ from the context menu.
- In the ‘Process’ tab, scroll down to find ‘Windows Explorer’.
- Click on ‘Windows Explorer’ to highlight it.
- Right-click and choose ‘Restart’ from the context menu.
A quick restart of Windows Explorer can refresh your system’s environment without the need to reboot the entire computer. This usually has minimal downsides but can interrupt file transfers or other processes managed by Windows Explorer.
Update Display Drivers
Outdated or corrupted display drivers may also affect the performance of the Preview Pane. Ensuring your drivers are up-to-date can help resolve the issue.
- Press the Windows key + X and choose ‘Device Manager’.
- Expand the ‘Display adapters’ section.
- Right-click your display adapter and select ‘Update driver’.
- Choose ‘Search automatically for updated driver software’ and follow the on-screen prompts.
Updating your display drivers can result in better system performance and compatibility, possibly resolving the issue with the Preview Pane. Be cautious, though, as incorrect drivers can sometimes cause more issues than they solve.
Run System File Checker
The System File Checker can help fix corrupted system files that could be causing the Preview Pane to malfunction.
- Type ‘cmd’ in the Windows search bar.
- Right-click ‘Command Prompt’ and choose ‘Run as administrator’.
- Type
sfc /scannowand press Enter.
This process will scan and repair system files. It’s a powerful tool that can prevent more serious system issues but it may take some time to complete.
Adjust Performance Options
Sometimes, setting the system for best performance can disable the preview features.
- Press Windows key + S and type ‘Adjust the appearance and performance of Windows’.
- Click on the result and then go to the ‘Visual Effects’ tab.
- Select ‘Adjust for best appearance’ or manually check the box for ‘Show thumbnails instead of icons’.
- Click ‘Apply’ and then ‘OK’.
Adjusting these settings can enhance visual effects, including the Preview Pane, but may cause a slight slowdown on older PCs due to increased graphical demands.
Clear Thumbnails Cache
The thumbnail cache might become corrupt, causing issues with the preview. Clearing the cache can help resolve this.
- Type ‘Disk Cleanup’ in the Windows search bar and open it.
- Select your system drive (usually C:) and click ‘OK’.
- Check ‘Thumbnails’ and click ‘OK’, then ‘Delete Files’.
This process frees up space and can often restore functionality to the Preview Pane, with no real downside beyond the time it takes to rebuild the cache as you use your files.
Repair Microsoft Office Files
If you’re trying to preview Microsoft Office documents, repairing the Office suite may resolve your issues.
- Go to Control Panel and select ‘Programs and Features’.
- Find Microsoft Office, right-click it, and select ‘Change’.
- Choose ‘Quick Repair’ and click ‘Repair’.
This process can resolve issues with Office file previews and is a standard maintenance procedure, though it can take some time if a full repair is needed.
Check if the File Format is Supported
Ensure that the file you’re trying to preview is in a format that Windows 10 supports for preview.
- Search online for ‘Windows 10 supported preview file formats’ to check if your file type is listed.
- If your file type isn’t supported, consider converting it to a supported format or using a third-party preview handler.
While changing formats can be a straightforward solution, keep in mind that converting files could result in a loss of quality or data.
Utilize File Preview Enhancements Tools
Third-party tools can extend the range of file types that can be previewed.
- Search for reputable third-party preview tools online.
- Download and install the tool, then follow the instructions provided by the software to set it up.
While these tools can provide expanded functionality, they can also pose security risks if not sourced from a trustworthy provider.
Disable and Re-enable the Preview Pane
Sometimes, toggling the feature off and on can reset its functionality.
- In File Explorer, go to the ‘View’ tab and click on ‘Preview Pane’ to turn it off.
- Wait a few moments, then click on it again to re-enable it.
This simple step can fix temporary issues with the Preview Pane, allowing it to function properly without any significant downsides.
Given these solutions, you’re now equipped with the knowledge to troubleshoot the Preview Pane feature in Windows 10. Whether it’s a simple tweak or a more complex approach, one of these methods is likely to restore your Preview Pane, enhancing your productivity and ease of access to your files.
In conclusion, the Preview Pane in Windows 10 is a convenient tool for quickly viewing file contents, but when it stops working, it can be frustrating. The troubleshooting steps outlined above are designed to help even those with limited technical knowledge to resolve common issues related to the Preview Pane. By following the provided instructions, the functionality of the Preview Pane should be restored, allowing for seamless file management.
FAQs:
-
What is the Preview Pane in Windows 10?
The Preview Pane in Windows 10 is a feature in File Explorer that allows users to see the contents of a selected file without opening it fully. -
Why might the Preview Pane not work correctly in Windows 10?
There could be various reasons, including settings that need to be adjusted, outdated or corrupt drivers, system file problems, or the cache may need to be cleared. -
Is it safe to use third-party tools to enhance file preview capabilities?
Yes, it can be safe as long as the tools are from reliable sources and have been properly vetted for security and compatibility. Always ensure you’re downloading from the official website or a reputable software provider.