For most of us, we can take a great many photos. These photos are taken at various locations or surroundings such as outdoors or indoors that too within various lighting conditions such as in presence of sunlight, studio lights, or with various other light sources.
Also, if there is a presence of glass as well, then the reflections of light could also take place. This will result in glare over the object in our photos.
In some cases, these things cannot be avoided in practice. But no worries there are various free apps and software which you can use to get rid of the glare from your photos. Throughout this article, we will see various ways which could allow you to easily and effectively remove the glare from the photos for free.
Solution 1: Remove Glare from Photo (Mac & Windows | Easiest Way)
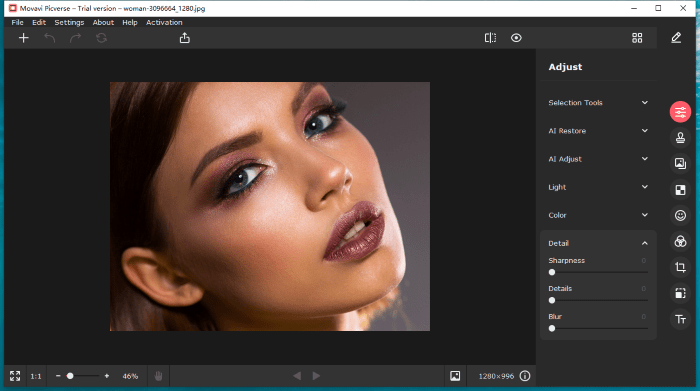
If you are looking for an efficient and easy way to remove glare from your photos, then you must try Movavi Picverse. It does not require professional skills like Photoshop, you only need a few clicks and can easily remove the glare from your photos.
It uses the latest artificial intelligence recognition technology, which can automatically detect the content of the photo and perfect it, and you can enhance the photo in a few seconds!
Here is how to remove glare from photo with clicks.
1. Grab a free copy of Movavi Picverse, then install and run the app on your computer.
2. Click File menu to add photos or just drag and drop the photo to Picverse.
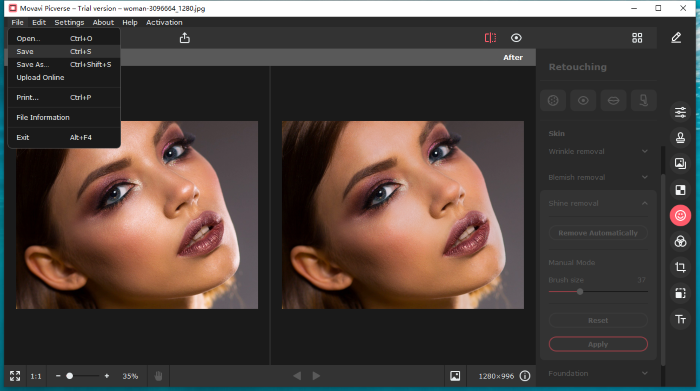
3.Head to Retouching>Skin>Shine Removal, you can choose to remove automatically.
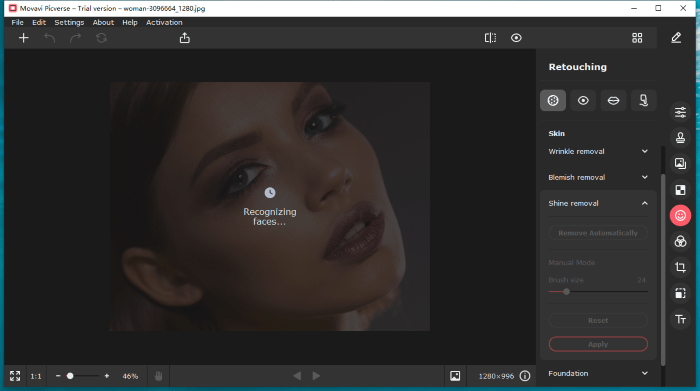
4. Or you can remove glare manually by brushing over the part where you want to remove glare.
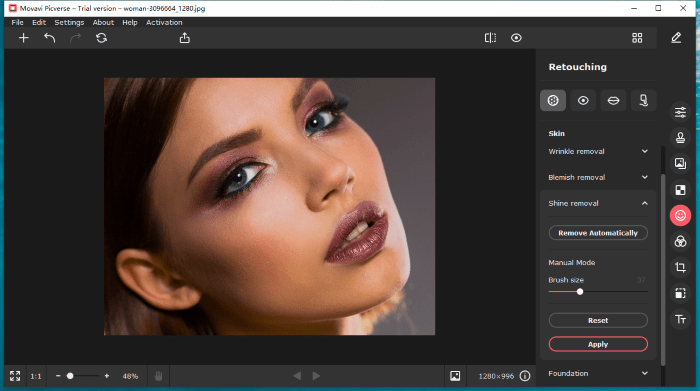
5. Check the result, then go to File>Save.
Solution 2: Remove glare from the photo using Photoworks
Photoworks is a free photo editing software for Windows operating system. It comes with various top-notch tools and features that allow users to edit their photos easily in less time.
Photoworks features include:
- Skin Retouch
- Convenient crop with crop presets
- Magical Brushes
- Provides the ability to add captions & watermarks to your photos
- Instant enhancement – Edit photos easily with fewer clicks
- Sharpen photo – Enhance the quality of the photos
- Batch Processing – Capable of editing multiple photos at once
- Supports image overlays and much more.
Let’s see step by step how to remove the glare from the photo using the Photoworks software.
- The first thing which you need to do is to download the PhotoWorks software from their official site.
- After downloading the software, open the software and choose the image from which the glare needs to be removed, by clicking the green “Open Photo” button.
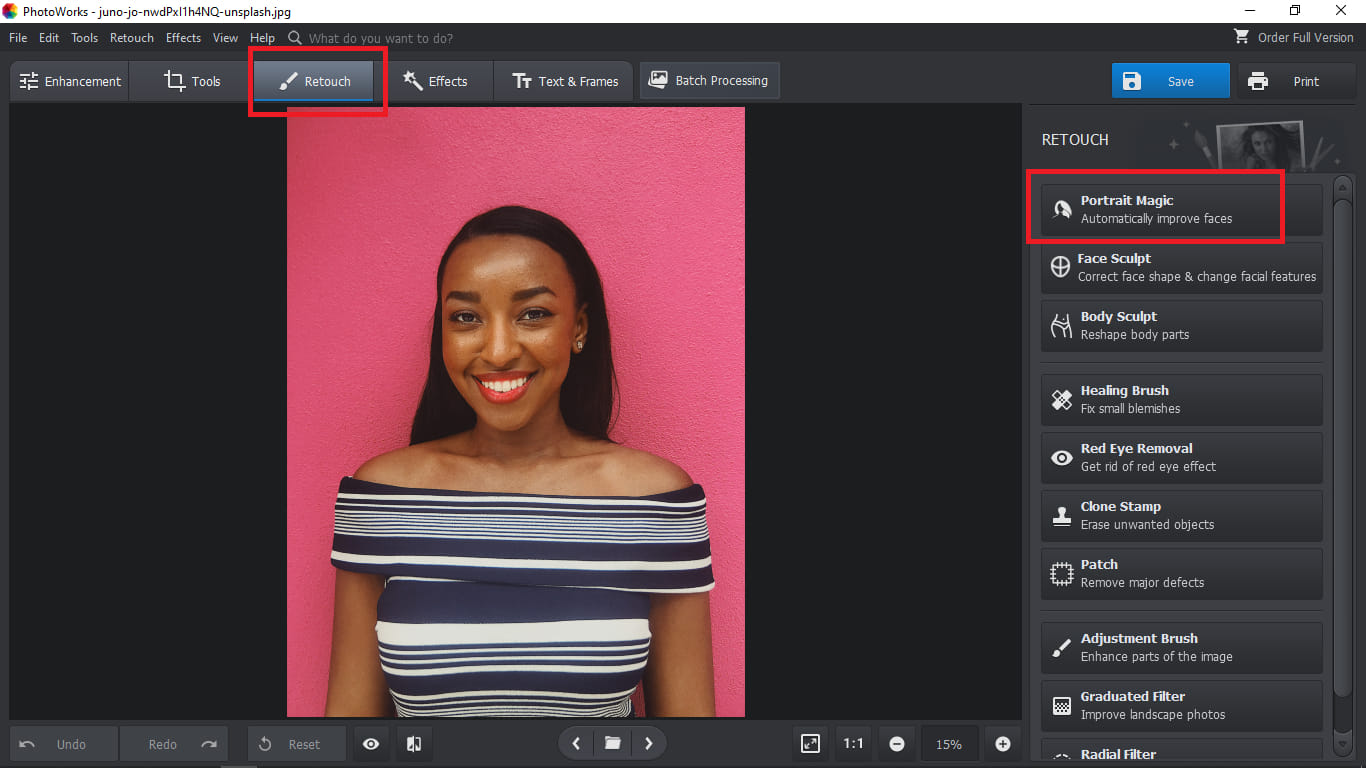
- Now the selected image will be shown on the screen. Then click the “Retouch” button which is present at the top, above the image. Now a list of options will be shown on the right side of the screen. Out of these options, select the first option “Portrait Magic”.
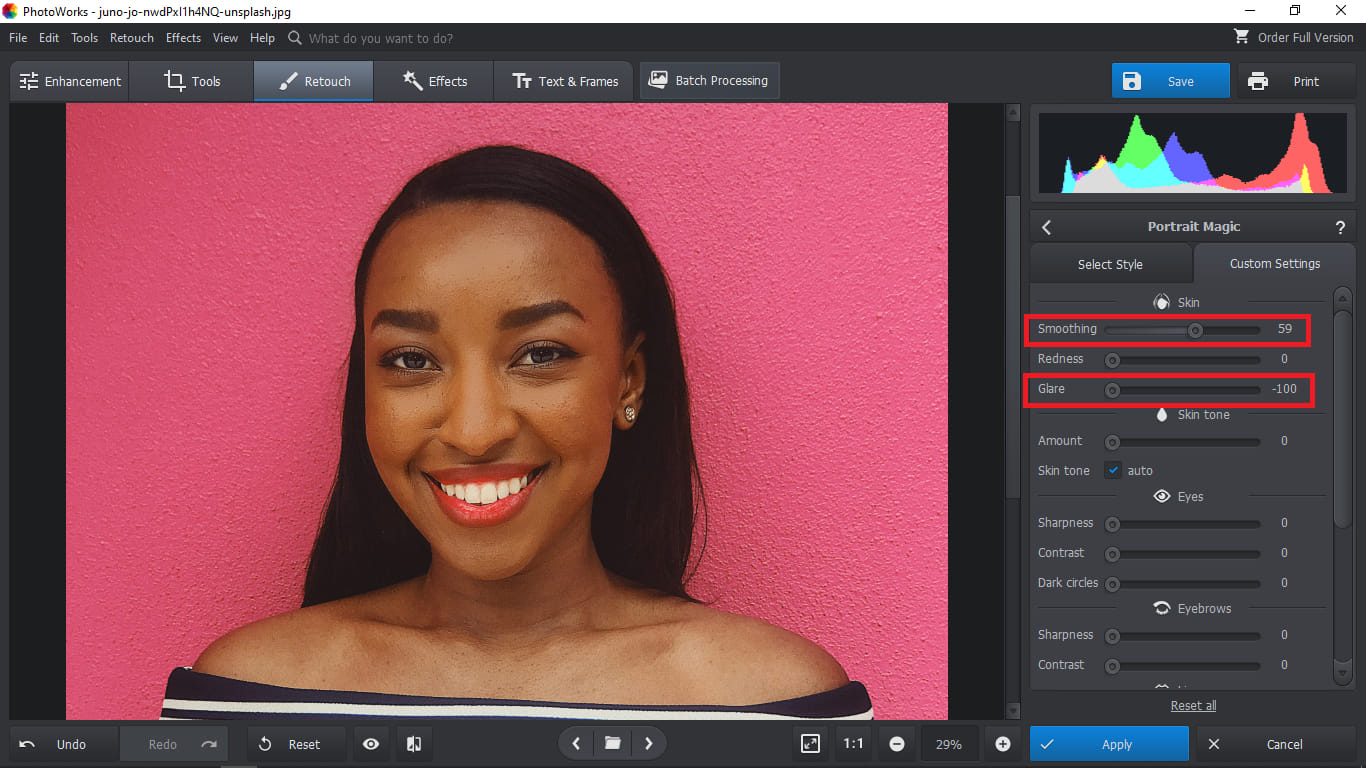
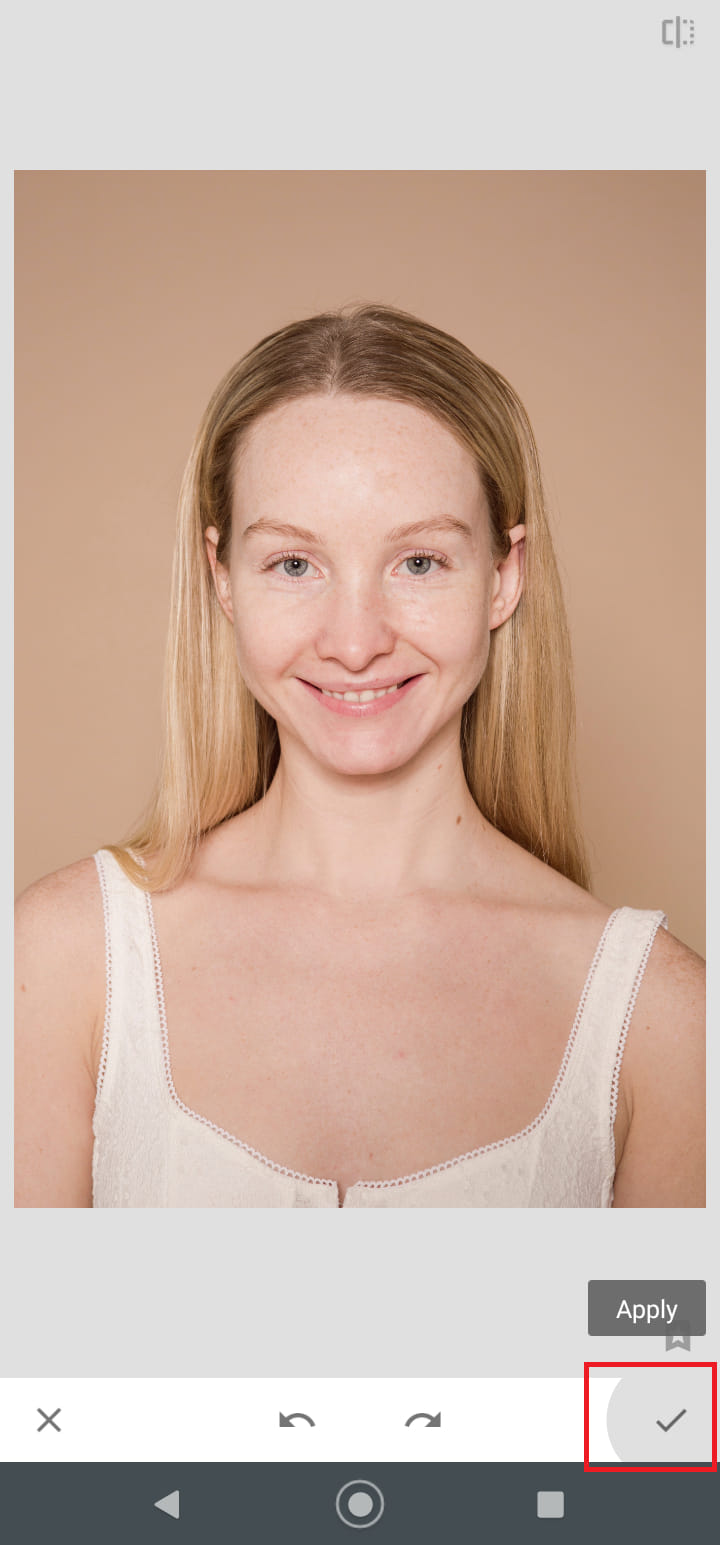
- Click on the “Custom Settings” button and then under “Skin” you have to adjust the “Smoothing” and “glare” properties. Make “glare” to -100 so that all the glare could be removed from the image. Then increase the “Smoothing” slider a bit according to your requirement to make the glare area smoother.
- After modifying, if you are happy with the final results then click on the blue “Apply” button present at the bottom of the screen. Lastly, to save the edited image to your computer system, you can click on the “Save” button at the top.

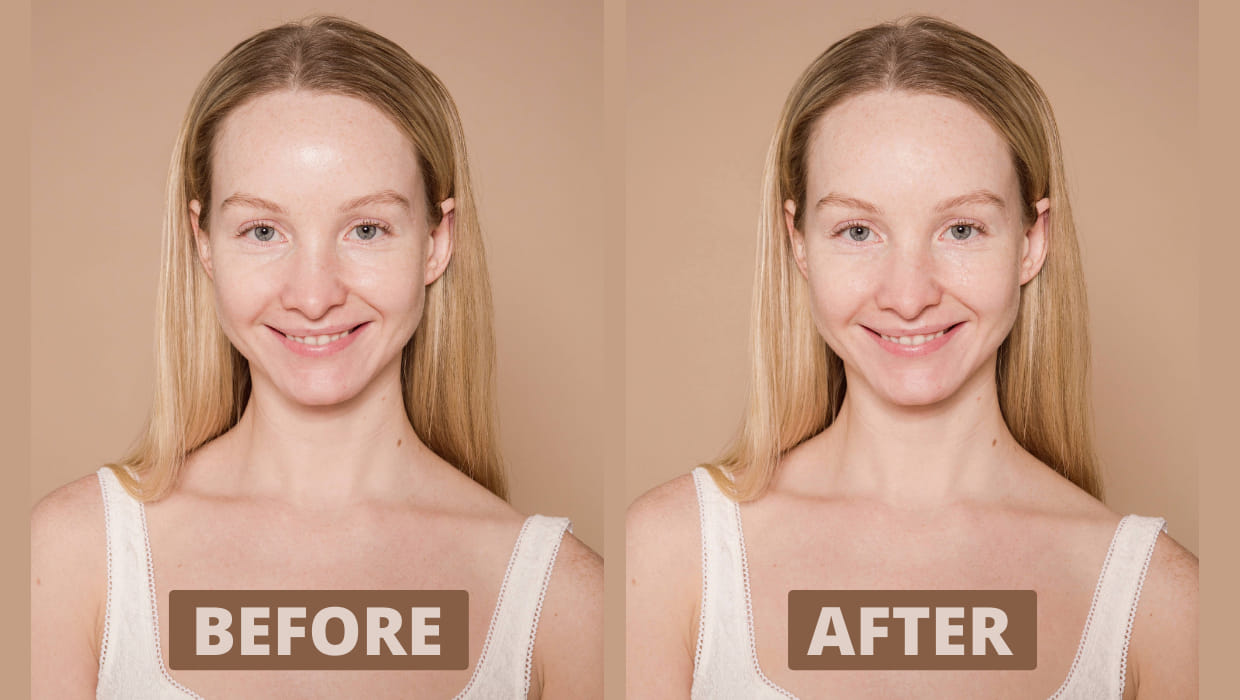
The below image shows the difference in the image, before and after removing the glare. The results are quite impressive.

Solution 3: Removing glare from an image using Snapseed mobile app
Snapseed is a great app for editing photos on our mobile devices. It has been developed by Google and is currently supported on both Android as well as on iOS platforms.
Snapseed comes with various features such as:
- Face Enhance
- RAW Develop feature that allows users to edit the RAW DNG files and save them in jpg format.
- Glamour Glow
- White Balance – allows adjusting colors inside the photos
- Tonal contrast
- HDR scape – for multiple exposures.
- Lens Blur
- Additional filters: Drama, Grunge, Grainy Film, Vintage, Retrolux, Noir, Black, and White
- Download the Snapseed app from the Google Play Store or Apple app store and then open the application.
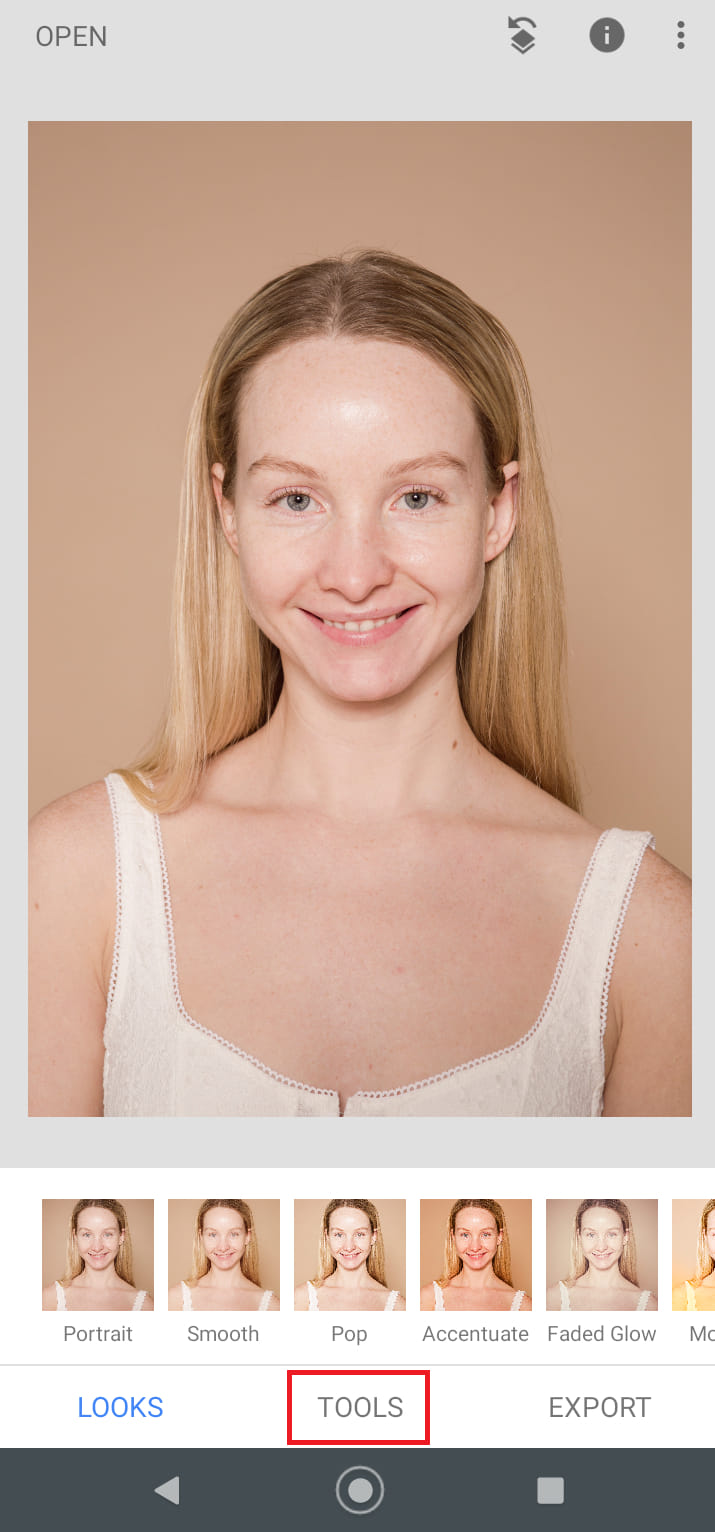
- After the app is open, you will see a “+” icon on the screen. Tap the “+” icon and then select the image from which you want to remove the glare. This will show the image on the screen as shown below.

- Now from the bottom navigation select the “Tools” options.
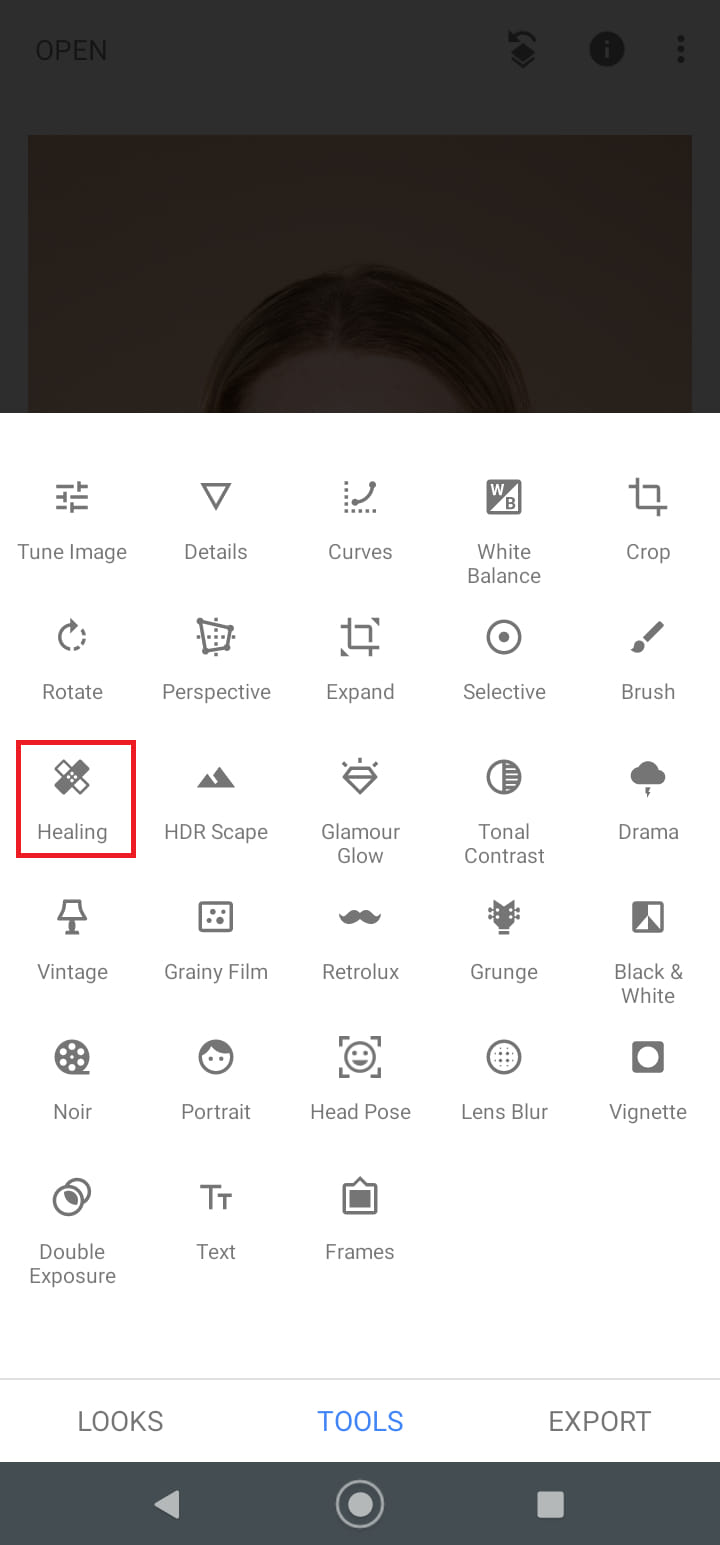
- This will open a panel that will consist of various tools. Since we want to remove the glare from the image, out of these tools, we will select the “Healing Tool”.
- To remove the glare, zoom over to the area where there is a glare with the help of your two fingers. And then move your single finger over the glare area. The movement of your finger and the area which is selected will be highlighted in red color. Try to perform this process multiple times on the glaring part till the glare is completely removed from the photo.
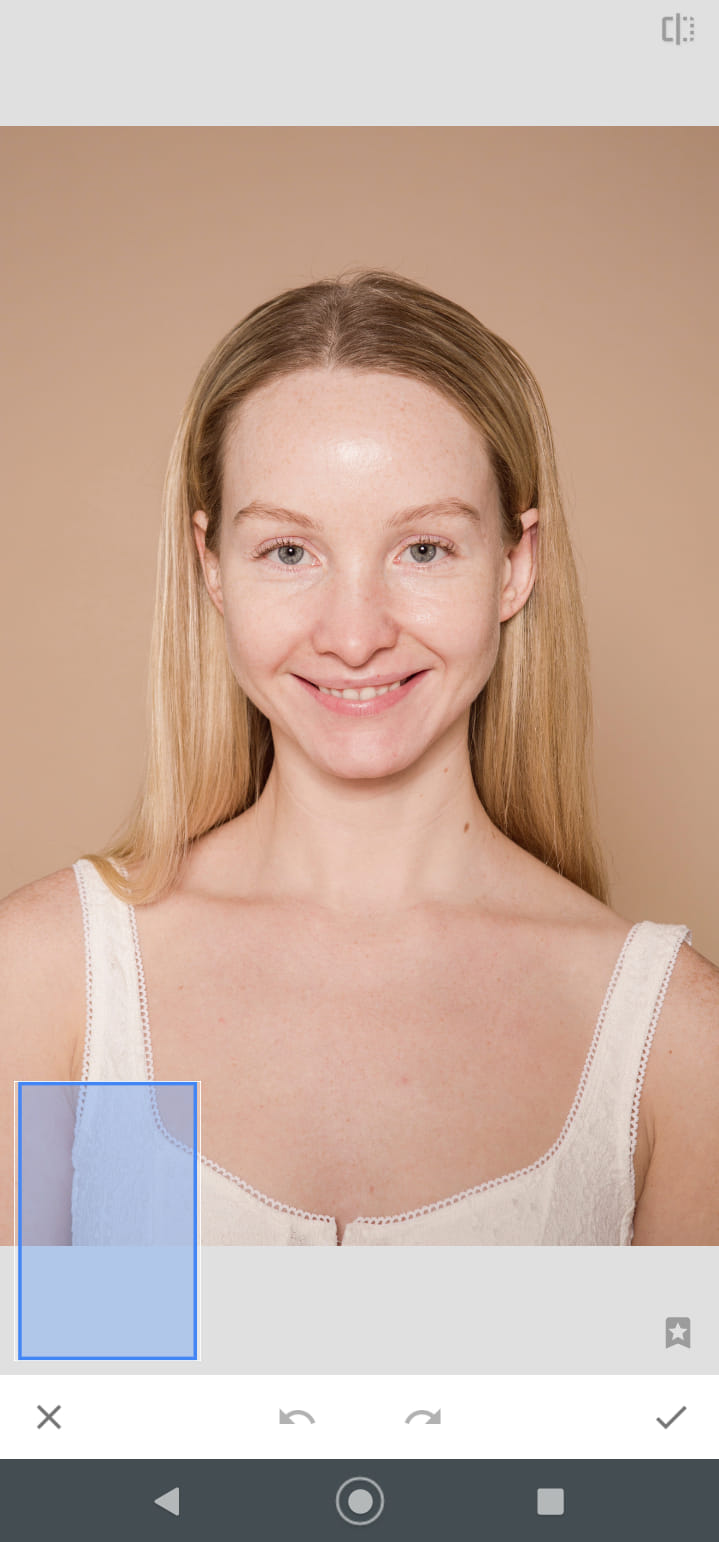
- After you are satisfied with the results of the healing tool, click on the correct sign present at the bottom-right corner of the screen to apply the changes which you have made to the image.
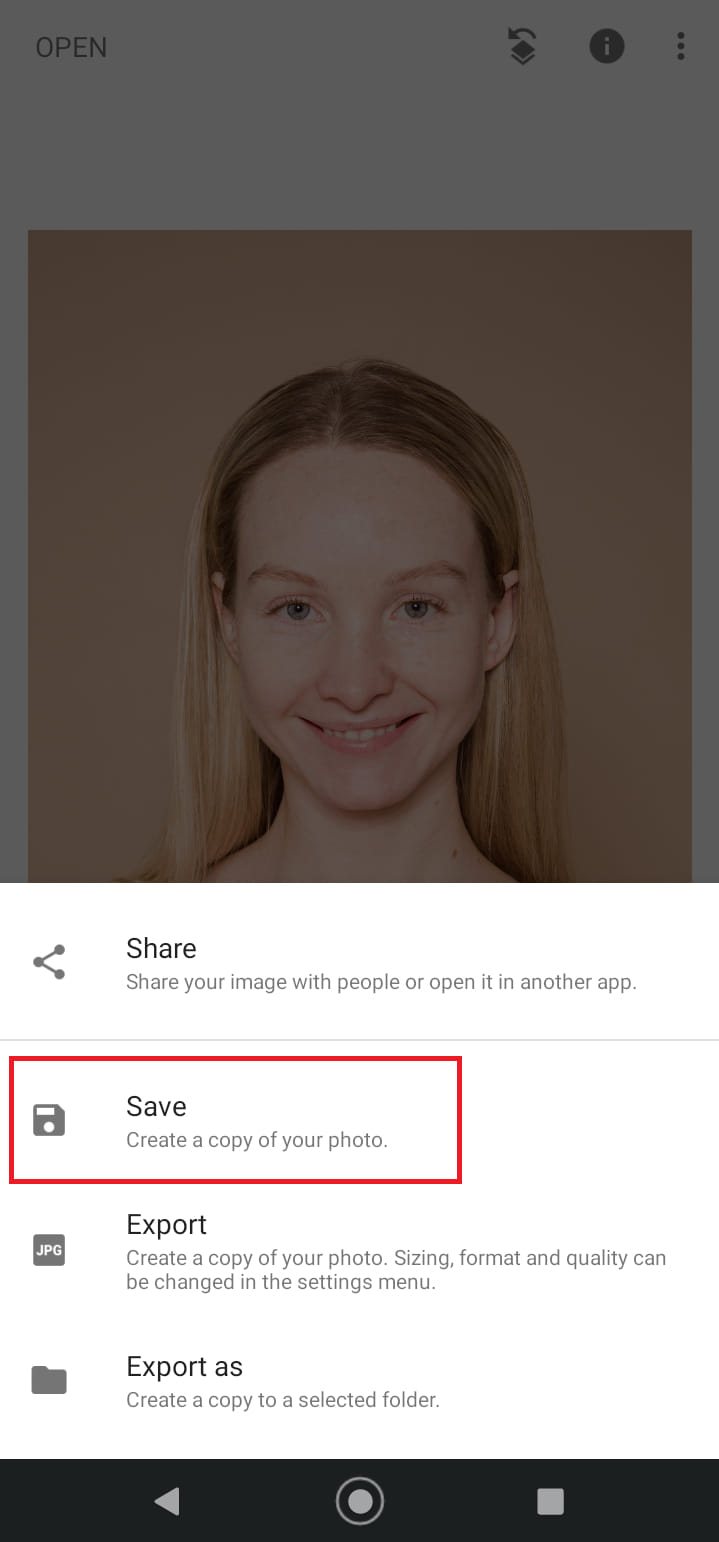
- To save the image to your gallery, press the “Export” option from the bottom navigation. And then click on “Save” to save the image locally.
Finally, we have removed the glare from our image. The image below shows the comparison between the photo with the glare and the photo after the glare has been removed.
Solution 4: Remove the glare from the image using GIMP software (Free)
The GIMP is a full-fledged photo editing software similar to Photoshop which is free and open source. The GIMP software is a cross-platform photo editing software for Windows, Mac, and Linux.
It can be used for raster graphics editor used for image manipulation and image editing, transcoding between various image file formats, free-form drawing, and more specialized tasks.
GIMP software provides the following features:
- High-Quality Photo Manipulation – It provides tools for high-quality photo manipulation
- For producing Graphic Design Elements – Icons, mockups, design elements, and user interface components
- Original Artwork Creation – Transform the image into unique characters
- Programming Algorithms – For scripted image manipulation
Let’s use the GIMP software to remove the glare from the photo.
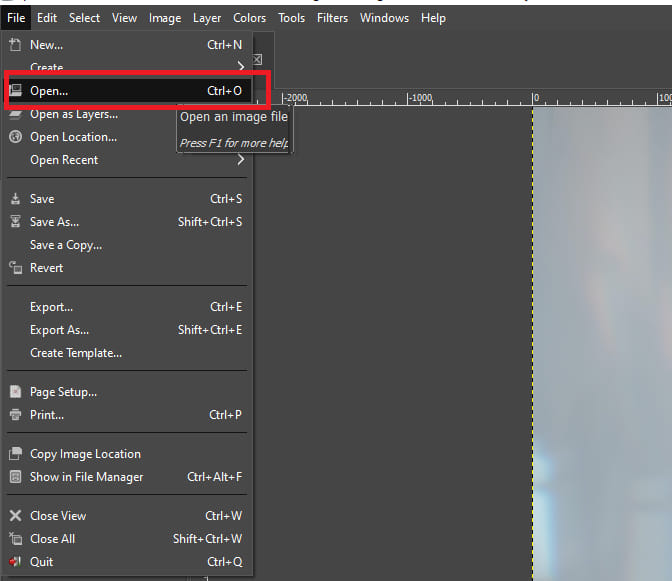
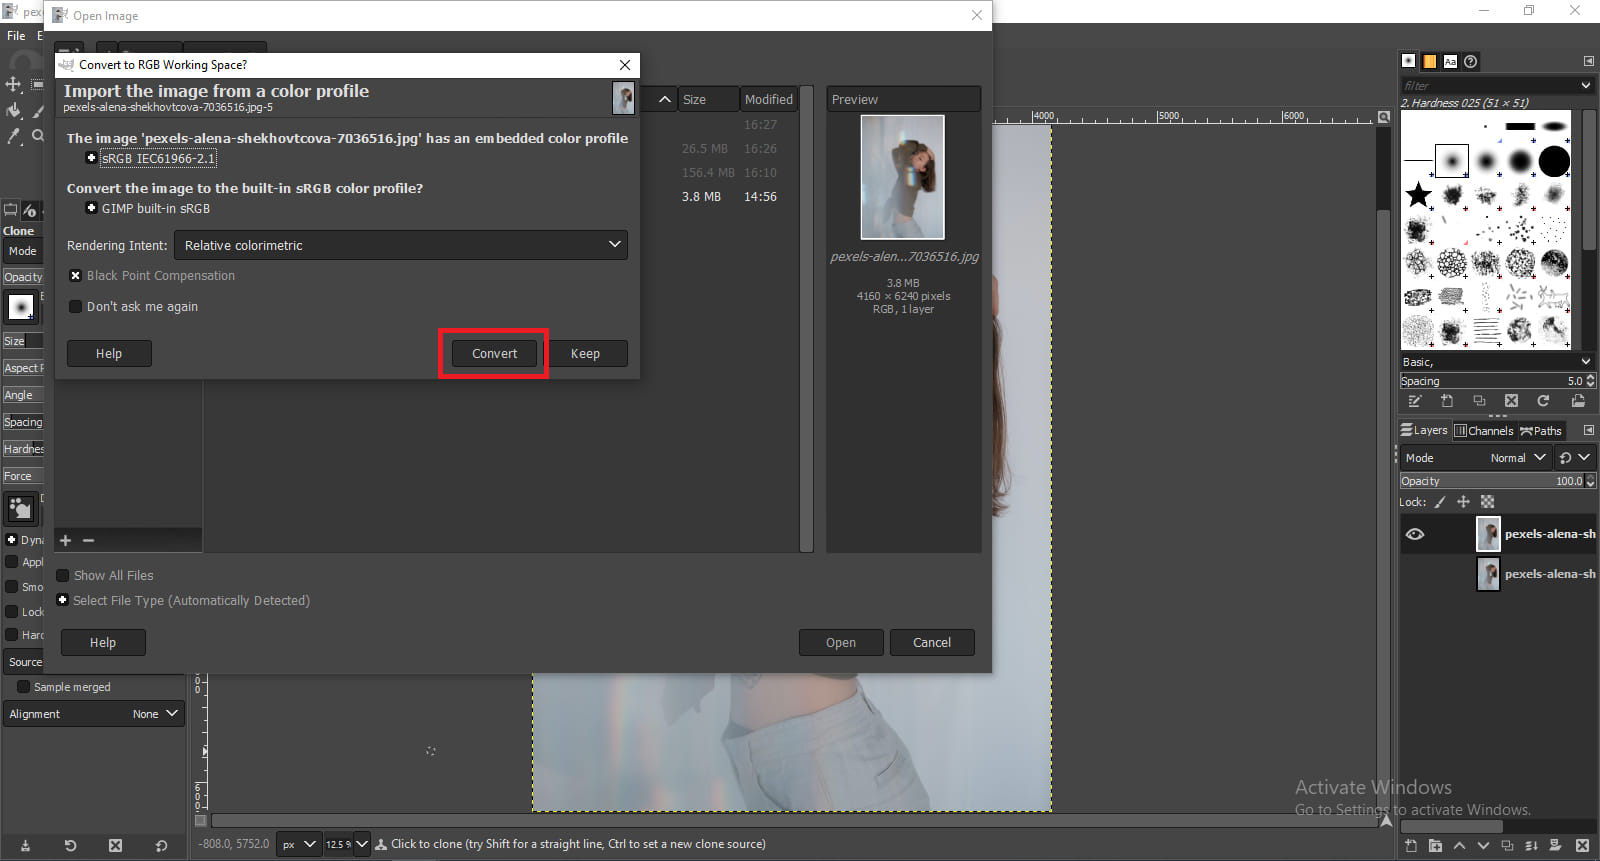
- Download the installer of the GIMP software and install it. After opening the software, click on the “File” present at the top-left corner of the screen. Then choose “Open” from the drop-down list and select the photo which you want to edit as shown below.
- If the software detects or finds any image profiles on the photo which you are trying to open then it will ask you whether you want to convert the image to a built-in sRGB color profile or to load the image as it is without converting the image.
In this case, we will click on the “Convert” button to convert the image into an sRGB color profile. If you want to keep the image as it is then just click the “Keep” button.
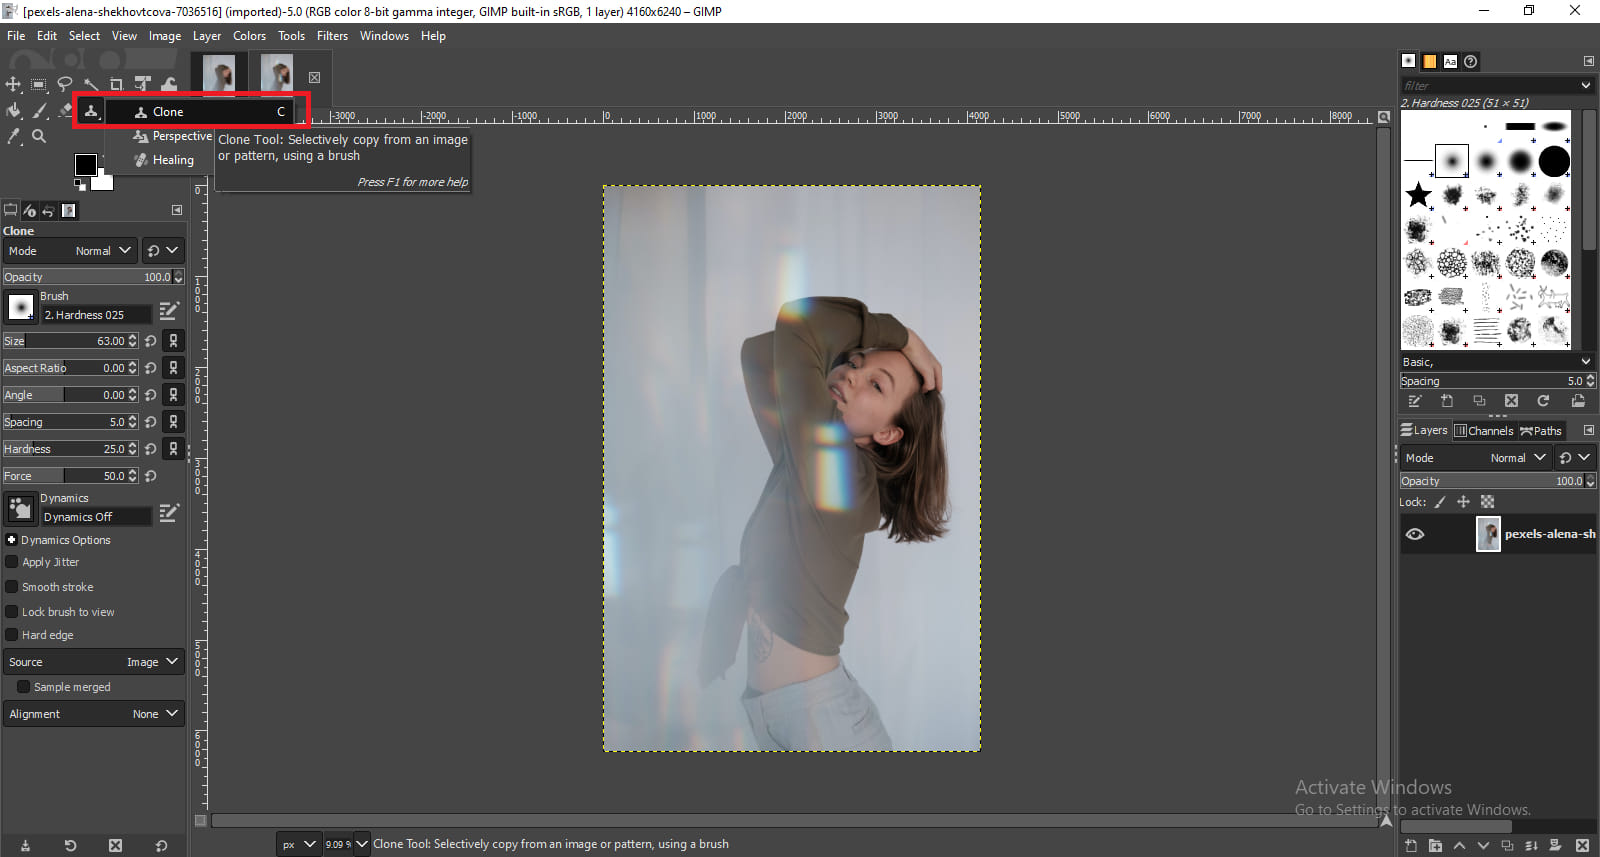
- Now that we have imported the image, we can now edit the image and remove the glare from it. To do this, we have to first select the “Clone” tool from the tools panel.
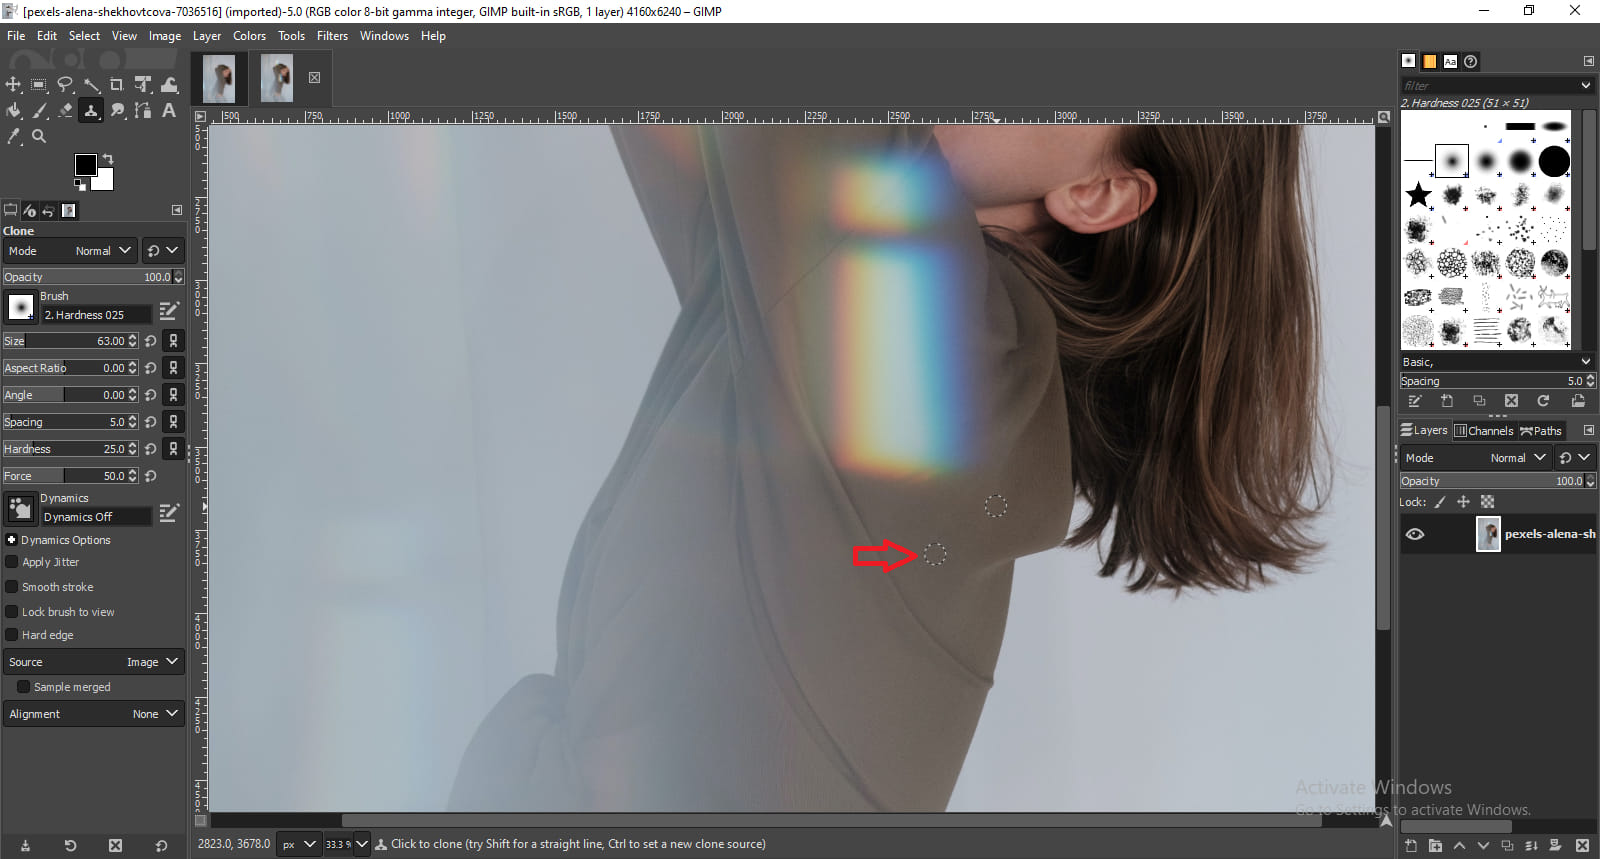
- To remove the glare you have to perform two things.
First, select some area from the image which you think could be a good replacement for the glare area by holding “Ctr” on the keyboard and clicking it with the right mouse click button. In this case, we have selected the greenish cloth area (highlighted by the red arrow) which could be a good replacement for the glare, since the glare is present over the cloth.
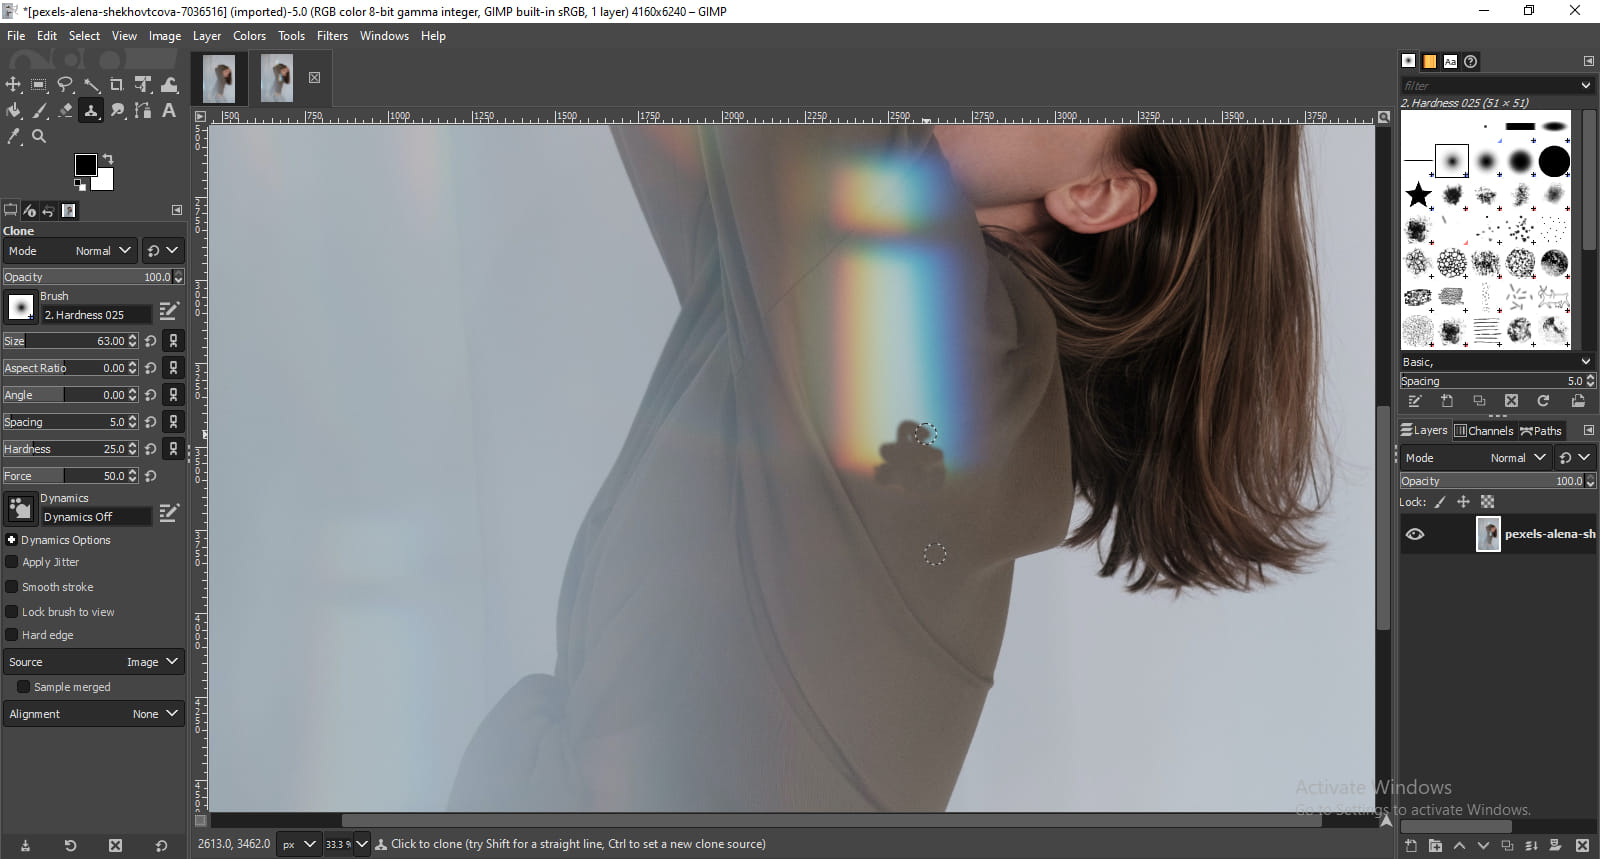
Secondly, we then have to click the glaring part with the right mouse button. This will start to replace the glare with the area which you have selected as shown below.
Try following this 4th step many times till the glare is completely removed from the photo.
- Finally, after you have completely removed the glare from the image and are satisfied with the results, then click on “File” and choose the “Export As” option from the drop-down list to export the photo.
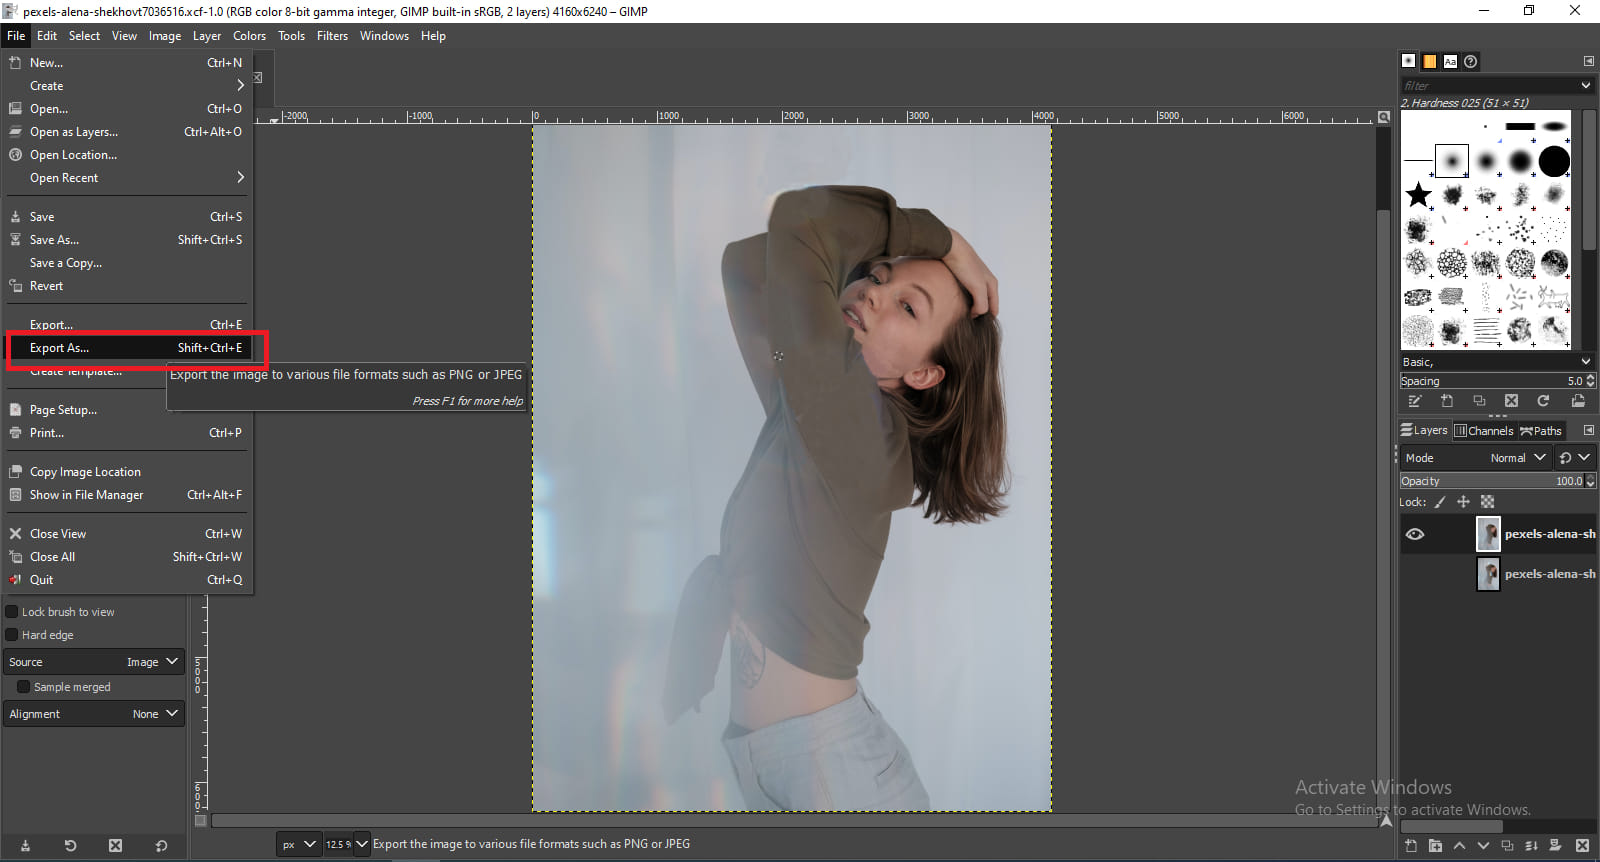
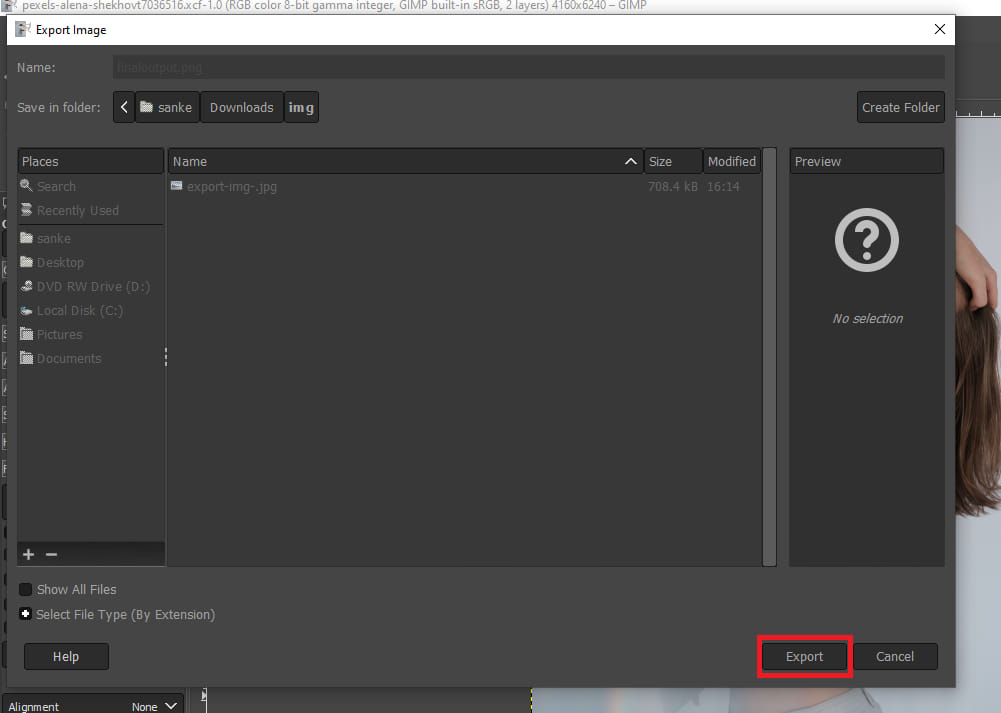
- Here, it will show you a pop-up window where it will ask you to give a name to the photo that you are exporting and to choose the destination folder for saving the photo. After doing so click on the “Export” button.
- Now it will show you another window with some export settings. We will keep the below settings as it is and then we will click the “Export” button. If you choose to tweak those settings you can surely do so.
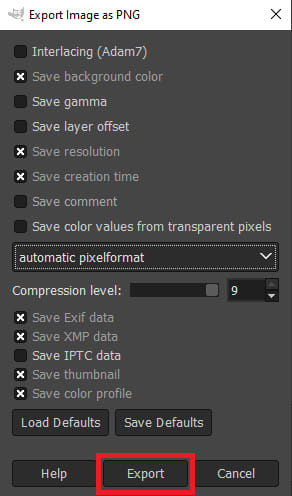
The export process will take some time to complete. Till then don’t close the export window, it will automatically be closed after the image is successfully exported.
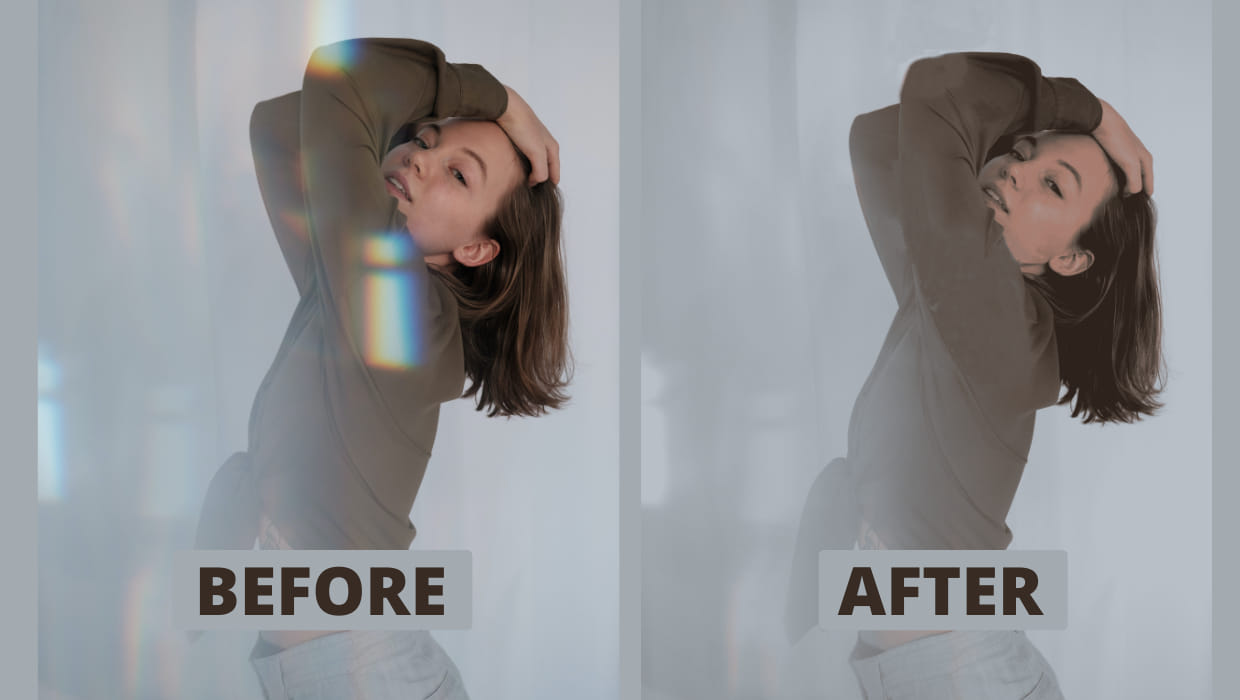
This is how the difference will look like before and after removing the glare from the image for free.
Conclusion
Images can be taken at various locations and with various devices. This could eventually cause glare over the photos and it’s quite common. There are various free software’s available like Photoworks, Snapseed, and GIMP which can make our life much easier when it comes to photo editing. This software can remove the glare completely from the image in less time and too for free.