Welcome to our easy-to-follow guide on how to remotely turn off your Wi-Fi router. Whether you’re away from home and need to save power, or you simply want to manage your network’s accessibility, mastering the control of your router from afar can be incredibly useful. In the next few steps, we’ll walk you through the process, ensuring that you can securely and efficiently control your Wi-Fi without being physically present. No technical jargon, no confusion—just a straightforward procedure to give you peace of mind and control at your fingertips.
Solution 1: Using the Router’s Web Interface
Introduction
Turning off your Wi-Fi router using its web interface is a common method that gives you control over your router’s settings from any device that has a web browser. This approach works by accessing the router’s built-in settings page, which is accessible via its IP address. It’s a secure method because you typically need to enter a username and password to access these settings. By logging into the web interface, you can manage not only the wireless functions but also a wide array of other options including security features, network configuration, parental controls, and many more.
Steps
- Connect to Your Network: Ensure your device is connected to the network of the router you wish to turn off remotely.
- Find Your Router’s IP Address: If you don’t know it, you can often find the default IP address printed on a label on your router or in the router’s manual. Common default IP addresses include
192.168.1.1,192.168.0.1, or10.0.0.1. - Access the Router’s Web Interface:
- Open a web browser on your connected device.
- Enter the router’s IP address into the address bar and press enter.
- You should now be presented with a login page.
- Log In to Your Router: Enter the username and password for your router. If you haven’t changed it, this information might be found in the router’s manual or online. Remember that keeping the default login credentials can be a security risk, so it’s recommended to change them if you haven’t done so already.
- Navigate to Wireless Settings: Once logged in, look for a section labeled ‘Wireless’, ‘Wireless Settings’, ‘Wi-Fi’, or something similar.
- Disable the Wireless Function: Inside the wireless settings, there should be an option like ‘Enable Wireless’ or ‘Turn on Wi-Fi’. Uncheck, toggle off, or select ‘Disable’ for that setting.
- Save Your Settings: Look for a ‘Save’, ‘Apply’, or ‘OK’ button to save the changes. The router may need a few moments to process the change, and you may be disconnected from your Wi-Fi network as a result.
- Log Out of the Router: For security reasons, be sure to log out of your router’s settings page once you’ve made the necessary changes.
Summary
The benefits of using the router’s web interface include a high level of control over your router’s settings and the ability to modify other aspects of your network. You don’t need any additional software or tools besides a web browser. However, there are potential downsides, such as the need to be connected to the network initially, the requirement to remember the router’s IP address and login credentials, and the process could be slightly technical for someone without prior experience. Furthermore, if you disable Wi-Fi remotely and you’re not physically near the router, you will need another means of connecting to re-enable it, such as a wired (Ethernet) connection.
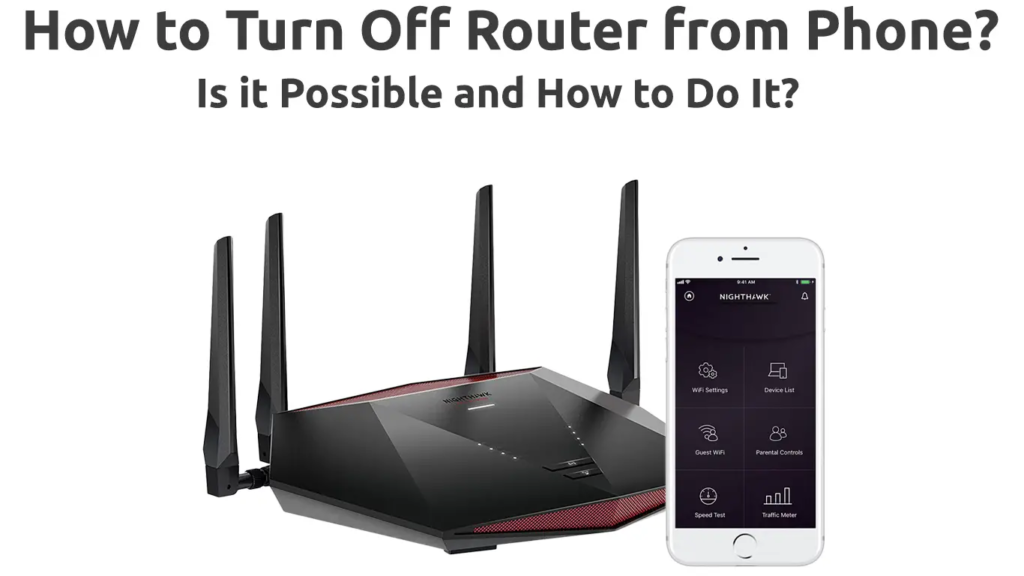
Solution 2: Mobile App Control
Introduction
In the age of convenience where smart technology is pervasive, managing your home Wi-Fi remotely has become an accessible feature for most users. The “Mobile App Control” method is particularly user-friendly, connecting you to your Wi-Fi router through an application on your smartphone or tablet. This solution is ideal for those with modern router models that support mobile app integration. Using these dedicated apps, you can manage network settings, including turning off your Wi-Fi, from virtually anywhere with internet access. This functionality not only adds a layer of convenience but also enhances the control you have over your home network’s security and accessibility.
Steps
Here’s how to turn off your Wi-Fi router using a mobile app:
- Identify Your Router’s Companion App:
- Check the documentation that came with your router or search online for the manufacturer’s mobile app.
- Compatibility information is usually available on the router manufacturer’s website.
- Download and Install the App:
- Go to the App Store (for iOS devices) or Google Play Store (for Android devices).
- Type the name of your router’s app in the search bar and download the appropriate application.
- Create an Account or Log In:
- Open the app after installation.
- You might need to sign up for an account using your email address, or log in if you already have an account.
- Some apps may require verification through a code sent to your email or phone number.
- Connect to Your Router:
- The app will typically guide you through the process of connecting to your router.
- This may involve scanning a QR code on your router or manually entering details such as the model, serial number, or a default password.
- Navigate the App:
- Familiarize yourself with the app’s interface.
- Look for sections labeled “Wi-Fi Settings,” “Network Management,” or similar terms.
- Toggle Your Wi-Fi:
- Within the app, find the option to turn the Wi-Fi off. This might be a simple on/off switch or toggle.
- Confirm your action, if prompted, to turn off the Wi-Fi.
- Verify Wi-Fi Shutdown:
- Check that the Wi-Fi indicator light on your router (if available) is off.
- Alternatively, try to use a device that was connected to the Wi-Fi network to ensure it can no longer connect.
Summary
The benefit of using a mobile app to control your router is the ease and convenience it provides. You have the flexibility to manage your network settings anytime and anywhere, making it perfect for addressing immediate concerns like unauthorized access or simply turning off your router when it’s not in use to save energy. It also eliminates the need for complex setup procedures or technical know-how.
A potential downside is the requirement of the initial setup, which might involve account creation and verification. Additionally, not all routers support mobile app control, which could limit the utility of this solution for some users. It’s also worth noting that internet connectivity is a must for the remote control to function. Lastly, keeping your app and router firmware updated is crucial for maintaining security and functionality, which could be an extra task for non-technical users to remember.
Solution 3: Smart Plugs
Introduction
Smart Plugs are a fantastic, user-friendly technology that can convert ordinary appliances into smart home devices. By utilizing these innovative gadgets, you can easily gain remote control over any device that plugs into a standard electrical outlet—including your Wi-Fi router. This is an ideal way to manage your home network, especially if you want to simplify turning off your router without needing to physically interact with it or navigate technical settings. With the installation of a smart plug, you can manage the power supply to your router via a smartphone app, offering both convenience and control whether you’re at home or away.
Steps
- Choose a Smart Plug: Start by selecting a smart plug that is compatible with your smartphone (iOS or Android) and if preferred, integrates with your existing smart home ecosystem (such as Amazon Alexa, Google Assistant, or Apple HomeKit).
- Install the Smart Plug App: Download and install the app for your chosen smart plug from the App Store (for iPhone/iPad) or Google Play Store (for Android devices). Follow the on-screen instructions to create an account if needed.
- Set Up the Smart Plug: Plug the smart plug into an electrical outlet and then plug your router’s power adapter into the smart plug. Power on the smart plug using its physical button (if available) and make sure your phone is connected to the same Wi-Fi network that your router provides.
- Connect the Smart Plug to Wi-Fi: Open the smart plug’s app on your smartphone, and you’ll typically be prompted to add a new device. The app should guide you through the process of connecting the smart plug to your Wi-Fi network.
- Name Your Smart Plug: After setting up the connection, give your smart plug a clear name in the app, such as “Wi-Fi Router” to easily recognize it among other smart plugs.
- Control the Power Remotely: With the setup complete, you can now use the app to turn the power to your router on or off with a simple tap, from anywhere as long as your smartphone has an internet connection.
- Automate the Process: Most smart plug apps offer the ability to schedule when the plug turns on or off automatically. This feature can be used to set specific times for when to disable and enable your router daily.
Summary
The smart plug solution offers a straightforward and accessible method to remotely control the power supply to your Wi-Fi router. It is particularly beneficial for those not comfortable with tinkering with router settings or using more technical methods. The vast majority can handle setting up a smart plug using the associated app without any hassle.
Benefits include easy setup, remote access, the ability to set schedules, and you can expand the convenience to other devices as well. On the downside, if your Wi-Fi is off, and the smart plug relies on a Wi-Fi connection, you won’t be able to use the smart plug to turn the router back on remotely until you have another form of internet access. Additionally, if there’s a power outage or the smart plug malfunctions, your ability to control the router will be affected. Despite these points, the simplicity and versatility of using a smart plug make it a valuable tool for remotely managing your Wi-Fi router.
Solution 4: Voice Assistants
The elegance of modern technology often lies in its simplicity and the ability to integrate devices for seamless user experiences. One of the remarkable conveniences provided by today’s smart home ecosystem is the capacity to control your Wi-Fi router using voice commands through voice assistants such as Amazon Alexa or Google Home. This method is certainly non-technical user-friendly and can be incredibly useful for when you’re away from home but need to manage your Wi-Fi settings.
Voice assistants work by listening for specific voice commands and then executing actions based on those commands. When you have a smart Wi-Fi router that is compatible with a voice assistant, you can set up voice controls to manage your Wi-Fi connection, including turning it off when necessary. This can be particularly valuable for managing screen time, conserving energy, or securing your network when it is not in use.
- Confirm Compatibility:
- Ensure that both your router and voice assistant device (like Amazon Echo or Google Home) are compatible and support the functionality to control your Wi-Fi through voice commands.
- Set Up Your Voice Assistant Device:
- If you haven’t already, plug in and set up your voice assistant device following the manufacturer’s instructions. This typically includes downloading the companion app on your smartphone.
- Connect Your Router to Your Voice Assistant:
- Open the voice assistant’s app on your smartphone.
- Look for a section like ‘Skills’ or ‘Home Control’.
- Search for your router’s manufacturer or dedicated skill and enable it.
- Follow the on-app instructions to link your router account to the voice assistant.
- Learn the Specific Commands:
- Refer to the user manual or online resource provided by your router’s manufacturer to learn the specific voice commands that the assistant can recognize to control your Wi-Fi.
- Initiate the Command:
- Use the wake word for your voice assistant, then follow with the command to turn off your Wi-Fi. For example, you might say, “Alexa, turn off the Wi-Fi,” or “Hey Google, disable my internet.”
- Confirm the Action:
- Your voice assistant should respond, confirming that the action has been completed. You can double-check using a device that was connected to the Wi-Fi to ensure the signal is indeed off.
Utilizing voice assistants to manage your Wi-Fi router remotely offers convenience and accessibility, making it an excellent solution for those who prefer quick and straightforward commands over navigating through complex menus. It’s particularly beneficial for non-technical users, as it communicates through natural language and doesn’t require any knowledge of networking concepts.
On the flip side, potential downsides include security concerns, as it’s important to ensure that your voice assistant is set up to prevent unauthorized access. Additionally, this solution requires investing in compatible hardware and a certain degree of initial setup and familiarization with voice commands.
Overall, controlling your Wi-Fi with a voice assistant can streamline your digital life and provide a touch of modernity to your daily routine. With privacy and security precautions in place, it can be a safe and efficient way to manage your home network without having to dive into the technical details.
Solution 5: Home Automation Systems
Introduction:
In the context of everyday life, convenience and efficiency are paramount. One of the cutting-edge ways of achieving this within your domestic environment is through the integration of smart home automation systems. These systems enable you to manage various aspects of your home, including appliances, lighting, security, and yes, your Wi-Fi router. Think of a home automation system as a central intelligence that can orchestrate various devices in your home based on specific triggers or schedules you set. This can effectively streamline your life and bring modern sophistication right to your fingertips.
Now, let’s focus on how a home automation system could be used to turn off your Wi-Fi router remotely. It’s important to understand that this method requires your router to be compatible with smart home devices or have the ability to connect to a smart outlet that is connected to your home automation system.
Steps:
- Compatibility Check: Ensure that your Wi-Fi router is compatible with the home automation system you intend to use, such as IFTTT, SmartThings, or any other popular platform.
- Integration: If your router is not inherently compatible or does not have built-in smart capabilities, connect it to a smart plug that is compatible with your chosen home automation system.
- Setup the Smart Plug: Install the smart plug by plugging it into a power outlet and then plugging your Wi-Fi router into the smart plug. Follow the instructions provided by the smart plug manufacturer to connect it to your home Wi-Fi network.
- Install the Home Automation App: Download and install the app for your home automation system onto your smartphone or tablet. Create an account if necessary and follow the setup procedure to connect the app to your home automation hub or platform.
- Device Recognition: Within the app, detect and add your smart plug as a new device. You may have to follow specific instructions such as pressing a button on the smart plug for it to be discoverable.
- Configure Automation Rules: Now, set up ‘applets’ or automation rules through the app for when and how you want your router (via the smart plug) to turn off. You can set it up based on time triggers, other device activities, or even external data such as your location.
- Testing: Once you have configured your settings, conduct a test by triggering the off command through the app to ensure that your router properly turns off as expected.
Summary:
The benefit of using a home automation system to turn off your Wi-Fi router is the sheer convenience it provides. You can shut down your internet access when it’s not needed, potentially saving on electricity costs and adding a layer of security by disabling remote access to your smart home network when you’re away. Plus, it offers the flexibility to accommodate changes in your routine or preferences over time without manual adjustments.
One potential downside of this method is the preliminary cost of purchasing and setting up the home automation system and smart plugs if you don’t already have them. Moreover, this setup requires a basic understanding and comfort level with smart home technology, which can be a barrier to entry for some users. Overall, however, if you’re looking to modernize how you interact with your home’s electronics, employing a home automation system to control your Wi-Fi router can offer a high level of convenience and control.
Solution 6: Remote Management Tools
Introduction:
Many of us have faced a situation where we needed to control our home devices while we were away. This is particularly pertinent when it comes to managing your home Wi-Fi network. Remote Management Tools can provide a solution to this need. By enabling remote management on your Wi-Fi router, you can gain access to your router’s settings and control it from any location with an internet connection. This means you can turn your Wi-Fi off when you’re on vacation, during the wee hours to prevent children from staying up late on their devices, or simply reboot it if it’s acting up, all without having to be physically present.
One of the primary benefits of using Remote Management Tools is never having to worry about leaving your Wi-Fi on unnecessarily, which can help save on power and reduce security risks when the network is not being used. Before diving into the steps for enabling this feature, it’s important to be aware that opening up your router to remote access can also pose security risks. Therefore, it’s crucial to ensure strong passwords and up-to-date firmware are in place to mitigate these risks.
Steps:
- Access Router’s Homepage:
- Open a web browser.
- Enter the IP address of your router into the address bar (commonly 192.168.1.1 or 192.168.0.1, unless changed).
- Press ‘Enter’ to navigate to the router’s homepage.
- When prompted, input your router’s admin username and password.
- Find Remote Management Settings:
- Look for settings named ‘Remote Management,’ ‘Remote Access,’ ‘Advanced,’ or something similar.
- The exact name and location of this setting can vary by router brand and model, so refer to your router’s manual if necessary.
- Enable Remote Management:
- Once you have found the relevant section, you will likely find an option to enable or disable remote management.
- Enable it and take note of the port number provided; you may need this for access later.
- Set a Strong Admin Password:
- This is a crucial step. Ensure your router has a strong, unique password to prevent unauthorized access.
- Navigate to the password setting section (typically under ‘Administration’ or ‘Security’).
- Update the password and save changes.
- Set Up Dynamic DNS (if necessary):
- If your Internet Service Provider assigns you a dynamic IP address, you’ll need Dynamic DNS (DDNS) to point to your router despite IP changes.
- Look for the DDNS settings in your router.
- Set up account details with a DDNS provider and save the settings.
- Save and Apply Settings:
- Save all changes and apply them. Your router may reboot.
- Accessing Your Router Remotely:
- From a location outside your home network, open a web browser.
- Enter your WAN IP address followed by a colon and the port number (example:
http://<WAN-IP>:<Port>). - Log in with your router admin username and password.
- Navigate to the setting where you can turn off your Wi-Fi.
Summary:
Enabling this functionality can be incredibly useful, but it’s important to maintain strict security practices to protect your network. By following these steps, you can comfortably and confidently turn off your Wi-Fi remotely. The benefits include convenience, energy savings, and improved control over your home network. However, note the potential downside: If your router’s security is compromised, it can lead to unauthorized access to your network. Therefore, keep your router’s firmware updated and maintain good password hygiene to protect your connection.
Solution 7: Scheduled Off Times
Introduction
For many, the idea of turning off a Wi-Fi router remotely might sound like a process that requires some technical prowess. However, one handy feature built into most modern routers is the ability to schedule when your Wi-Fi turns on or off. This function is essentially like setting an alarm clock for your router, telling it at what times you want it to be active or inactive. It’s an excellent way to ensure that your Wi-Fi isn’t running when it’s not needed, such as during the middle of the night or when you’re out for work, thus potentially saving energy and adding a layer of security. Let’s walk through the steps required to set up scheduled off times for your router.
Steps
- Access the Router’s Admin Interface:
- Connect your computer or mobile device to the Wi-Fi or connect directly using an Ethernet cable.
- Open your web browser and type in your router’s IP address (commonly
192.168.1.1or192.168.0.1but can vary by model). - Enter the login credentials (username and password) for your router’s admin interface (you might find these details on the bottom of the router or in the manual).
- Locate the Schedule Settings:
- Navigate through your router’s web interface. Look for sections named ‘Wireless,’ ‘Security,’ ‘Advanced,’ or ‘Access Control.’
- Inside one of these menus, search for ‘Schedule,’ ‘Timer,’ ‘Access Schedule,’ or something similar.
- Set the Schedule:
- Once you’ve found the schedule function, enter the times and days you want your Wi-Fi to turn off. This will often involve setting up ‘start’ and ‘end’ times for each day of the week.
- Ensure that you set the correct time zone for accurate scheduling.
- Save and Apply the Settings:
- After inputting your desired off times, make sure to save or apply the changes. The router may reboot to activate the new settings.
- Test the Schedule:
- To ensure that your settings are correct, you can wait to observe if the Wi-Fi turns off as scheduled. Or, if your router shows next scheduled off time, verify that it matches your expectations.
- Adjust as Necessary:
- If your circumstances change, or if you find the Wi-Fi is turning off at inconvenient times, you can always go back to the settings and adjust as needed.
Summary
Using scheduled off times to disable your router’s Wi-Fi can have multiple benefits, including reducing energy consumption, limiting online distractions during certain times, and enhancing security by reducing the hours the network is exposed to potential threats. The main advantage is that once set up, the schedule runs automatically, so you don’t have to remember to turn the Wi-Fi off manually.
There are a few potential downsides to consider as well. Setting up the schedule incorrectly might result in Wi-Fi downtime during needed hours, which can disrupt your activities. Furthermore, any changes to your daily routine might require reconfiguring the router settings to match. Lastly, if the router resets or loses power, you may need to check if the scheduled times are still in place, as some routers might revert to default settings after a reset.
Solution 8: VPN and Network Management Software
Introduction
Turning off your Wi-Fi router remotely can often be essential, whether it’s to save energy, troubleshoot network issues, or secure your home network while away. Solution 8 involves using a Virtual Private Network (VPN) coupled with network management software for remote access and control. A VPN creates a secure connection over the internet, which can be used to access your home network as if you were physically present within its range. When combined with network management software, it provides a robust and secure method to manage your router’s settings, including the ability to turn off the Wi-Fi signal without physically being near the router.
Steps
- Ensure Your Router Supports VPN: Check the user manual or specifications of your router to verify if it supports VPN connections. Some routers come with built-in VPN server capabilities.
- Set Up a VPN Server: Configure your router to act as a VPN server. This typically involves accessing the router’s web interface and finding the VPN server settings. Enable the VPN, choose the type of VPN protocol you’d like to use (such as OpenVPN or PPTP), and follow specific setup instructions that your router provides.
- Create VPN User Accounts: Within the VPN setup area, create user accounts that will have the permission to connect to the VPN. You’d normally need to specify a username and password for each user.
- Configure VPN on Your Remote Device: On the device you’ll use to access your home network remotely (like a laptop or smartphone), configure a VPN client. This means you’ll install VPN software and input the necessary details such as the server address (your home IP address), your username, and your password.
- Test the VPN Connection: Connect to the VPN server using the remote device to ensure that the setup works correctly. Once connected, you should be able to access your home network’s resources as if you were directly connected to your home Wi-Fi.
- Install Network Management Software: If your router doesn’t have a web interface that’s accessible from a remote connection, install network management software that is compatible with your router. Some routers come with their own software, while others may work with third-party applications.
- Access Router Settings Remotely: Open the network management software while connected to the VPN on your remote device. Navigate to the Wi-Fi settings within the software dashboard.
- Turn Off the Wi-Fi Signal: Look for a setting that controls the Wi-Fi signal, such as “Enable Wireless” or “Wireless Radio.” Toggle this setting to the off position to disable the Wi-Fi signal.
- Disconnect and Store Credentials Safely: After you’ve turned off the Wi-Fi, ensure you properly log out of the network management software and disconnect from the VPN. Keep your VPN credentials in a secure place for future use.
Summary
Using a VPN and network management software to remotely turn off your Wi-Fi router is a powerful and secure method. This solution is especially beneficial for ensuring security or saving energy when away from home. The major advantage of this solution is that it closely mimics the control you would have if you were at home. A potential downside to this method is the initial complexity of setting up a VPN and requiring compatible network management software. However, once configured, it usually operates smoothly and gives a high degree of control over your network settings.
Solution 9: Command Line Access
Introduction
For users who have a bit more technical confidence and are familiar with text-based commands, using Command Line Access to manage your Wi-Fi router offers a direct and powerful way to control its functions remotely. This technique typically involves using tools such as Secure Shell (SSH) or Telnet, which are protocols that allow you to access the command line interface of your router over the network. By doing so, you can execute specific commands that can enable or disable the Wi-Fi connection. This method is especially useful for those who need to manage routers that may not have a web interface, or when other methods of remote access are not available.
Steps
- Enable Command Line Access on Your Router:
- Log into your router’s web interface (typically through entering its IP address into a web browser).
- Look for settings related to “SSH” or “Telnet” and enable them. You might find these settings in sections like “Administration,” “Advanced,” “Security,” or similar.
- Set up a username and password for SSH or Telnet access if required.
- Take note of the router’s local IP address for LAN access or public IP address for access over the internet. You may need to set up port forwarding if you’re planning to access the router from outside your local network.
- Connect to Your Router via Command Line:
- On a Windows PC, you can use an application like PuTTY for SSH access. Download, install, and run PuTTY.
- Enter the router’s IP address in the “Host Name (or IP address)” field.
- Ensure the connection type is set to SSH (port 22) or Telnet, depending on what you enabled.
- Click “Open” to establish a connection.
- If on a Mac or Linux system, open Terminal and type
ssh [username]@[router IP address]ortelnet [router IP address]and press Enter.
- Log in to Your Router:
- Enter the username and password you set up for SSH or Telnet access.
- Issue Command to Disable Wi-Fi:
- The specific command will depend on your router’s brand and firmware. You might need to consult your router’s documentation or online support to find the exact command. A generic command might look like
ifconfig wlan0 downfor disabling Wi-Fi. - Type in the command and press Enter.
- Close the Command Line Session:
- After executing the necessary command(s), you can close the session by typing
exitand pressing Enter. - If using an application like PuTTY, simply close the window.
Summary
Command Line Access is a highly flexible and powerful method for managing your router’s settings, including turning off Wi-Fi remotely. The benefits of this method include direct access to the router’s functions and the potential for automation through scripting. However, it does require a fair amount of technical knowledge, and an incorrect command has the potential to disrupt your network configuration. Additionally, enabling SSH or Telnet without proper security measures can pose a security risk, so it is essential to ensure that these services are used with strong passwords and, ideally, only over a secure network. Lastly, always be cautious about accessing your router over the internet, as exposing administrative interfaces can potentially open up security vulnerabilities.
Solution 10: Third-Party Remote Access Tools
Introduction:
Third-party remote access tools are software applications that allow you to connect and control one computer from another through the internet. By using these tools, you can operate a computer that is located in your home or office from anywhere in the world as long as you have an internet connection. This is particularly useful when you need to manage devices that do not have their own remote access capabilities, such as Wi-Fi routers.
Utilizing a third-party remote access tool can transform any of your devices into a makeshift management console for your router. This approach is ideal for instances when your router itself doesn’t support remote management natively, or when you have a more complex network setup that requires the use of a full-fledged computer system to manage.
Steps:
- Choose a Remote Access Tool:
- Research and select a reliable third-party remote access tool. Some popular options include TeamViewer, AnyDesk, and Chrome Remote Desktop.
- Ensure that the tool you choose is compatible with the operating system of the computer you wish to use for controlling the router.
- Install the Remote Access Software:
- Follow the instructions provided by the chosen software to download and install it on the computer that is connected to your Wi-Fi router (the “host” computer).
- During the installation, set up a strong password or any other form of authentication required by the software to ensure a secure connection.
- Configure the Software for Remote Access:
- Complete any additional setup steps required by the tool, such as creating an account, verifying email addresses, and setting up two-factor authentication if available.
- Take note of any IDs, access codes, or other information necessary to connect to your host computer from a remote location.
- Connect from a Remote Device:
- Install the same remote access software or a compatible client on another computer or mobile device (the “remote” device) that you will use to access the host computer.
- Open the software and use the previously noted IDs and passwords to connect to the host computer.
- Access the Router Settings:
- Once connected to the host computer remotely, open a web browser and enter your router’s IP address to access its web interface.
- Enter the router’s username and password to log in (these are often different from your Wi-Fi password).
- Turn Off the Wi-Fi Router:
- Navigate through the router’s menu to find Wireless Settings (the exact wording may vary).
- Look for an option to disable or turn off the wireless function and apply the changes.
- Your router’s Wi-Fi should now be turned off remotely.
Summary:
Using third-party remote access tools to turn off your Wi-Fi router remotely can be an effective solution when other direct methods are not available. It provides the versatility of complete control from anywhere, using a familiar computing environment. The benefits of using this approach include the ability to manage multiple devices and the freedom to customize your network configuration without being physically present.
However, with such powerful access come potential drawbacks. Ensuring the security of the remote access tool is paramount, as unauthorized users gaining control could lead to significant privacy and security breaches. Always secure your accounts with strong, unique passwords and enable any additional security features provided by the software to mitigate these risks.
In summary, third-party remote access tools extend your reach to control your home network, like turning off your Wi-Fi router, no matter where you are. The key to successfully utilizing this method is in the careful setup and maintenance of secure, remote connections.
Conclusion
Turning off your Wi-Fi router remotely is a handy skill that can increase security, save power, or help troubleshoot connectivity issues. By utilizing mobile apps provided by the router’s manufacturer, setting up remote access through a web interface, or employing home automation smart plugs, managing your Wi-Fi remotely becomes convenient and accessible. Remember to maintain strong security practices to prevent unauthorized access to your network. With the simple directions provided, even those without technical background can confidently control their Wi-Fi anytime, anywhere.
FAQs
Q1: Can I turn off my Wi-Fi router remotely without any additional equipment?
A1: Yes, many modern routers offer a mobile app or web interface that allows for remote management without needing extra hardware.
Q2: Is it safe to manage my Wi-Fi router remotely?
A2: Yes, it’s safe as long as you use secure passwords and keep your router’s firmware updated to protect against vulnerabilities.
Q3: Will setting up remote access to my router affect my internet speed or performance?
A3: Remote access typically has minimal to no impact on your internet performance. It only allows you to manage settings and does not consume significant bandwidth.