In the world of music, there’s nothing more frustrating than hearing a tune you love but not knowing its name or the artist who sings it. Enter Auto Shazam – a superb feature of the well-known music identification app, Shazam. This innovative function continuously listens for music and media around you, naming tunes effortlessly without the need to hit the ‘Shazam’ button each time you hear a song. Designed for ease of use, it enhances your music discovery experience and ensures you never miss out on adding a new favorite track to your playlist.
Enabling Auto Shazam
Auto Shazam is a feature that allows your device to identify songs playing around you without the need to interact with your phone each time.
Detailed Steps:
- Download the Shazam app from your phone’s app store if you haven’t already.
- Open the Shazam app.
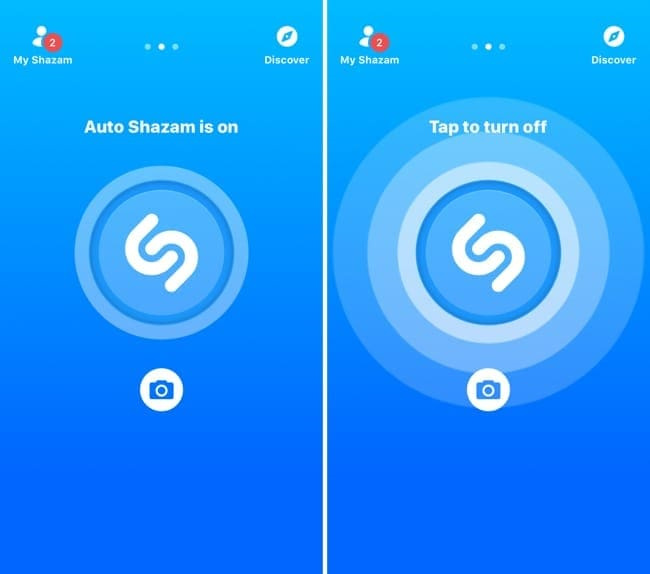
- On the main screen, you’ll see a big Shazam button (a blue button with a camera symbol for iOS, or a simple blue circle on Android).
- Long-press the Shazam button. This will enable Auto Shazam.
Summary
After enabling Auto Shazam, your device will continually listen for music and automatically provide you with the song titles and artists. It’s particularly handy when you’re at an event or location where a lot of music is being played, and you can’t interact with your phone. However, keep in mind that it can drain your battery faster and may use up more of your data allowance if not connected to Wi-Fi.
Checking Your Auto Shazam History
Auto Shazam keeps a record of all the songs it identifies, which can be accessed through the app.
Detailed Steps:
- Open the Shazam app.
- Swipe to the right or tap on ‘My Shazam’ which is commonly found as a tab or button in the app.
- Here, you’ll find a list of all the songs you’ve identified, including those found with Auto Shazam.
Summary
The ability to check the history of your Shazam identifications means you will never lose track of the songs you’ve discovered. The downside is that if Auto Shazam captures a large number of songs, sorting through them can be overwhelming.
Auto Shazam with Voice Command
Some devices allow you to activate Auto Shazam using voice commands without even opening the app.
Detailed Steps:
- Ensure your device supports voice commands (like Siri on iOS, Google Assistant on Android).
- Say the activation phrase (“Hey Siri” or “Ok Google”).
- Then say “Turn on Auto Shazam”.
Summary
The convenience of voice activation for Auto Shazam is undeniable, especially when your hands are busy. However, it does require your device’s voice assistant to be set up properly and for your surroundings to be quiet enough for the assistant to hear your command.
Managing Auto Shazam Notifications
Auto Shazam may send notifications when it identifies songs, but these can sometimes be intrusive or unwanted.
Detailed Steps:
- Open the Shazam app settings.
- Find the ‘Notifications’ option.
- Adjust the settings to your preference, either enabling or disabling Auto Shazam notifications.
Summary
Customizing notifications allows you to control how and when you’re alerted about song identifications, which can be especially beneficial if you find constant alerts disruptive. The downside here is that you might miss the instant discovery of a new song.
Preserving Battery Life While Using Auto Shazam
Using Auto Shazam continuously can drain your device’s battery faster than usual.
Detailed Steps:
- Use Auto Shazam selectively when you anticipate song discoveries.
- Charge your device or carry a portable charger when using Auto Shazam for extended periods.
- Disable other battery-intensive apps or services to offset the additional usage.
Summary
Minimizing the impact on battery life when using Auto Shazam makes your experience more efficient. However, being mindful about when to activate the feature adds an extra step to your music discovery process.