Mail Drop is a convenient feature offered by Apple that allows users to send large files via email, something that would otherwise be difficult due to the size restrictions on standard email services. It seamlessly integrates with your device’s operating system, be it an iPhone or a Mac, removing the frustration of large-file sharing. Learning how to use Mail Drop is easy and offers a way to share your large videos, high-resolution images, and vast documents without the need for complex third-party services.
Understanding Mail Drop
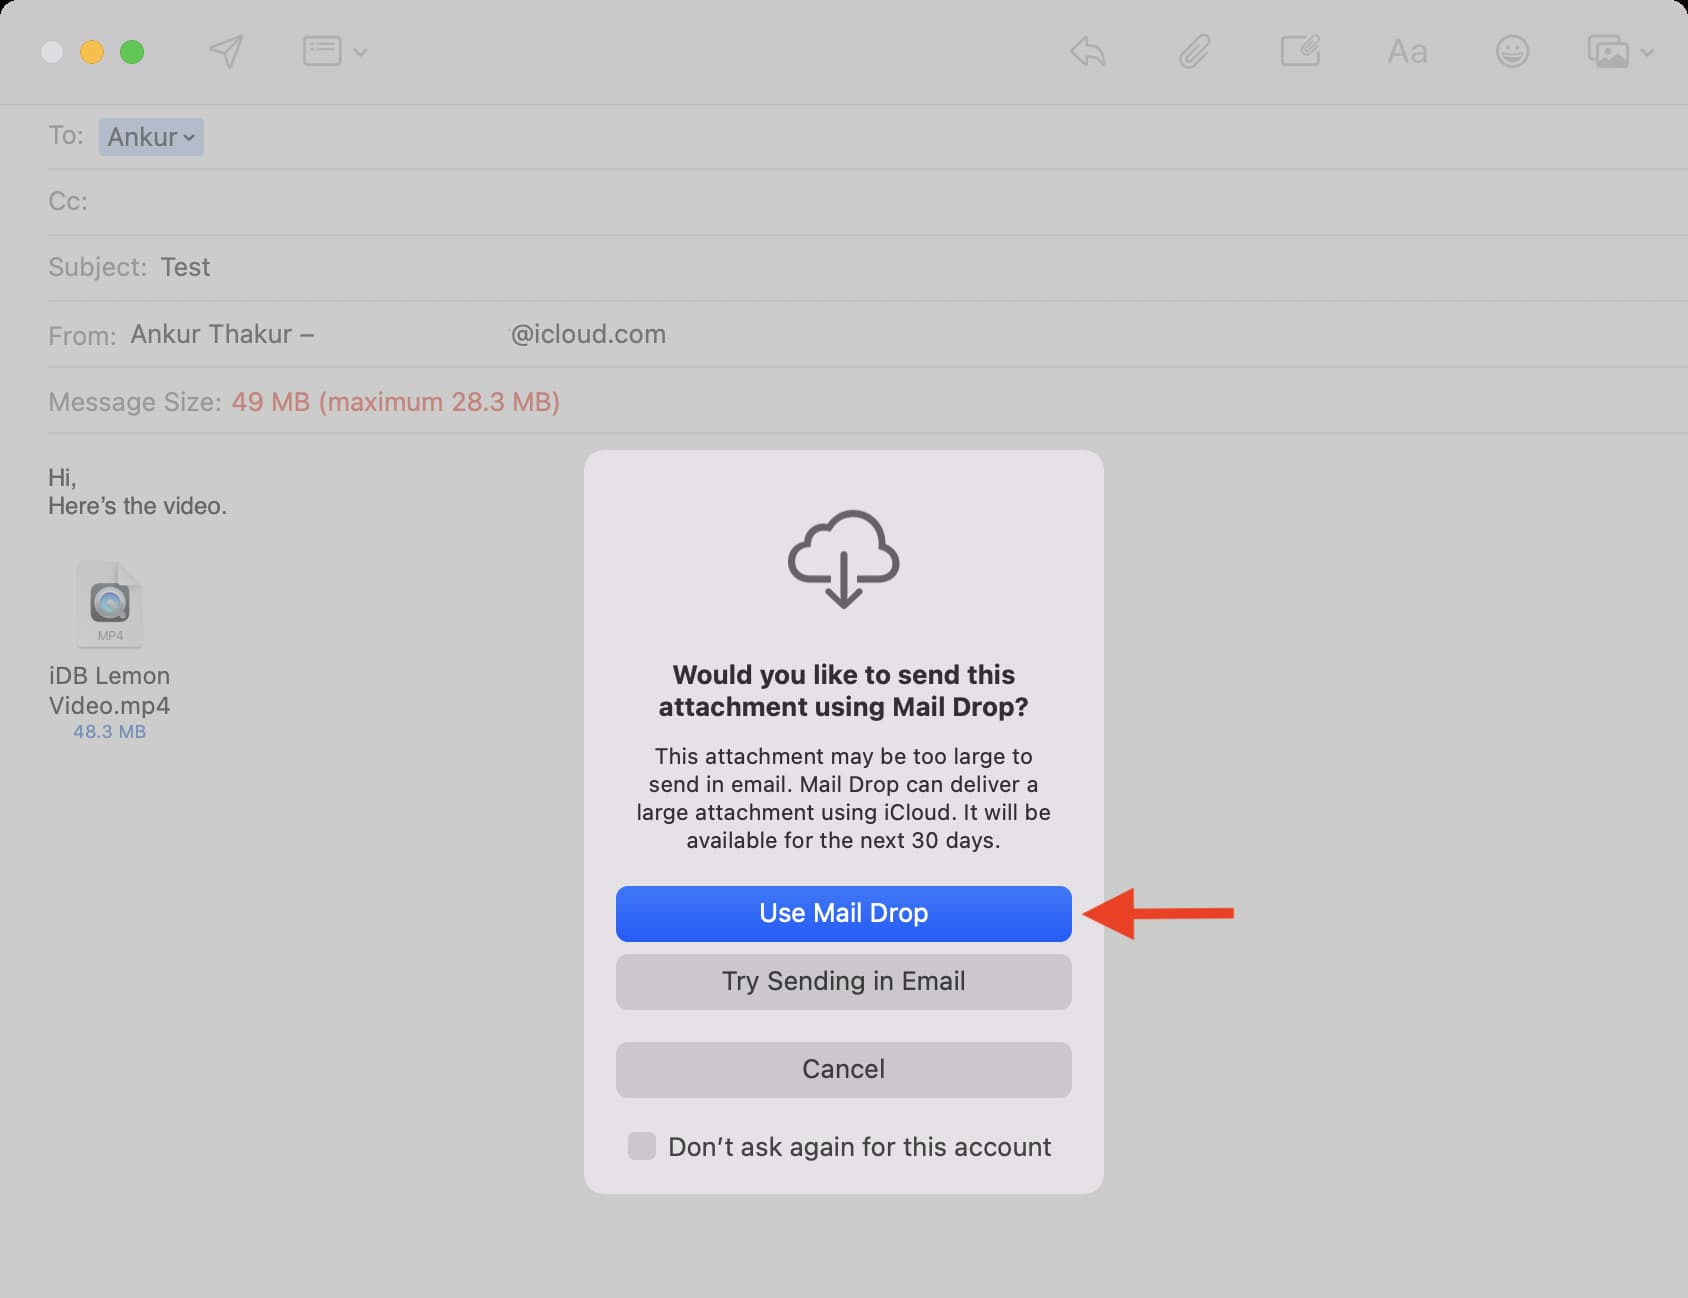
Mail Drop is Apple’s solution to the common problem of email size limits. It works by uploading the large file you want to send to iCloud, Apple’s cloud storage service, and then providing the recipient with a link or download option directly in the email. This happens automatically when a file exceeds the size limit for an email attachment, which is typically around 20MB. The recipient doesn’t need to have iCloud or even an Apple device; they simply need access to the internet to download the file.
Detailed Steps:
-
For iPhone Users:
- Open the Mail app and compose a new email.
- Tap on the body of the email to bring up the menu options, select the “insert photo or video” or use the attachment icon.
- Choose the file that’s too large to normally send via email.
- If the file is above the size limit, a prompt will offer to use Mail Drop. Accept it, and your file will be uploaded to iCloud.
- Send the email as you normally would.
-
For Mac Users:
- Click on the Mail app in your dock or applications folder to open it.
- Begin to compose your email by pressing the ‘New Message’ button.
- Drag and drop the large file into your email, or use the paperclip icon to attach the file.
- If your attachment is too large, a pop-up will offer the option to use Mail Drop. Choose “Use Mail Drop” to enable it.
Summary:
Using Mail Drop simplifies the process of sending large files without relying on third-party services. It’s built into your Apple devices for convenience and security. However, Mail Drop’s links to the uploaded files expire after 30 days, and there’s a 5GB limit on files that can be sent, which is a potential downside for users who need a more permanent or more substantial file-sharing solution.
Enabling Mail Drop on Mac
Some users might find that Mail Drop isn’t automatically prompted. You may have to enable this feature in the settings of your Mail application if this is the case.
Detailed Steps:
- Open the Mail app on your Mac.
- Go to ‘Mail’ in the menu bar and open ‘Preferences.’
- Click on the ‘Accounts’ tab.
- Select the email account you wish to use Mail Drop with from the sidebar.
- Go to the ‘Account Information’ tab and find the ‘Send large attachments with Mail Drop’ option and ensure it’s checked.
Summary:
Enabling Mail Drop ensures you’re ready to send large files whenever necessary. It is user-friendly and integrates well with the Apple ecosystem. The downside is that you need to have enough iCloud storage to support the file sizes you wish to send, which might require a paid iCloud plan if your needs exceed the free storage capacity.
Checking Your iCloud Storage
Mail Drop uses your iCloud storage to send files. If you’re unsure about the space you have left or need to manage your storage, you should check your iCloud usage.
Detailed Steps:
-
For iPhone Users:
- Go to ‘Settings’ and tap on your Apple ID.
- Tap on ‘iCloud,’ and this will take you to a page that shows your iCloud storage usage.
-
For Mac Users:
- Click on the Apple logo in the top left corner of the screen.
- Choose ‘System Preferences’ and then click on ‘iCloud.’
- Your storage usage will be displayed towards the bottom of this window.
Summary:
Regularly checking your iCloud storage can prevent potential issues when using Mail Drop. Knowing how much space you have enables you to manage your files better and decide whether you might need to upgrade your storage plan. The only downside is that if you run out of space, you may have to pay for additional storage to continue using Mail Drop for large files.
Managing Attachments on iPhone and Mac
Larger attachments require more bandwidth to send and more space to store. If you find that Mail Drop isn’t necessary for slightly larger files that still fall within the attachment size limit, iOS allows you to resize images and videos before sending them.
Detailed Steps:
-
For iPhone Users:
- Open the Photos app and select the image or video you’d like to send.
- Use the editing tools within the Photos app to crop or compress the file.
- Once edited, you can attach the file to an email as usual, and it should fall within the standard size limits.
-
For Mac Users:
- Right-click on the file you want to send and select ‘Compress’ to create a smaller zipped file that can be attached to email.
- Alternatively, use an image editing tool on your Mac to resize or compress the image.
Summary:
Understanding how to manage your attachments effectively can reduce the need for Mail Drop for every large file you want to send. It’s a quick and easy way to stay within the size limitations of regular email services. However, excessive compression can lead to a loss of quality in your files, which may not be ideal for every situation.
Instead of using Mail Drop, another Apple-centric method to share large files is with iCloud Drive. With iOS 13, iPadOS, and macOS Catalina and later, you can share entire folders with others through iCloud Drive.
Detailed Steps:
-
For iPhone Users:
- Open the Files app and navigate to iCloud Drive.
- Select the folder you want to share, then tap the ‘Share’ icon.
- Choose ‘Add People’ and select how you’d like to send the invitation.
- You can now invite people to access the folder via a link.
-
For Mac Users:
- Open Finder and navigate to iCloud Drive.
- Control-click the folder you wish to share and select ‘Share’ > ‘Add People.’
- Choose how to send the invite and customize permissions if necessary.
Summary:
Using an iCloud Drive folder to share files can be more convenient if you need to share multiple files or allow access to files over an extended period. This method provides easy collaborative access but is best for users well-versed with the Apple ecosystem and doesn’t offer the simplicity for one-off file-sharing that Mail Drop provides.
Alternate Cloud Services
If your recipient isn’t on Apple devices or you’re looking for a different solution, numerous other cloud services offer file-sharing capabilities. Services like Google Drive, Dropbox, and OneDrive are all good alternatives.
Detailed Steps:
- Choose a cloud service and sign up or log in.
- Upload the large file you wish to share to the cloud service.
- Once uploaded, you can share the file by creating a shareable link within the service.
- Send the link to your recipient via email or another preferred method.
Summary:
Alternative cloud services provide flexibility and oftentimes more storage space without payment than iCloud. However, they require your recipient to access their platforms, which introduces an extra step compared to the directness of Mail Drop.
Reducing File Size Before Sending
Sometimes, reducing the file size of what you’re trying to send can circumvent the need for Mail Drop altogether. There are a variety of ways to reduce file sizes, especially for images and videos.
Detailed Steps:
- Use file compression software to make files smaller.
- Edit videos to a lower resolution or compress them.
- Save images in a different format that uses less space, like JPEG instead of PNG.
Summary:
Reducing file size is a handy skill that can work well in many scenarios. It avoids the need for extra steps like using cloud services but can affect the quality of the files you’re sending. It’s a trade-off that requires consideration depending on the importance of the file’s quality.
Sending Files in Multiple Parts
For files that are just slightly over the size limit, consider breaking them into smaller parts and sending them across multiple emails.
Detailed Steps:
- Use a file splitter, which is a type of software that can divide your files into smaller, more manageable pieces.
- Attach each part to individual emails.
- Instruct your recipient on how to reassemble the parts if necessary.
Summary:
Sending files in parts can be a free and quick alternative to using Mail Drop or other cloud services, especially if the file is only slightly larger than the allowable size. It requires a bit more effort and coordination with the recipient, however, and may not be practical for extremely large files.
Compressing Files into a ZIP Archive
Using compression to turn files into a ZIP archive not only reduces the file size somewhat but also makes it easier to send multiple files at once.
Detailed Steps:
- Select the files you want to send on your Mac and right-click to choose ‘Compress items’.
- For iPhone, use a third-party app to create a ZIP file.
- Attach the ZIP file to your email and send.
Summary:
ZIP archives are universally recognized and easy to create on both iPhones and Macs. This method can sometimes reduce files enough to avoid using Mail Drop, but the compression is generally mild and might not be enough for very large files.
Educating Recipients on How to Download Attachments
It’s essential to ensure your recipients know how to download the attachments you send via Mail Drop, especially if they are not familiar with Apple’s services.
Detailed Steps:
- Provide clear instructions in your email about how to access and download the file.
- You can let them know that they do not need an Apple device or iCloud account to download the file.
- Remind them that the download link is temporary and how long it will stay active (30 days).
Summary:
A well-informed recipient will have no trouble accessing files sent through Mail Drop. It ensures a smooth experience but requires that you take the time to educate those who may not be as tech-savvy.
Reviewing Email Provider Limitations
Always keep in mind the limitations imposed by your own and the recipient’s email service. They can affect whether Mail Drop is necessary.
Detailed Steps:
- Check the size limit for attachments for your email provider.
- Verify if the recipient’s email provider restricts file sizes and if they can handle Mail Drop links.
- Adjust your file-sending method accordingly.
Summary:
Awareness of email provider limitations is essential for seamless file sharing. It helps you to make informed decisions about when to use Mail Drop or other methods and avoid unnecessary delivery issues. The downside is that it requires some research and might lead to inconsistent experiences based on varied restrictions.
Conclusion
Mastering the art of sending large files is easy with tools like Mail Drop for iPhone and Mac users. Apple has designed this feature with user-friendliness in mind, seamlessly integrating it into your standard email workflow. While it’s an excellent service, it’s also valuable to be aware of alternative methods for those times when you or your recipients may have different needs or preferences. By understanding all these various options and how to use them, sharing large files should no longer be a hurdle in your digital communications.
FAQs
-
Does using Mail Drop cost anything?
No, Mail Drop is a free service provided by Apple. However, you will need to have enough available iCloud storage for the files you wish to send. -
Can Mail Drop be used with any email provider?
Yes, recipients of your Mail Drop files can use any email provider. They only need an internet connection to download the attachments. -
Are files sent with Mail Drop secure?
Yes, files sent using Mail Drop are transferred over encrypted connections, making it a secure way to send large files.


